NEC's Tetris Processor
Tags: computer nec mini5 bungo dumping floppy word-processor retrochallenge retrochallenge-october-2022
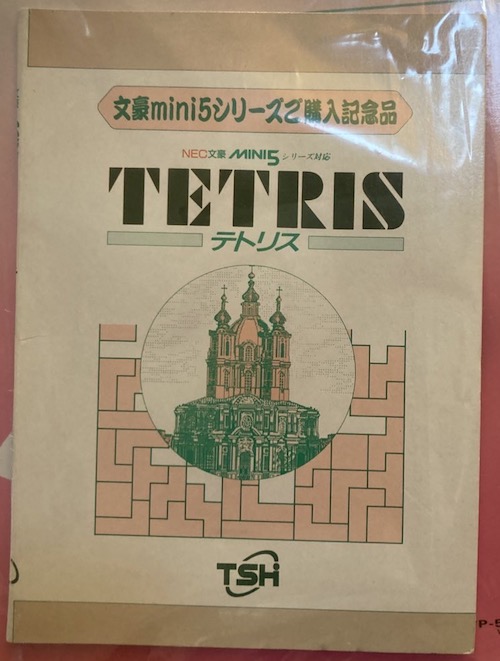
Tetris is a classic time-waster, both in and outside of the office. What good is any computing device if it can’t play this game? Tokyo System House certainly thought so, and ported it to the NEC mini5 line of CP/M-based word processors. Let’s preserve it for future generations and then see what it’s like!
I’ve been trying to get this game for a bit. First, I had been looking at the online old-games reseller Suruga-ya’s inventory for a few months. Then, one day, I decided to take a walk through Mercari and see if anyone had it for sale. They did… with a catch.
You see, in order to get ahold of this copy of Tetris, I had to buy an NEC mini5SX. That’s right, another Bungo. It was not cheap to ship, especially with all the manuals, and even a videocassette included. Also, it was broken!
In the last entry, I fixed that mini5SX and got it to run again.
Arrival
The seller put all of the paper stuff into ziploc bags when the computer was shipped. Some of these bags are huge, like the ones holding the system manuals. The one for Tetris is rather small, since it’s only protecting a leaflet that doubles as a disk holder:
There is some neat marginalia inside the manual:
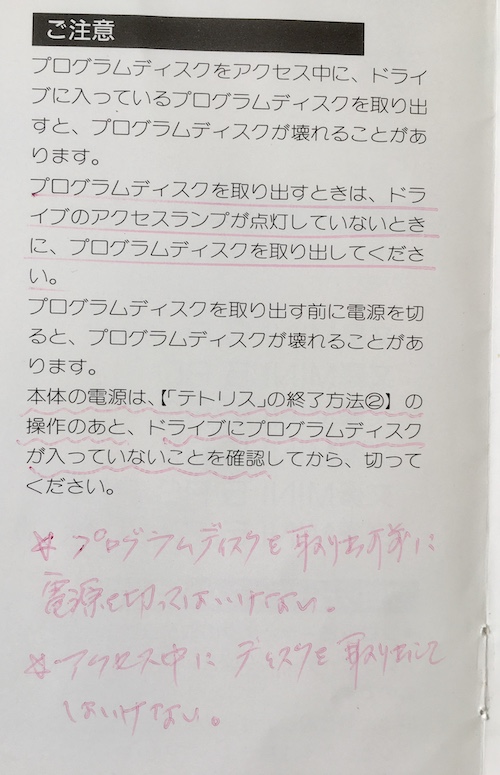
It basically says “don’t remove the disk while accessing. You do not need to turn off the power to remove the program disk.”
Now that the mini5SX is fixed, we can go right to testing out this Tetris program disk.
Well, after we back it up. Better safe than sorry, right?
Korobedumpin’
Wasting no time, I dumped this disk using a standard NEC IBM PC floppy drive (an FD1231H, if you must know,) and a Greaseweazle V4. It was dumped in SuperCard Pro (SCP) format, producing an image that’s roughly forty megabytes.
Why so large? The SCP format captures all the “raw” magnetic-flux transitions of the disk, rather than trying to interpret the flux down to a computer-readable “block” image. This is important for things like copy protection, where the original disk authors have done weird stuff like shift sectors out of phase, have weakly-written bits, or even burned a hole in the disk. Capturing the flux that this produces means that we have a much better chance of being able to back up the disk to another, new disk, without running into problems like this. This is the big advantage of stuff like the Greaseweazle and the KryoFlux.
![The copy protection warning in the manual: essentially, "this game has copy protection and we will not be responsible [for problems] if it is copied."](/assets/mini5-copy-protection-warning.png)
And we’ll need that, because according to the manual, the game has copy protection.
You can see some indication of it in the HxC image visualizer – I suspect it’s this entire track that’s got flux even “between” sectors.
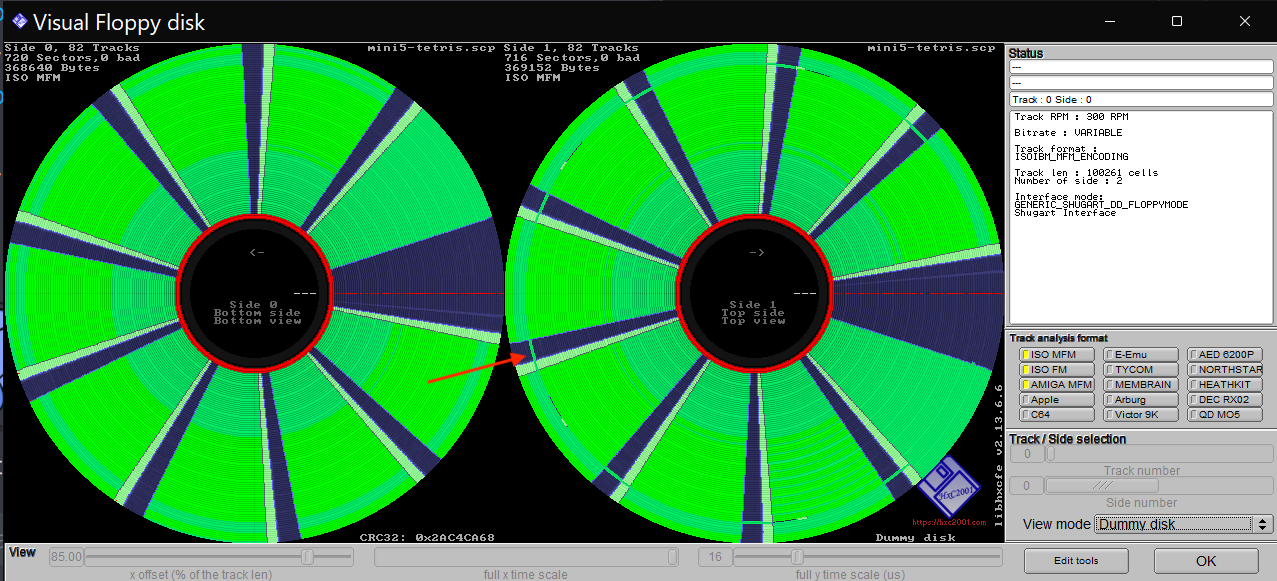
When read with a regular IBM PC disk-copying utility, this track would get mangled. A normal computer’s floppy controller would deliberately wait a certain amount of time after seeing the index hole to start reading the track, and it wouldn’t bother reading between sectors. I don’t know for sure that this is the copy protection method in use – if you do know, please chime in the comments.
It doesn’t really matter: whatever it is, I’m reasonably sure the flux image method will get it.
Let’s Tear It Apart
Now that we have an image of the disk, I thought it would be a good use of my time to pick at the creamy binary contained within. Nevermind that I have dozens of other reverse-engineering projects, ROMs to dump, and a dead mini5SX on the bench to resuscitate too.
At first, I figured I could access this like any other CP/M disk, using the cpmtools utilities. But doing so just produced garbage. I was confused for a good hour, and was starting to doubt my own memory. Then I looked at the images again.
Here’s a disk full of word processing documents from my mini5HA:
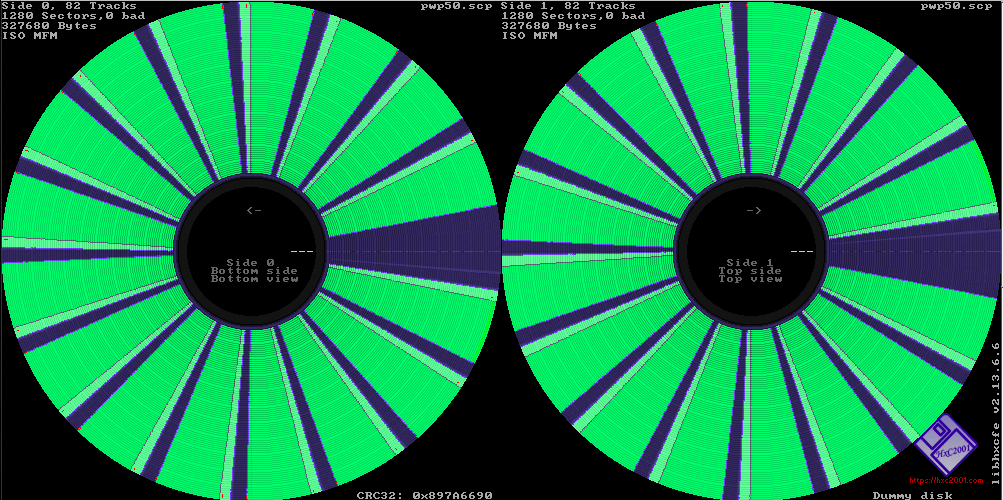
16 sectors, which is what I have configured in cpmtools. And here’s the Tetris disk again:

What?! Why is this a nine-sector disk instead of 16-sector?
Confused, I reached out for the mtools utilities instead. These deal primarily with FAT12 disks intended for MS-DOS systems. And indeed:
% mdir -i mini5-tetris_scp.img
Volume in drive : has no label
Directory for ::/

TETRIS   COM      3797 1991-08-27  16:55
        1 file                3 797 bytes
                                  0 bytes free
…it’s booting off an MS-DOS FAT12 disk?
Even so, mtools is foiled here. Trying to mcopy the suspiciously small TETRIS.COM program produces a binary with a lot of garbage $e5 on the front end and no obvious chunks of executable code or graphics. A similar thing happened with the Time Bandit disk on the Sanyo MBC-555: the disk structure in use for both games is just a little bit too special, and mcopy is assuming it’s a normal disk and erroneously pulling out the wrong chunks from the file.
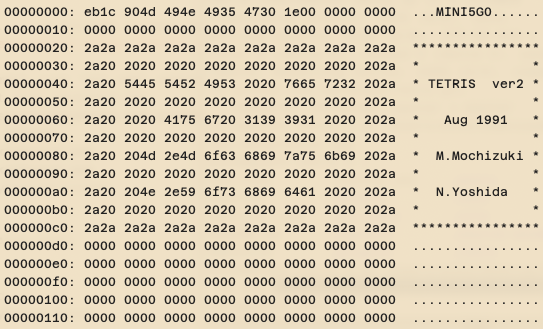
At the top of the disk is a very interesting MINI5G0 header, which I assumed must give the ROM some clues about how to boot the software within. I don’t think the first few bytes before MINI5 are an x86 instruction, or at least not useful ones1, and they don’t seem to be an offset into the disk either. From consulting the Bungo page on Japanese Wikipedia, it sounds like the BIOS will also search for a file named IPL.COM (initial program loader?) but I don’t see any mention of that string inside the disk, so there probably isn’t one there. A mystery!
I also noticed that the disk full of the previous owner’s documents that was included with the mini5SX was also only readable with mdir, which means it must be a FAT12 disk. This is not too much of a surprise, as formatting a “DOS” floppy is one of the options in the mini5SX’s floppy menu.
Testing It
Now that I have made a flux-level copy of the disk, I should be able to use that flux image to write out a near-exact duplicate of it onto a new disk. I grabbed a double-density disk off the stack – which is starting to run a little low now – and wrote it out with the Greaseweazle, using the SCP image from before.
I put it into the mini5SX, but was confronted with the “insert auxiliary floppy” screen from the previous entry once again. That’s probably because in the previous entry, I sent the leaking back-up battery to the land of wind and ghosts, and haven’t bothered to put a new one in yet. After inserting the auxiliary floppy and holding the requested keys, I was able to warm-boot the word processor back into its main menu.
Unfortunately, Tetris wasn’t starting. On startup, the computer would blip the floppy drive but not try to read from it. I did something drastic here: I read the manual.
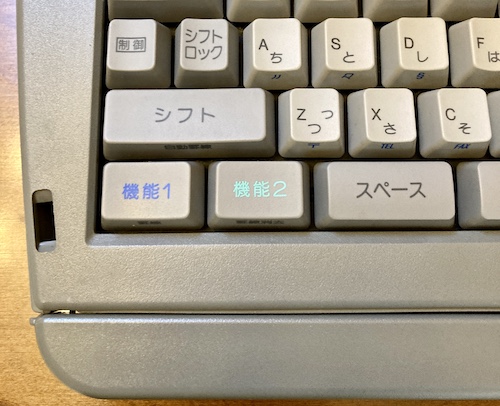
The manual says to hold FUNCTION 1 and FUNCTION 22 at startup, which is similar but not exactly the same key shortcut to how I booted CP/M on the mini5HA. These are the two keys in the extreme lower-left of the keyboard, so it’s easy to remember.
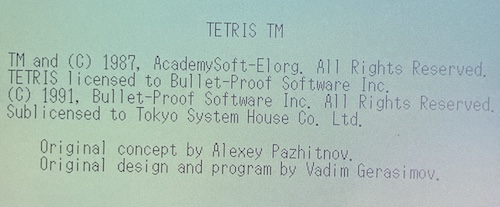
I held them down, and the disk started to read. And then, after a breathless wait, a confusing page of trademark and copyright spew. Yep, this is Tetris, alright.
Playing It
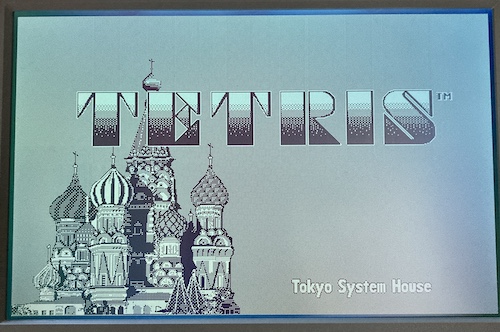
After a little while, a slick animated title screen appeared.
The game moved swiftly into the automated “attract mode” demo, playing Tetris at a super-fast speed. I pushed the Execute button, which brought me to the normal difficulty/speed adjustment screen, and then I was in the game.
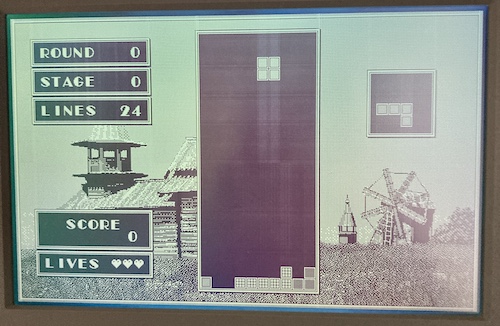
Tetris on a word processor. The mind boggles.
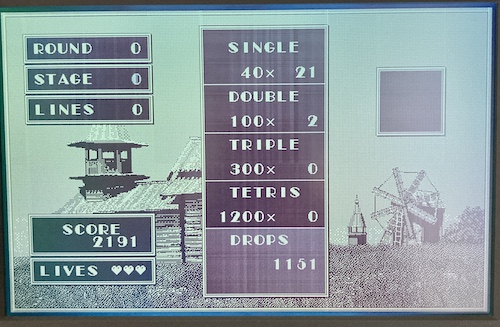
I was a little concerned that the score wasn’t going up as I played – maybe this was some secret copy protection failure? However, after I finished the first level, it added up the score. Nice!
After pushing the “stop” key in the top left of the keyboard, I was told to remove the disk and restart the machine to continue Bungo-ing.
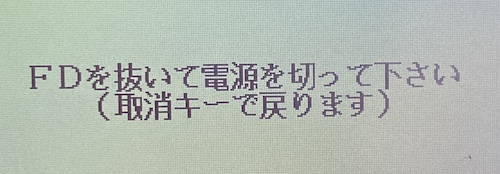
It worked!
The Second 99%
So, the game is backed up, and I was able to write a working disk from that backup. What’s next? Obviously, scanning and dumping all the packaging. Because I was reliant on the manual in order to play the game, I wanted to scan it all in, to help the next person. And the box was cool, too. And so was the disk label.
Scanning the disk was pretty easy: it’s flat.
The cardboard packaging was thick and had foam (to hold the disk) inside, so it was difficult to squish it enough that it would sit flat on the glass of the scanner. The inner manual holder, which has a screenshot, was especially difficult to get straight. I’m still not super happy with the quality of it, but it’s legible.
However, I’d never scanned a manual before. After looking at it, I realized the eight-page manual was just two pieces of paper held together with staples, like an old-school ‘zine. I bent the staples back with a pair of fine needle-nose pliers and scanned the sheets separately, stitching them back together with ImageMagick later.
I had to re-do two pages because a hair managed to sneak into the scan, which I only noticed at the very end after stitching the PDF together. Paper is some harrowing stuff compared to silicon!
I wasn’t sure what the standard is for preservation, so I just scanned everything on the highest DPI that my junky old Canon USB scanner would support. That resolution is a mere 300dpi, which I assume is terrible, but at least I have it in TIFF. If anyone doesn’t like it, then they can bring their super-expensive scanner to my house, and we’ll do it all over again.
I ended up with a 175MB PDF for the manual, and I wanted to offer a much smaller in order to make it easier to share and hoard. By using this brilliant snippet, I could convert the PDF to PostScript and then back to PDF again, which somehow made it just 3MB:
ps2pdf bungo-tetris-manual.pdf bungo-tetris-manual-smaller.pdf
I noticed something interesting when I scanned the floppy disk:

Considering the EXE says that this game was developed in August 1991, this has to be one of the last versions of Tetris to mention the USSR when discussing ELORG’s copyright. What a high note for the Soviet Union to go out on!
Uploading
I quickly put together a post for the Internet Archive. To be honest, I basically just wanted all of this stuff “off” my computer and on someone else’s computer as well.
Here’s what you’ve been waiting for. This is the post of Tetris for the NEC Bungo mini5 on the Internet Archive, which can be downloaded as parts or a whole archive (recommended in case something happens to IA.) It contains an SCP image, which you’ll need to write using a Greaseweazle or something similar – conversion to a “sector” image is likely to damage the copy protection data and keep the resulting disk from working.
More Testing
If you’ve looked at the upload, then you’ll notice this little detail from the manual.
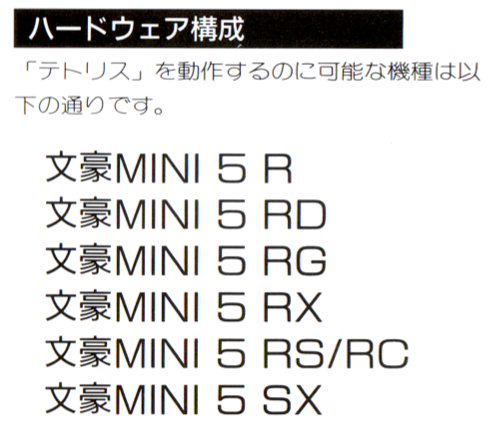
Tokyo System House, in the manual, says that the game is meant to run only on the mini5R, mini5RD, mini5RG, mini5RX, mini5RS/RC, and mini5SX. That doesn’t include the mini5HA that I’ve been playing with before!
Now, that does make some sense. The mini5HA, being a much older machine from December 1987, doesn’t have a fancy graphical user interface like the SX. Maybe the display hardware is different. And as we’ve just seen, Tetris is distributed on a DOS-style FAT12 disk, which I was pretty sure the mini5HA didn’t use.
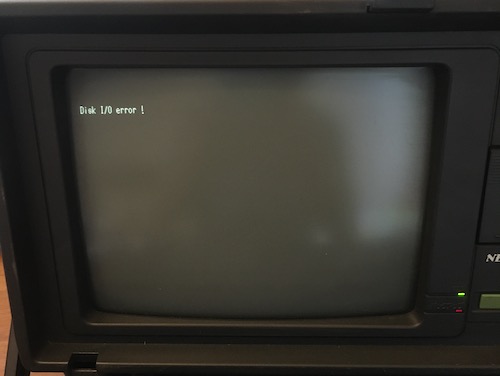
What happens if we plug the disk into the mini5HA and try to boot it by holding Extended 1 and Extended 2 together? It churns for a bit and then says “Disk I/O Error,” which confirms my belief that the HA cannot read FAT12 disks. When booted into CP/M, the disk is equally unusable.
So that kind of stinks. I have one NEC word processor that can run CP/M but not Tetris, and another that can run Tetris but not CP/M. It seems like the sweet spot to get a model that can do both would be the 5RX, which is the last model with the key shortcut for booting into CP/M. Or, if you wanted a CRT, the 5RG.
What Next?
Well, Tetris for this system has been dumped and uploaded. That was one of my major goals for this RetroChallenge, and one of the reasons I got more Bungos. It’s a good thing I did get another Bungo, too, as we found out that the mini5HA can’t play the game. Sometimes things work out.
I really want to do some more tearing into TETRIS.COM in a future entry, to answer at least these questions:
- How do I extract the executable cleanly, if
mtoolsisn’t working? - Is
TETRIS.COMa CP/M executable or an MS-DOS one? Maybe I can find out by studying the sys calls. - How does the BIOS know to load
TETRIS.COMinstead of the reportedIPL.COM? - How do I make my own
IPL.COMand seize control over the system?
It would also be nice to play some CP/M-80 game on the mini5HA. Maybe Zork after all? And how does that built-in assembler work, anyway?
-
Pushing $eb1c90 through defuse.ca’s online disassembler produces the instructions
jmp 0x1e; nop, which seem promising, but both $1e absolute and relative end up inside either the “text part” of the disk header or in a block of $00 . It seems likely that this is actually some kind of high-level opcode or magic number for the BIOS to interpret. ↩ -
These are not to be confused with F1, F2, etc… which are also on the keyboard in the usual place. ↩