Outfitting my BlueSCSI disk image
Tags: computer apple macintosh homemade-software bluescsi
The BlueSCSI hard drive emulator works well in my Macs. But what use is a hard drive if it’s not stuffed full of programs? In this article, I’ll detail my process for putting software on an old Mac using a new Mac. Don’t worry, I will play a videogame at the end. For a couple of minutes.
Creating disk images
BlueSCSI loads its emulated drive contents off of some disk images on the SD card. This is a little different from the older SCSI2SD, which required you to write your disk contents directly to the blocks of the SD card using their configuration utility. I find this design to be much more convenient, but there are some small traps to be aware of when dealing with Macintosh disk images.
Because the BlueSCSI uses the (almost) same logical disk image format as the Basilisk II Mac emulator, the smart move here is to use the Basilisk II emulator to modify the disk images. Then your “real” Mac will end up being a copy of the “fake” Mac, which makes philosophers a bit angry but is much easier to download software on.
Getting Basilisk II to run required me to unearth my collection of old Mac ROMs, but once that was done, I had the System 7.0.1 boot image from my previous article mounted and running inside the emulator.
One additional thing that needed to be done was to rename the extension on the SD card’s disk image in order to open it in the Basilisk II emulator. At the time, BlueSCSI wanted an *.hda extension, while Basilisk II stubbornly insisted on *.img. I renamed the image a few times, then got tired of doing it and just made a symbolic link, so that /Volumes/BLUESCSI/System7.img would point to the correctly-named BlueSCSI image. I configured Basilisk II to use this link instead of the “real” file. Then, I’d insert the SD card into my MacBook, launch Basilisk II, and be ready to edit the image.
It has been a long time since I used Basilisk II, but I remember it being a lot slower than this. The emulator runs super fast on my 2015 MacBook Air, which made the whole experience nicer.
Even when it was frustrating, such as…
The shared drive problem
Basilisk II, the emulator I chose to build the disk image with, has one interesting foible of which I wasn’t previously aware. The “shared Unix root” feature, which lets you mount a directory on your host computer as a fake drive on the emulated Mac, does not work under System 7.0 or 7.1 specifically.
I’ve never looked into why, but this is an easy enough problem to work around: I downloaded the RaSCSI 7.5.3 boot image and put that as the first image in the Basilisk II configuration. This way, the emulated Mac would boot into 7.5.3, but still mount the 7.0.1 image so I could copy files into it.
System 7.5.x also gives you another great feature for this purpose: AppleScript. We’ll cover why that’s so helpful in a bit.
The disk driver problem
If you create a new hard drive image in Basilisk II, instead of using the pre-made RaSCSI/BlueSCSI images, and then copy that image to your BlueSCSI’s SD card, an actual Mac won’t boot it. The reason why is that the disk driver is wrong. In order to boot a disk, the Mac needs to be able to check the header of the disk at startup, and potentially load the executable code required to continue mounting and running the disk. I haven’t looked into why, but Basilisk II doesn’t seem to worry about having a header.
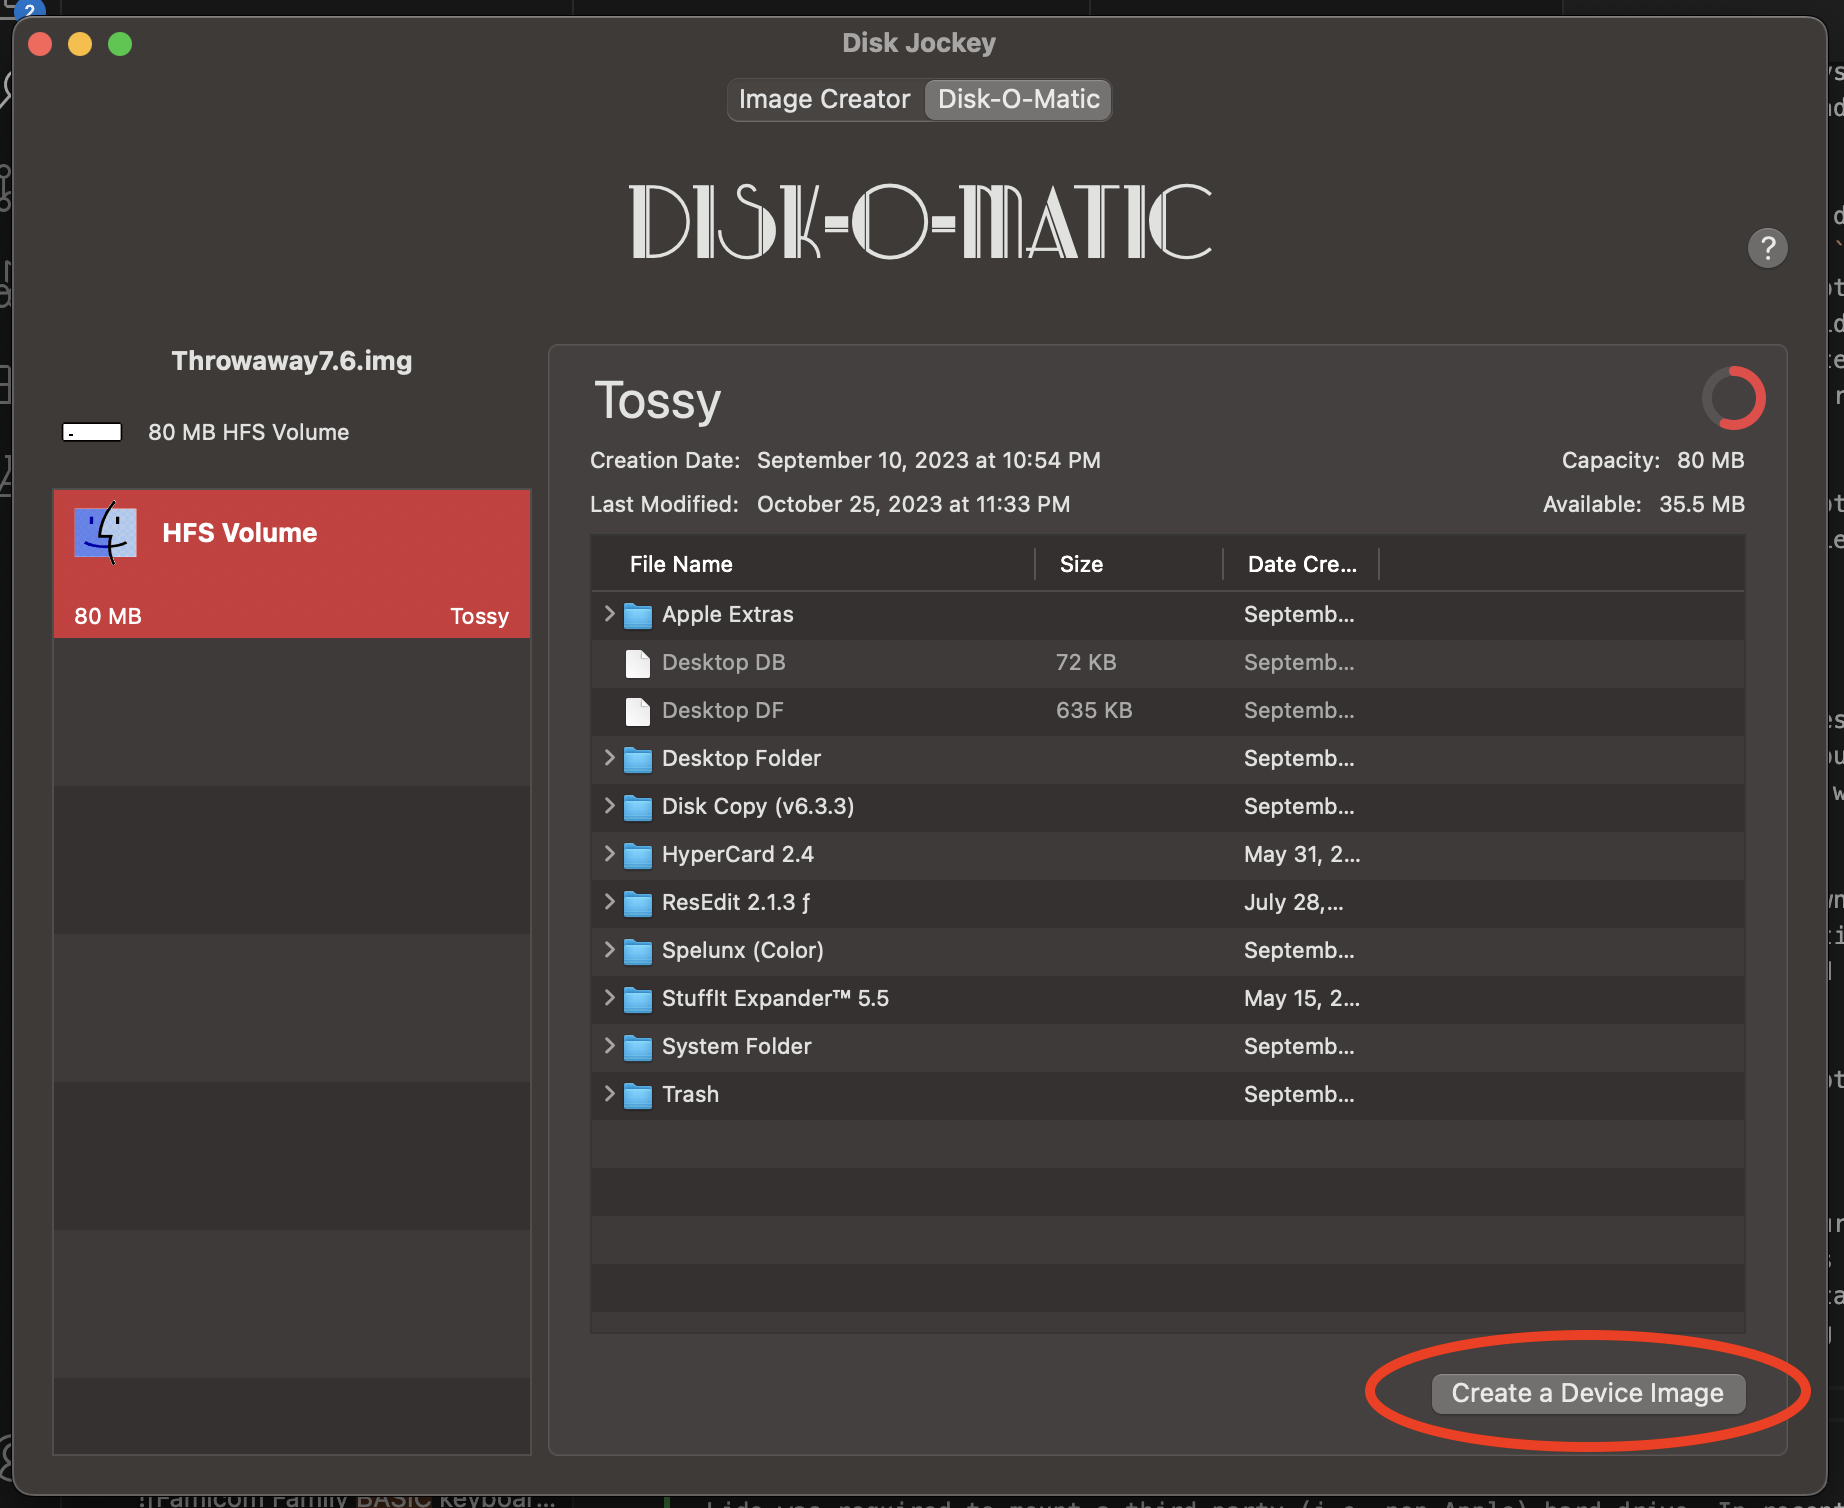
Fixing this is easy enough, using the Disk Jockey utility, which has many other handy tools for messing with disk images as well. You open the image in the Disk-O-Matic tab, and then click “Create a Device Image” in the lower right. A bootable image will fall right out, and you can even keep using that newly modified image with Basilisk II if you want.
Back in the olden days, loading a third-party disk driver like FWB HD ToolKit, Silverlining, or Lido was required to mount a third-party (i.e. non-Apple) hard drive. In recent years, it’s become more trendy to hex-edit Apple’s HD SC Setup utility in order to not bother checking to make sure the drive is an “Apple” drive before installing the Apple disk driver, avoiding a lot of this kerfluffle in the first place.
This disk driver mechanism is how whole-disk password protection utilities like the one offered by FoolProof used to work, as stuff at the disk driver level could survive virtually anything the operating system could do to it. And as the disk driver, you can simply choose not to do anything you don’t want to do to the underlying drive, including refusing to de-scramble it.
The type/creator code problem
Occasionally, you will download a StuffIt archive where the Mac simply has no idea what it is. The older Mac operating systems had no understanding of a file extension: instead, they use a metadata system of “type” and “creator” codes.
Here’s an example: a text file is often type TEXT. If you created that text file with SimpleText, the creator code is ttxt, whereas with BBEdit, the creator code will be R*ch. Both these programs tell the operating system that they can handle files of type ttxt, so you can open a text file with multiple different editors, but once the creator code is set, you can just double-click the file to open it in your editor of choice.
Of course, all this metadata is stored in the resource fork of the file, which is often lost1 when transferring to the internet. In fact, BinHex is designed specifically to preserve this information, but in a way that won’t get mangled by DOS/Unix machines trying to handle it.
As a result, when you download a Mac file using FTP or a web browser, the computer needs a way to figure out what it was. In the earliest days of the Web, they would rely on the MIME-Type header being set properly (“yeah, this is a Stuffit archive.”) The client would have a little table that converts from MIME-Types to type/creator codes, and by the time the file is fully written to the hard drive, it would have the correct icon and be double-clickable.
For whatever reason, a lot of StuffIt archives you find have had the type and creator code completely stripped off and replaced with NULL. When you drop them into your desktop, the operating system doesn’t think to let Stuffit Expander call dibs on opening them. As a result, you need to change the type/creator code manually. Here’s a list of common Mac type and creator codes, which may be useful if you run into this problem yourself.
Back in the day, I would do this with ResEdit2, but the ResEdit archive was one such file that had broken metadata!
Luckily, System 7.5 and above come with the AppleScript utility, which has a ton of power for making programmable scripts. You can, for instance, tell Finder to change the type and creator code of files dropped onto your script:

In this case, we’re setting the type code to SIT! and the creator code to SITx, which aligns with a StuffIt archive.
It’s not a perfect script. For instance, if the creator code or type code in the file under conversion is literally null, the opening dialogue will just cut off (likely interpreting it as a string null-termination byte – probably a bug in AppleScript, or the System.) But it will still work, and all of a sudden you can drag the converted files onto Stuffit Expander!
This felt good, but ultimately wasn’t exactly what I needed, and I already knew why. The version of Stuffit Deluxe I had installed (3.0.7) is positively ancient. Aladdin Systems actually changed the file format around Stuffit 5.5 (for what were hopefully good reasons) and a lot of archives you find on popular archive sites are actually Stuffit 5.5 files!
The Stuffit 5.5 Problem
With Stuffit 3.0 installed, it would often complain that 5.5+ archives had an unexpected end-of-file and that they were corrupt. Obviously, this isn’t the case, so I had to get 5.5 onto the machine somehow to continue my work.
What actually happened? Aladdin changed the archive format used in Stuffit after version five. The old version of Expander obviously can’t handle the new format, and lots of “preserved” software on sites like Macintosh Garden was archived using a v5+ archive format, even if that software predates Stuffit 5.
This is such a common chicken-and-egg problem when setting up a new Mac that the Macintosh Garden website actually provides a special download of just Stuffit 5.5 that is on a disk image. The Internet Archive also boasts a BinHexed version of a ready-to-run disk image.
I mounted the Mac Garden-sourced disk image on my Basilisk II configuration, and suddenly all of the “corrupt” archives were working just right3.
They were working so well, in fact, that I decided to move the whole mess into a blank 1GB image. Forty megs is just not enough for all the crap I want to carry around, even if it will take a long time to do stuff like rebuild the desktop.
KanjiTalk!
KanjiTalk is Apple’s name for a version of the Macintosh operating system intended for Japan. Although my Japanese language skills are still hovering somewhere around “particularly dumb toddler,” I am interested in a lot of the things that will only run under a Japanese Mac OS, such as Japanese HyperCard stacks.
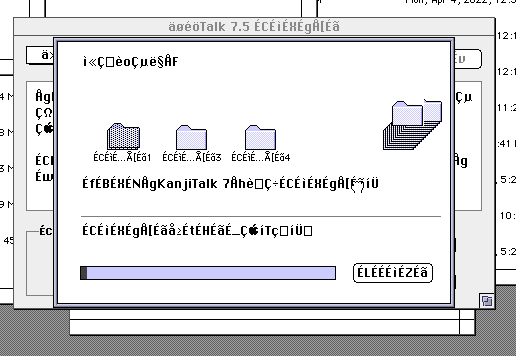
I’m fairly sure that this could have been accomplished in a less miserable way – I remember Japanese language kits being sold at the store that would add Japanese support to a US System 7 install – but after some backflips, I managed to blindly install KanjiTalk 7.5.3 (for whatever reason, the 7.0 CD-ROM image just did not want to install, and I can’t even use Google Translate to figure out the mojibake.)
It’s incredible how much of this operating system that I can still navigate from pure muscle memory.
Setting an Icon
Last, I wanted to change the hard drive icon. And I wanted to change it to a little picture of the Pioneer MPC-LX1004 it will soon be going inside.
I applied the Pioneer MPC-LX100 icon by unpacking the LX100-Icon.hqx compressed archive provided on Pioneer’s website. Then I double-clicked the PICT file that fell out to open it in TeachText.
![]()
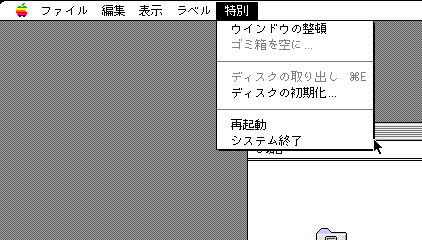
To replace the icon on the hard drive, I selected the hard drive, and then hit “Get Info…” (Command-I) from the File Menu. This opens the Get Info dialogue box. I clicked on the old hard drive’s icon in the Get Info dialogue box, highlighting it, and then picked “Paste” (ぺースト) to paste the PICT from my Clipboard onto the hard drive icon.
![]()
There you have it – I now have a custom icon for the hard drive.
![]()
Initially, I was not even going to mention this step in this much detail. Lately, though, I have found that some newer classic Mac users (and even more experienced ones) do not know about this feature. If there is any interest in more stuff like this, I might put together an article consisting of all the little tricks that I remember from old System Software versions. Let me know.
Testing It Out

One of my favourite old Mac games is Blobbo, which is a sort of puzzler in which a bunch of simple rules combine into very complex (and difficult) puzzles. Here you can see me managing to avoid trapping any treasure chests as I let a giant funnel full of bowling balls loose.
Another good use for an old Mac is lots of great HyperCard stacks. Here’s one called JapanEASE, which is a sort of interactive learn-Japanese-basics introductory tutorial, plus a very basic translation dictionary. I can use all the help I can get.
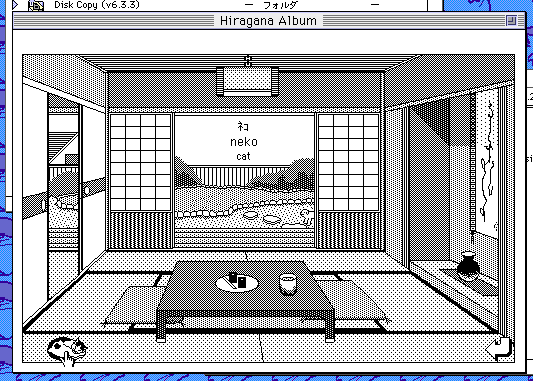
Now I can figure out what a cat is called in Japanese!
-
Since this article was written, BlueSCSI Toolbox has adopted an incredible tool named Fix-A-Fork, which uses heuristics from the data fork of the file to reconstruct a valid resource fork. It then staples the correct type/creator code onto the reconstructed file. Some real magic happening here. ↩
-
FileTyper is also a good utility for this purpose. It can even do batch type/creator code changes. It also came with a utility called MakeAutoTyper, which produced one-off specialized “typers” for a specific file type. These AutoTypers are sometimes distributed with applications. ↩
-
You may have trouble using Stuffit 5.5 on a machine with fewer than four megs of RAM. It also won’t work properly on a 68000. You can use the amazing new tool What the SIT? to conclusively identify a suspicious archive before transferring it to your old Mac. ↩
-
The Pioneer MPC-LX100 is based on the Mac LC630, and is the only official Amelio-era 68k Mac clone that was released. If you’re at all familiar with the LC630, you can already see a problem with using a BlueSCSI for it. ↩