You're telling me there's 64 Nintendos in there?
Tags: console nintendo nintendo64 mod
Once, I had a Nintendo 64, and now I have another. The new one is from a different country, and sometimes there’s a period of adjustment. Adjustment, and maintenance. Also, I build a bootleg cartridge.
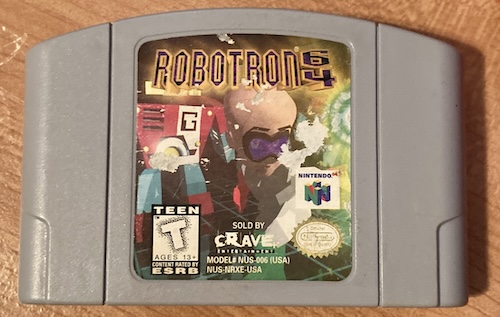
The genesis of this project is that I found an exceptionally good deal on a worn-out copy of Robotron 64 at the local old-games store – just three bucks! – and I wanted to play it again. Unfortunately, I no longer had a Nintendo 64. With local prices for systems still being a little crazy, I decided it would be a good idea to see what Japan had.
Booking Off Time
Japanese auctions were full of Nintendo 64s, but often the sellers were very explicit about what they were selling. The N64 expansion pak (which adds another 4MB of Rambus DRAM to the system, enabling higher resolutions and more features in many late-release games) is pretty desirable, but its inclusion drives up the price of an N64 to the point where it didn’t really make sense to buy one from Japan. All the sellers knew this, of course, and would pop the little door off the top to show off the Expansion Pak and collect their reward.
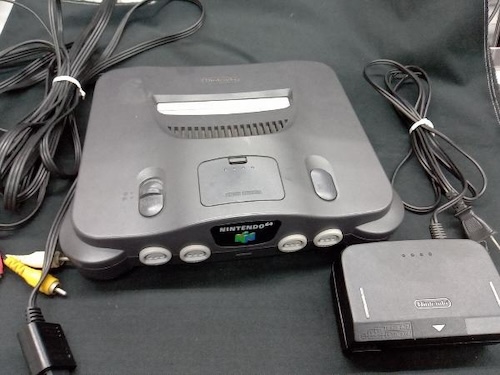
I found this Nintendo 64 listed by a Book Off1 account, and decided I would take a gamble. Obviously, any listing from a Hard Off would know about the value of an Expansion Pak, but (at the risk of sharing my shopping secrets) Book Offs seem to be a little less clued-in about old video games.
As such, the ad didn’t bother to show the status of the memory expansion, but even if I had ended up with just the base zero-megabyte “jumper pak,” I’d have still gotten three controllers, a power supply, and a composite video cable2, which aren’t necessarily included in the other ads, and still cost money to buy. A good starter machine, and it’s not like Robotron 64 can take advantage of the extra RAM even if I did have it.
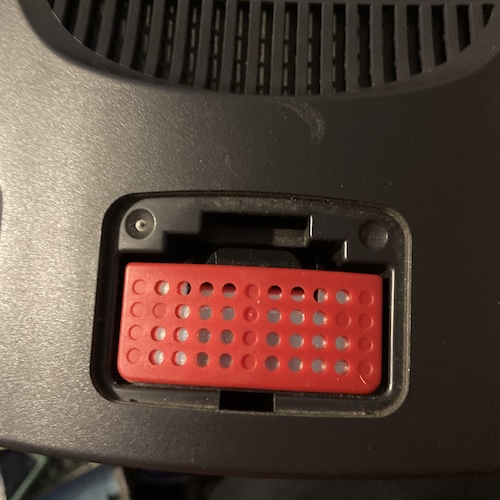
When it arrived, I was very happy to find that my new prize did have an Expansion Pak installed. And a Controller Pak that I hadn’t noticed in the pictures! Those battery-backed, 32kB miracles are used for saving games – not all game cartridges included onboard save memory of their own, and many games (like Perfect Dark) allowed you to carry your personal configuration with you to a friend’s house using them.
What a score! Now, I just had to figure out how to use a Japanese Nintendo 64 in Canada.
Power Supply Recap
Of course, I forgot to buy any cartridges along with the system, and a Japanese Nintendo 64 is somewhat region-locked. While I was waiting for the part to un-region-lock it (more on this in a bit,) I figured I’d take a look at the power supply to make sure it was in tip-top shape.
The Nintendo 64 power supply is a semi-external block that clicks into the back of the system and has a hard-wired 2-prong power cord sticking out of it. Two voltage rails are provided by the supply: 3.3V and 12V. Reportedly, the supply is prone to running a little hot, even when the system isn’t turned on, and caps hate heat.
While looking over the exterior, I saw that one of the screws holding it together looked corroded. This made me decide to take it apart. Like most Nintendo products, the plastic casing of the power supply is held together with “GameBit” style screws. The board is stuck into the case thanks to a big chunk of double-sided tape on top of a transformer, and it was a real fight to get it out, as I suspect the plastic has shrunk over the years in addition to that adhesive.
I was ultimately successful by wiggling the mains cord out of the way, looping my thumb around the heat shield near the entry, and just reefing on it until the board popped out. Of course, I discharged any dangerous-looking caps in the area first.
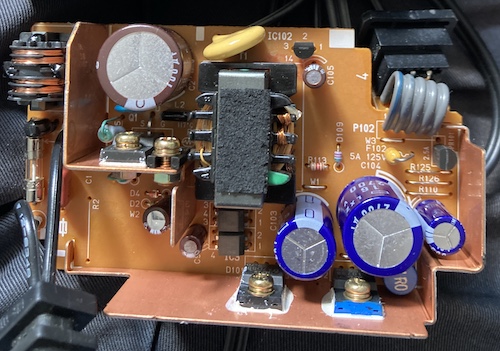
All the caps failed ESR testing, but just narrowly. This was a little surprising, as they seem like high quality parts, but they are in a very tight area with no venting, next to hot transistors, and the wear on the controllers did indicate that this particular Nintendo 64 has seen a lot of hours.
| Capacitor | Capacitance (µF) | Voltage (V) | Body diameter | Body height |
|---|---|---|---|---|
| C2 | 100µF | 200V | 18mm | 21mm |
| C103 | 680µF | 35V | 13mm | 20mm |
| C104 | 2700µF | 16V | 16mm | 21mm |
| C8 | 100µF | 35V | 6mm | 12mm |
| C9 | 0.1µF | 50V | 5mm | 11mm |
| C106 | 680µF | 10V | 8mm | 16mm |
| C105 | 47µF | 35V | 5mm | 11mm |
Because of the size constraints, I decided I would just order some fresh caps. I chose 105°C rated caps, like the originals, with the highest lifetime that I could find. It was a pretty straightforward recap: the height restriction is the only thing of note.
Joystick Rebuild
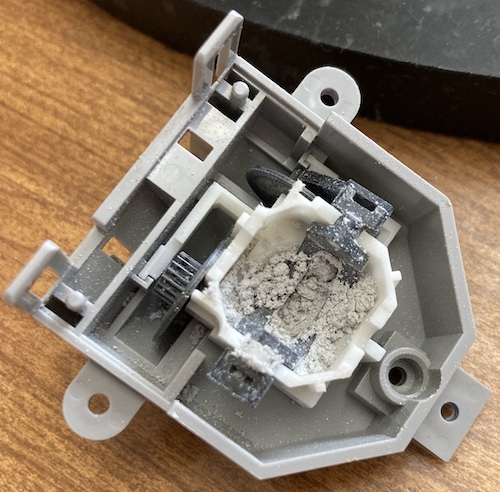
The powdery substance inside this analogue joystick is all too familiar to anyone who has owned a Nintendo 64 before. Its plastic parts are breaking down from heavy use.
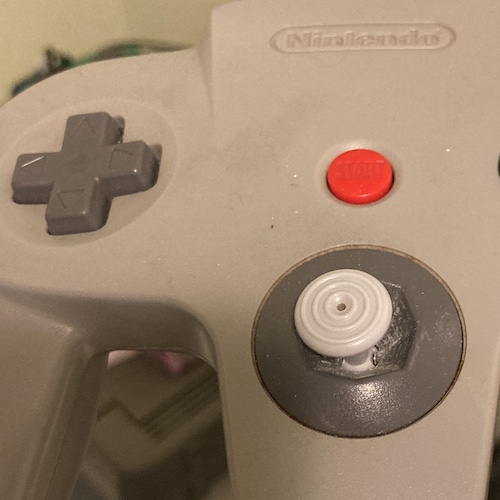
The joystick construction in the Nintendo 64 analogue joysticks is a little unusual by modern standards. Rather than a pair of potentiometers along each axis like a modern Dual Shock controller, Nintendo instead used windowed gears, like a computer mouse.
One limitation of this design is that the bowl the joystick’s bottom travels through wears down, as does the bottom shaft of the joystick. That’s where a lot of the mysterious white powder came from in thoroughly-used joysticks, and eventually the stick itself wears out and kind of limply flops to the left. This left-flopping behaviour was exhibited by all three of the controllers I just got, so it’s time to rebuild them.
The new parts are relatively simple: a new thumbstick, two toothed cams (one for X, one for Y – they are not the same part even though they look very similar) and the bowl that they ride in.
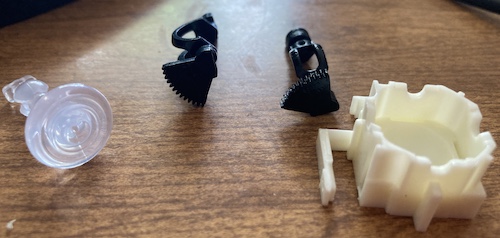
The thumbstick clicks into the void between the axial cams and turns them, and their teeth turn the aforementioned windowed gear, which in turn updates a sensor inside the thumbstick module.
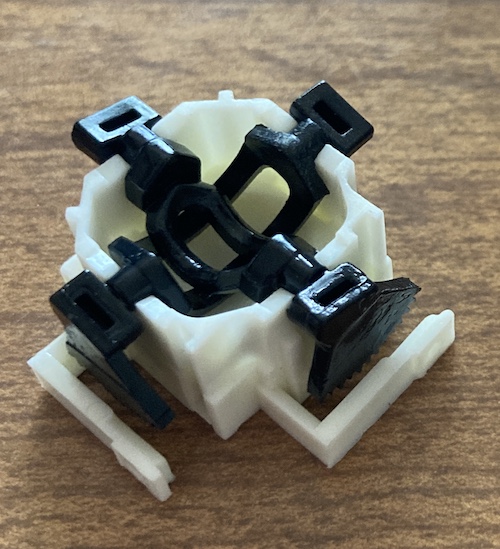
For repair parts, I picked up a set of joystick repair modules from Kitsch-Bent, along with some Game Boy parts. Normally, I wouldn’t go in for a clear thumbstick, but they were out of OEM grey at the time of ordering.
I started with the green controller, thinking that it would be a good place to start. Taking apart the controller is pretty easy. It takes some Phillips-head screws. There are two different sizes – the two screws inside the Controller Pak connector are smaller. Once it was apart, I started scrubbing down all the plastics to get rid of the accumulated hand gunk.
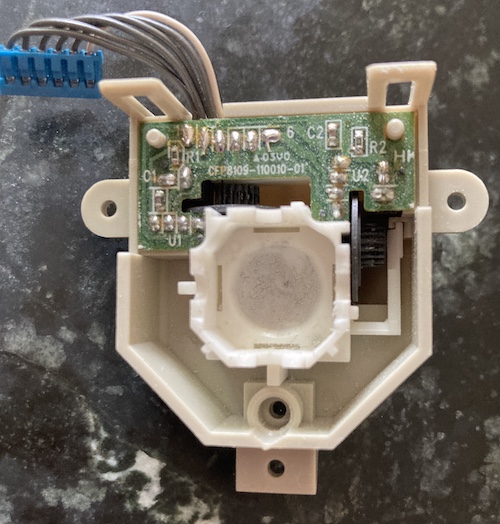
Based on the PCB, this controller turned out to be a late-1999 date code. And its bowl was relatively clean, and not excessively torn up. I still replaced it.
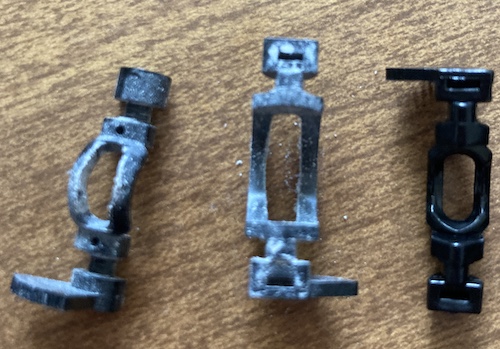
Its original thumbstick was a little bit loose when I put it back together with the new cams, necessitating replacement with a fresh part (good thing I bought some!)
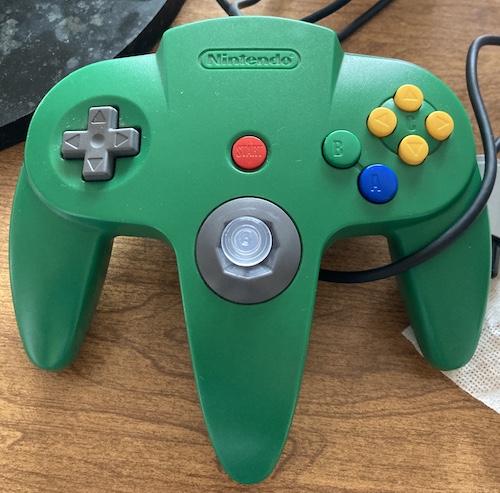
That’s one controller done. The green one has a nice feel to it now, although I had forgotten how notchy the N64 controller feels compared to its successors.
The grey controllers, however, were a whole different story. They were very dirty inside and had earlier date codes, making me suspect that they had seen much more use. And indeed, the bowl for one of them was completely filled with microplastic shavings:
They came back together without too much trouble, although the more worn of the two gave me some headaches trying to align the d-pad.
For all three controllers, I removed all the buttons, cleaned them, and used a fresh piece of printer paper to deglaze the carbon pads on the interior rubber membranes. I think this makes a difference, as I’ve used this technique before to revive old controller membranes before.
Both grey controllers worked great after the rebuild, but the green controller refused to work properly. I took it apart again…
When I got it open, it seemed as if the spring had partially bound up the inner swivel cams, keeping them from rotating in the y-axis. I was very careful while reassembling it this time.
Putting the second try back together, I had trouble closing the lid. It stayed stubbornly open on the right side. It turns out that, after cooling down a little, that the C-Up button had come loose from its slot in the plastic and was cockeyed, so it was holding up the whole assembly from closing. Don’t attempt to close these controllers unless all the front plastic pins are sticking through the PCB!
This made things even worse: now the stick didn’t work at all. Progressive attempts to disassemble, fiddle, and reassemble made it better, but still not great.
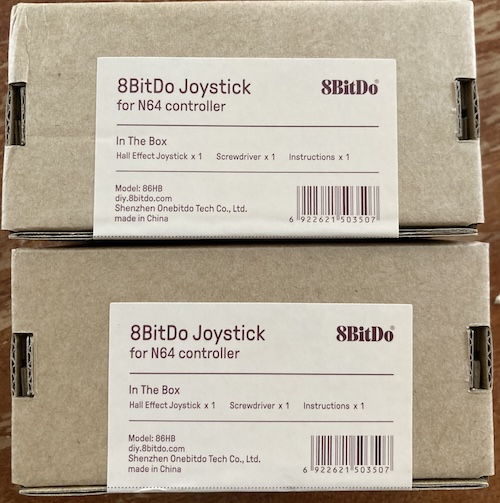
This time, I decided that I would try something new and exciting. A Hall effect joystick seemed like the ideal thing: it would replace the entire module, and since there were no moving parts required for sensing, I was unlikely to get stick drift or a worn-out stick in the future. I bought a pair of them from 8bitdo’s online store for $20 USD each. They arrived quickly, with very cheap shipping, although the tracking was completely unreliable.
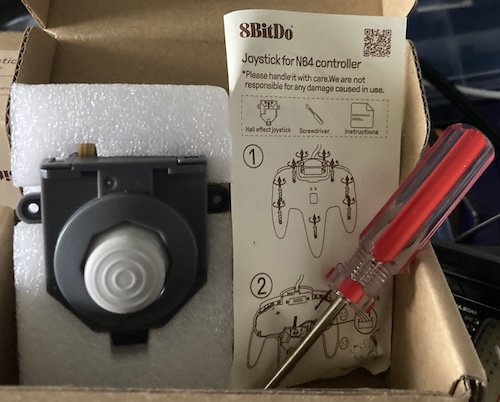
Each joystick box includes the stick module, a little manual explaining what to do, and a magnetized Phillips screwdriver. I preferred my own Vessel screwdriver for this work, but it’s good enough that I have used it for a handful of projects since. Installation went quickly, and I fired up Super Mario 64 to test, which played well with the stick: it was harder to modulate Mario’s speeds than I remember, probably because of the shorter stick throw, but I was able to get to the top of the mountain and teach that Bob-Omb who’s boss.
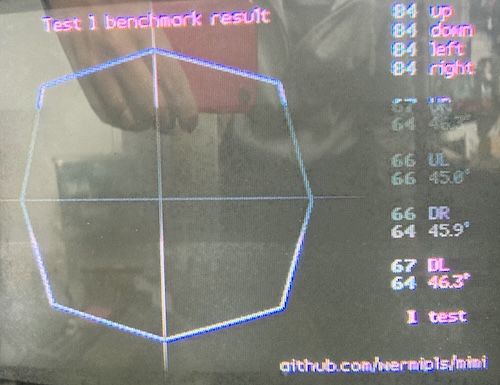
I quickly ran the mimi test suite, which is a controller test ROM for testing the joystick against an idealized model of a new Nintendo OEM stick, and the numbers look okay to me (because they’re mostly green.)
I am by no means a hardcore game player, but I am very happy with this swap. A very worthwhile upgrade. For comparison, a brand-new AliExpress controller received much worse numbers, with a significantly lopsided left side and an unpleasant grinding sensation that got worse as gameplay progressed.
A Saving Grace
Speaking of the Controller Pak, I was curious what was on it. Because the N64 has no user-accessible boot BIOS, games with support for the Controller Pak were expected to implement their own memory management screens. Although most of them are the same and likely implemented from an SDK example, occasionally you see one that’s a little different, which is a fun quirk of the system.
I fired up Hybrid Heaven while holding the START button to go to its Controller Pak management menu:
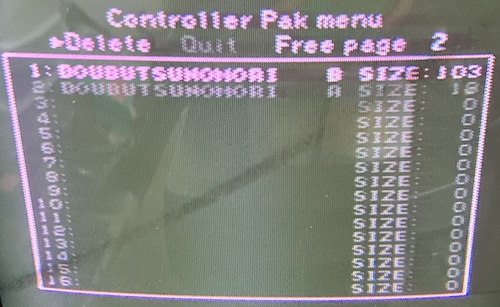
Looks like the previous owner played a lot of Doubutsu no Mori, also known as Animal Forest/Animal Crossing. Your town and its inhabitants essentially swallow up an entire memory card. Good thing I got a couple of copies of that game – we’ll get to that in a bit, see how the animals have been doing in the decades since it was fired up last.
Cartridge Tray Replacement
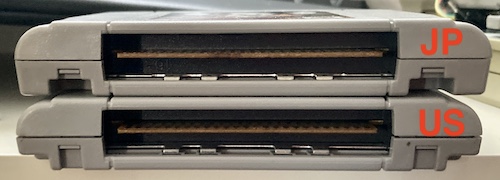
Nintendo has a very simple form of region lock on these systems. If you try to put a North American cartridge into a Japanese system, it doesn’t fit. How do they accomplish this? The cartridge slot is surrounded by a plastic tray with tabs, which line up with a corresponding hole in the cartridge shell.
Opening up the N64 is easy, it just involves a lot of “GameBit” screws. The only snag that most people will run into is that you have to remove the Expansion Pak or Jumper Pak from inside the memory expansion slot, as it keeps the top case from coming off.
Once it’s off, you can look at… some RF shields. And a lot of hair and gunk. I quickly blew out and vacuumed up what I could, and then got to work on the top case.
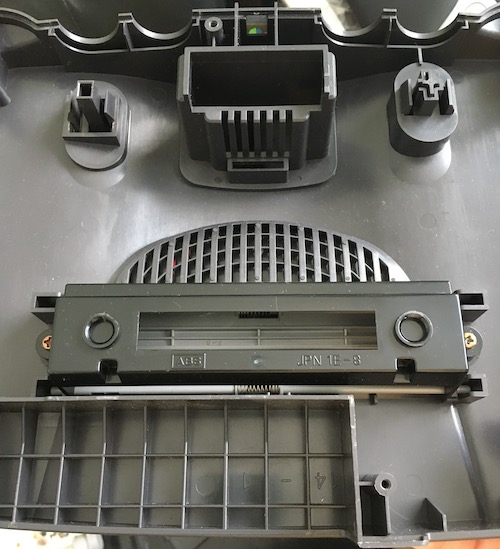
Even though the outside of the system is GameBit, the tray itself is held in place with some good, old-fashioned Phillips-head screws. These are dispatched quickly.
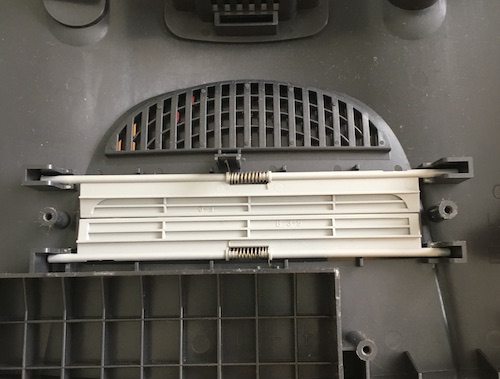
It also looks like the tray is responsible for retaining the “flaps” that protect the cartridge slot when there’s no cartridge inserted, which is probably one way Nintendo discouraged people from just removing this region-locking tray and throwing it away altogether. I do remember old issues of EGM referring to having to leave a cartridge in the slot if you threw away the tray, and now we know why.
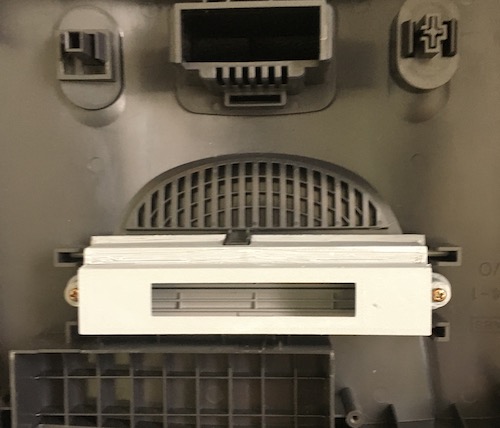
Installing the new 3D-printed cartridge tray was easy; it just needed a little bit of finagling on the right side, as the hole was slightly too small for the screw to go back through it. I had to take it back apart to file a little bit of plastic off the recess in the new tray, as the doors caught and stuck open, but it wasn’t a hard process at all.
Now, I could insert a Western cartridge. And what other Western cartridge would I pick, but…
GoldenEye
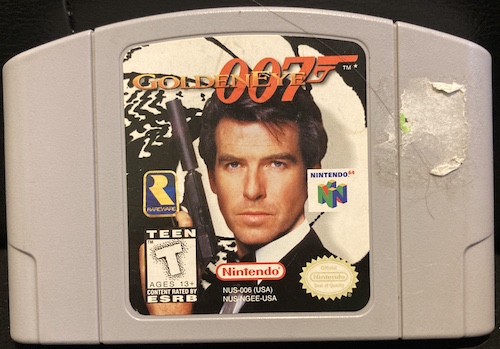
No Nintendo 64 is complete without the best game released for the system: GoldenEye 007.
Yes, I did get this system to play Robotron 64 again, and I will get to that. What a taskmaster you are. I suspected that, because GoldenEye had on-cartridge save games (as opposed to Controller Pak saves, like Robotron 64) I would need to do a battery swap before I could enjoy it.
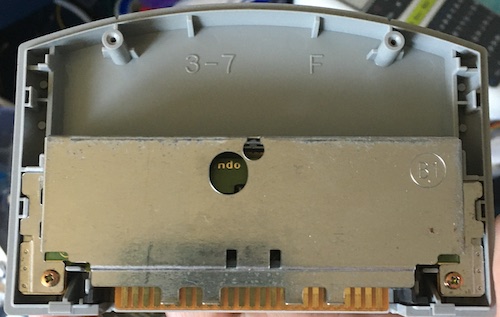
The N64 cartridges have an additional RF shield around the ROM board, along with two additional screws holding the whole sandwich together. No wonder these things were expensive to make.
Once I got it open, I was surprised to find out that GoldenEye, despite saving game progress to the cartridge, did not have a backup battery. Instead, it has this eight-pin “BU9850” part, which is likely some kind of SPI EEPROM. Despite giving it a decent college try, I was not able to find a datasheet for this part: please let me know if you do!
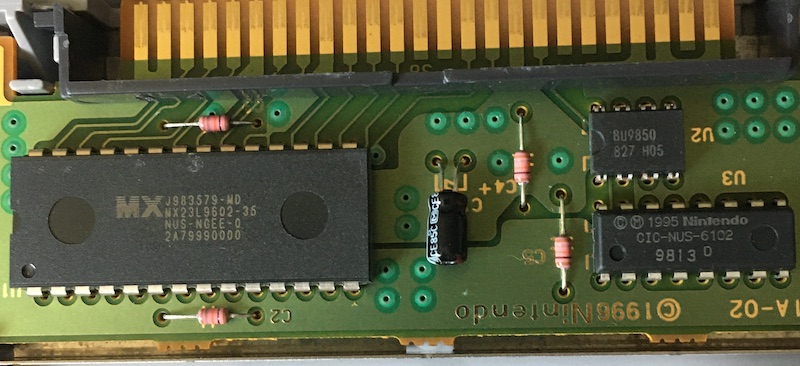
With no battery to replace, there was not much to do in here other than clean the card edge fingers of the cartridge thoroughly.
It turns out that this game has been aggressively beaten – all the cheats are unlocked and everything’s been aced on 00 Agent level. I immediately fired up the Dam level on Agent difficulty, and found myself fumbling around.
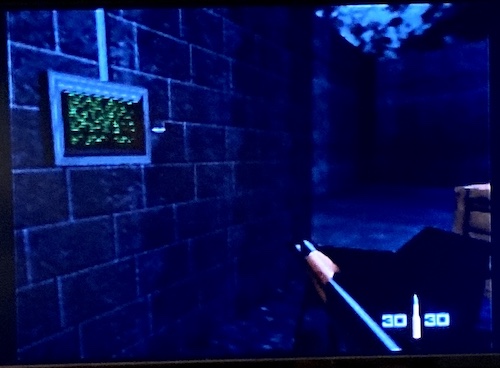
I used to use the 1.2 Solitaire configuration (Turok-style controls) where the C-buttons on the right moved Bond and the control stick aimed. However, everything seemed screwed up to me, with all my aiming “off,” even with the new stick. Assuming it was a “got used to new consoles” thing, I tried using the left-handed configuration for awhile, which made things better, and then I tried it again but with the view “inverted,” the airplane-style default. Suddenly all the muscle memory of the game came back! I had completely forgotten I played this game inverted the whole time.
Other Games
To try and bolster my collection inexpensively, I got a bunch of games from Yahoo! Auctions. Buying sets helps save some money, although you do end up with a lot of mediocre games.
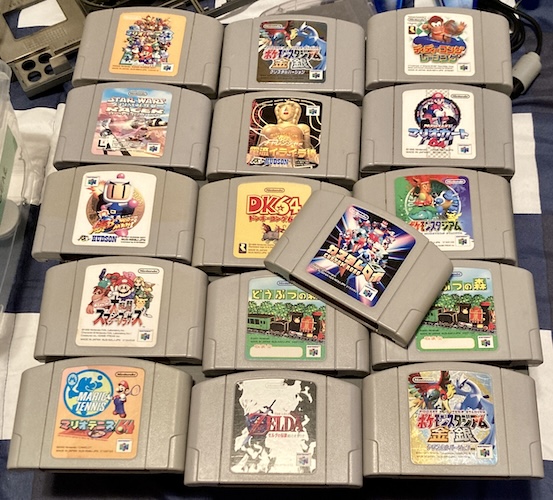
As you might expect, all of these cartridges needed a ton of intensive cleaning, which used the better part of a lazy summer afternoon. Mario Kart 64 had weird organic waste that was corroding the board near the edge, took the cartridge apart to scrape it off. Everything else was just dirty edges like usual, so I would set a timer and q-tip everything as clean as I could get it, even if it took multiple swabs.
Even after that, I had to clean the cart slot of the N64 itself a few times to get games to load reliably, probably because I had jumped the gun and tried dirty games in it.
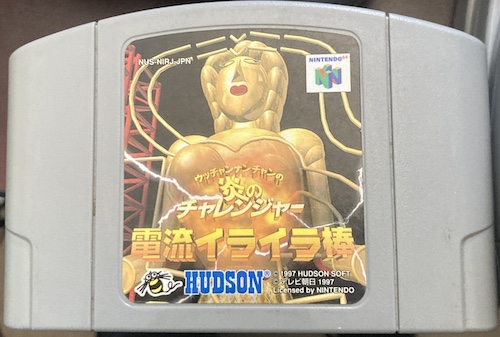
One of the few Japanese-market games I didn’t know anything about was this: Uchan Nanchan No Hono No Challenge: Denryu Ira Ira Bou3. From the looks of it, I had assumed it was a mahjong or pachinko game. I couldn’t have been more wrong: it’s an N64 version of Irritating Stick! You have to maneuver a small dot through a maze without touching the walls and getting electrocuted. I had a lot of fun testing my new joystick out with this one, although I suspect I’m missing out on some (all?) of the thrill by not having a Rumble Pak.
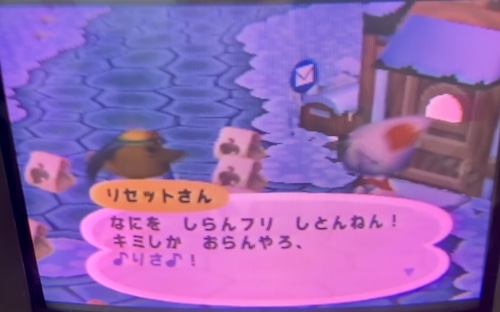
I also fired up Doubutsu No Mori, otherwise known as Animal Forest, to load up the save from the Controller Pak. This is the N64 precedessor to the Animal Crossing series. Although I haven’t spent much time with it, it appears that “Risa” didn’t save her game before turning it off back in January of 2000. Mr. Resetti has been waiting 24 years to scream at her for save-scumming. For shame, Risa.
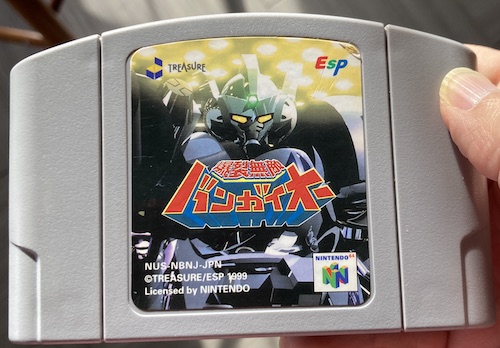
Last, I went big and finally bought a copy of Bangai-O. This Treasure gem was never localized for North America, and reportedly fewer than ten thousand units were ever made. I hunted for copies for a few months, and eventually got what I thought was a pretty good deal, about ¥5000 under market for a loose copy. It was still a lot of money for a cartridge, almost more than I’ve ever paid for an old computer. While that rarity and cost doesn’t guarantee that it will be a good game, I was reasonably confident that Maegawa and Co. wouldn’t let me down.
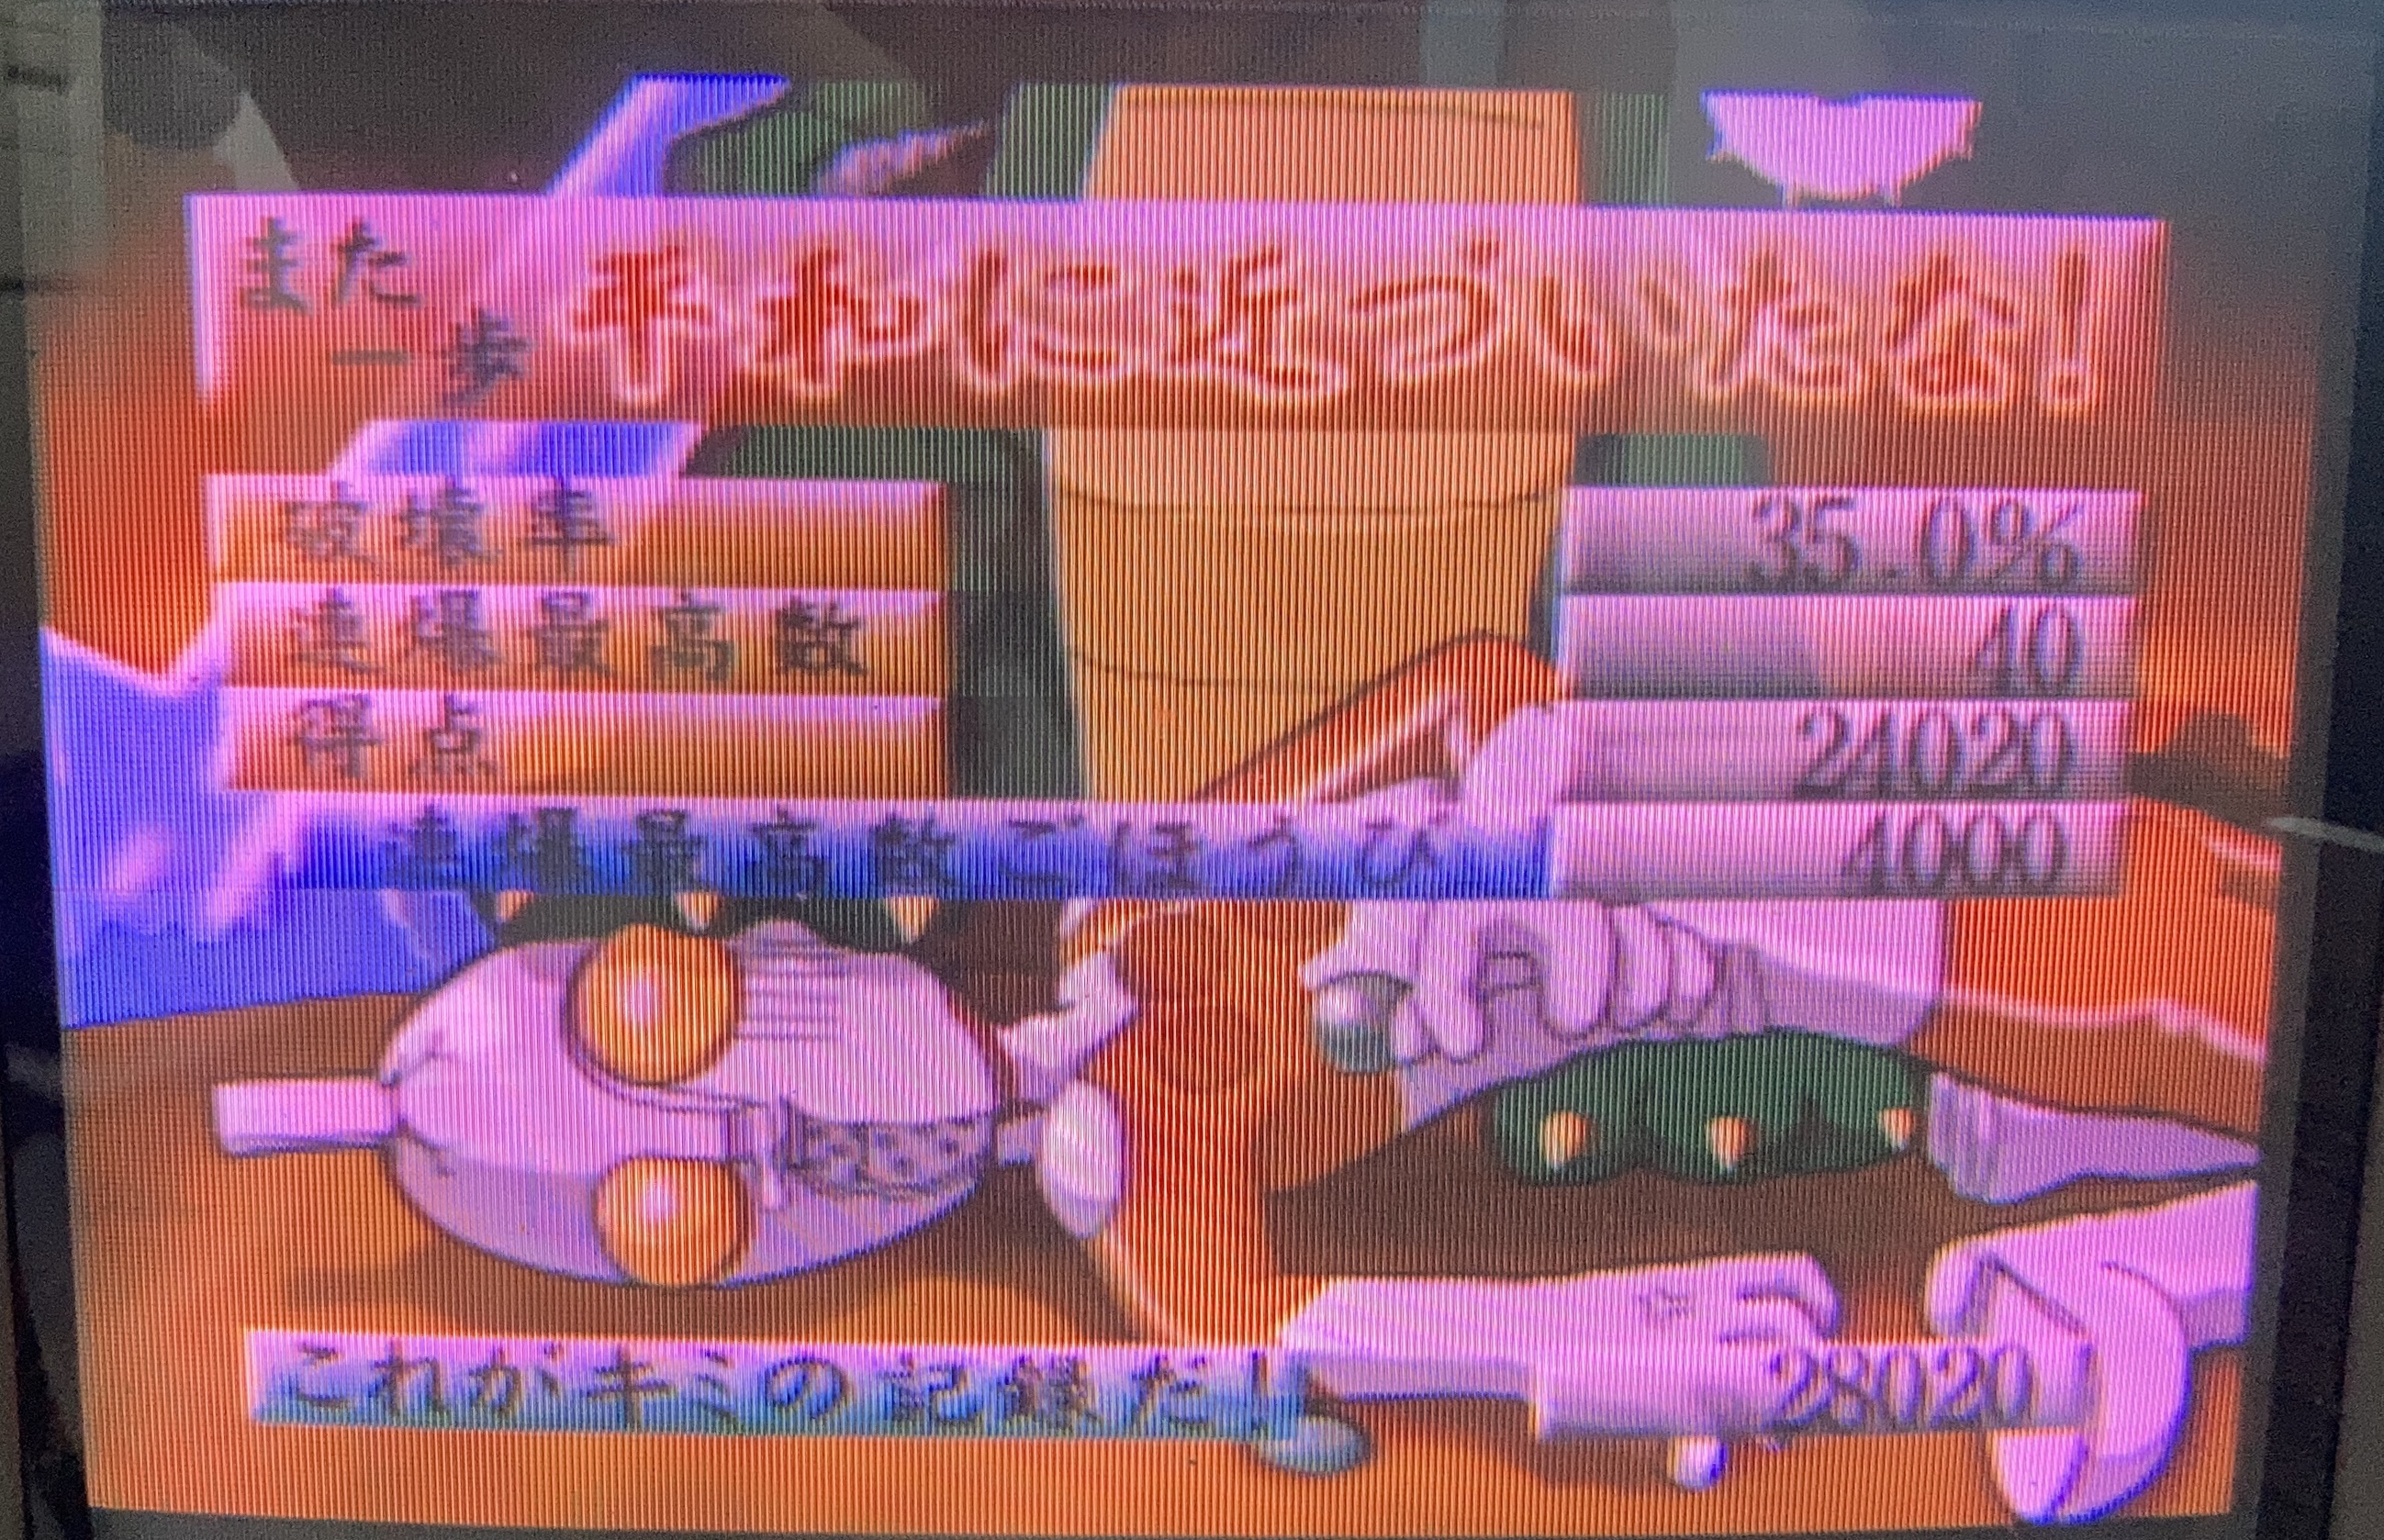
I think it’s a pretty good game! It might not be one of Treasure’s best, but it definitely makes good use of the hardware. I look forward to getting good at it. Or passable at it.
I set up my capture rig to play some Robotron. That is, after all, the goal of this exercise.
Those of you shocked by my sudden display of competence at playing a videogame need not be. Robotron 64 is a really easy game, these are the early waves, I take my sweet time clearing a wave, and I also have burned dozens of hours playing it to completion multiple times. If you need additional reassurance, watch to the end where I try one of the cool camera angles and almost get killed by several Tanks and a Prog.
Borrowing Games
When I had a Nintendo 64 the first time, one of the games that I really wanted to beat was Mystical Ninja Starring Goemon. This is the first Nintendo 64 installment of Konami’s Goemon series, which is best described as a bizarre ninja comedy. It largely follows the Zelda pattern in gameplay.
I feel bad for whoever had to localize this, as a lot of Japanese humour and items (such as dango to replenish health) are simply going to get lost on a Western audience. As a teenager, I certainly did not understand most of what is going on here. Returning to it, with a slightly deeper (but still largely superficial) cultural understanding of Japan, seemed like it would be a fun experience.
Just one problem, though: even though the game has a reasonably large Western printing, the going price for it is pretty high, and I no longer have my copy. How would I ever be able to get the game without paying over a hundred bucks for a loose cart? I’m sorta tapped out after all that Bangai-O, you see.
Enter the PicoCart 64. This flash cartridge PCB uses a Raspberry Pi Pico (or compatible – more on this in a second) microcontroller board to handle ROM emulation for a Nintendo 64 cartridge. I ordered my PCB from Solder Party, which provided it along with the small surface-mount components required, but no Pico.
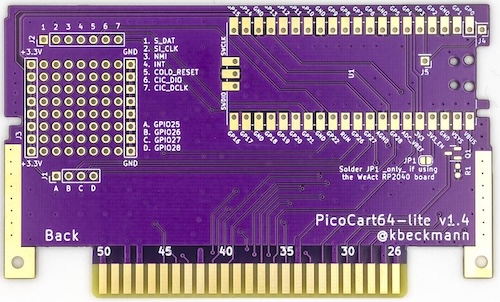
Sure, a multi-game cart like the EverDrive64 is also a great option to play expensive games on this system. I wanted to make my own dedicated cartridge, and I think it’s for a good reason.
Long-time readers of the blog know that I already have enough trouble actually playing games, without the option of being able to simply hit reset and pick a different game when I run into trouble. And I run into trouble a lot, because I’m not especially good at videogames. That extra step of having to power off the system, physically remove a cartridge, and install a new one is often just enough to get me to give a tricky section one more try.
To house the game, I also ordered a Nintendo 64 cartridge shell from AliExpress, which proved to be surprisingly high quality when it arrived. Nice, thick plastic, and even the RF shield and screws were included. The plating on that shield is sort of patchy and uneven, but even with a transparent shell I don’t think anyone will get too mad.
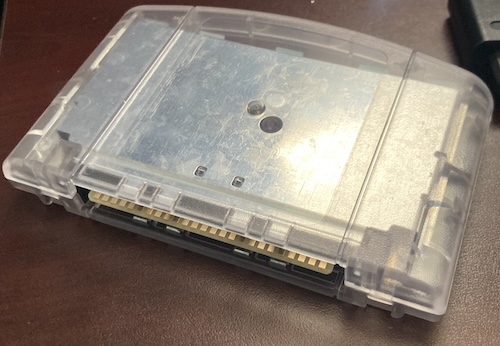
The RF shields in the cartridge shell are just clearing the pin headers, but not the USB-C port, so I have to add kapton tape to the inside of the shell. Screwing down the case is putting pressure on the USB-C port of the WeAct Pico board that it probably doesn’t especially enjoy. If I built another one of these, I would clip out the plastic parts of the pin headers after soldering so that the Pico can be slammed down directly into the board and the case closes easily.
Are there some ethical concerns in stealing a game about a famous thief? Sure, but Konami is welcome to sell me a brand-new copy of Mystical Ninja any time they want. Somehow I doubt they’re making any money off of me buying a used copy of the game from eBay.
Make Goemon Smaller
Because the original Pico has only 2MB of flash storage, and Goemon is a 16-megabyte (128-megabit) ROM, it was simply not going to fit. I ordered a WeAct RP2040 board, which is a Chinese-made Pico clone but with 16MB of flash. Even so, that still felt a little tight.
I tried the PicoCart64 ROM Builder webapp anyway, to see if its compression option would make something magically smaller out of Mystical Ninja. It produced a 33-megabyte UF2 file, but it also said this:
Required flash: 15.78 MB
It’s been awhile since elementary school math, but I’m fairly sure that’s less than 16 MB. Could I get away with it? Almost certainly not, but let’s try it anyway.
For some reason, that same page asks me to first flash the nightly UF2 file to the Pico before I flash the modified-ROM UF2 file. I assume that the original file is the actual firmware, and the second file is just the compressed ROM, and that the UF2 file contains positioning information that places it in the flash where the firmware expects it to be. After quickly scanning the UF2 file format to gain an appreciation for it, I decided that this is what it’s doing.
The copy of the “ROM” UF2 took a very long time, and my Mac’s Finder didn’t give me a progress indication: just that it was preparing to copy and trying to estimate the time. Then, after several minutes of awkward waiting, it abruptly closed the copy dialogue box and ejected the “Pico.” I guess it copied eventually!
Did it work? My worry was that the second file was too big, and during the write, it somehow looped around to the front of the flash and mangled the firmware sitting in low memory. Or, even worse, it would appear to work and then explode later on as I ran off the end of memory. Without more knowledge, I could think of no good way to confirm that the flash was valid (the handy drag-and-drop UF2/FAT interface has its drawbacks!) so I decided to just stick it in the Nintendo and find out.
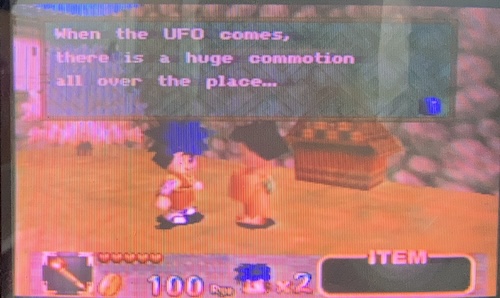
To my surprise, Goemon booted right up. I was able to play the game and get to the top of Mount Fuji: about 15 minutes of play, with no crashing.
The Nintendo 64’s BIOS implements a header-checksum system, and will refuse to boot any game that doesn’t pass the checksum. If it was indeed using Goemon’s checksum, then I could assume that the entire game was loaded into ROM and accessible to the checking function.
I turned it off, and my Controller Pak is full of Animal Forest, so I have to start over from the beginning. Okay, let’s hang out more in town and see if we can make Goemon crash. Maybe Plasma Man has some advice.
Seems pretty decent to me! I did notice that pushing the Reset button will sometimes freeze the N64 on a black screen, which seems like a relatively minor fault. I’m about two hours into the game now, and things still seem to be going okay. I’ll update this article if it turns out the game got mangled in translation.
What’s Next?
There’s a lot of places that this gently modernized Nintendo64 could be taken to. Namely, blog friend Tianfeng makes a pretty decent RGB mod board for this exact model. For now, though, I’m going to enjoy all of these great games.
I don’t know what this Smash Brothers game I got is, though. Seems unpopular?
Repair Summary
| Fault | Remedy | Caveats |
|---|---|---|
| Joysticks don’t reach their extents. | Replace worn-out joystick with aftermarket parts, then replace them with aftermarket parts again. |
-
Book Off is the used-bookstore arm of the Hard Off used-everything group. They often also carry music and games, especially in towns too small for a Hard Off. ↩
-
I used an old SNES S-Video cable as well, but it made very little difference to picture quality on my hogged-out, tiny, Sony PVM-9L2. Like anything with S-Video, I imagine the effect is more dramatic on a larger TV: on the SNES it’s a cheap upgrade that is worth it! ↩
-
My Japanese language skills are terrible, but I think this reads, roughly, Utchan Nanchan’s Flaming Challenge: Electric Current Irritating Stick. “Utchan Nanchan” is a famous Japanese comedy duo, who are supposedly the people yelling as I’m trying to play the game. Celebrities are always trying to tell me what to do with my stick. ↩