Super Famicom Repair-O-Rama!
Tags: console snes super-famicom nintendo magic-smoke retrochallenge retrochallenge-april-2018 repair
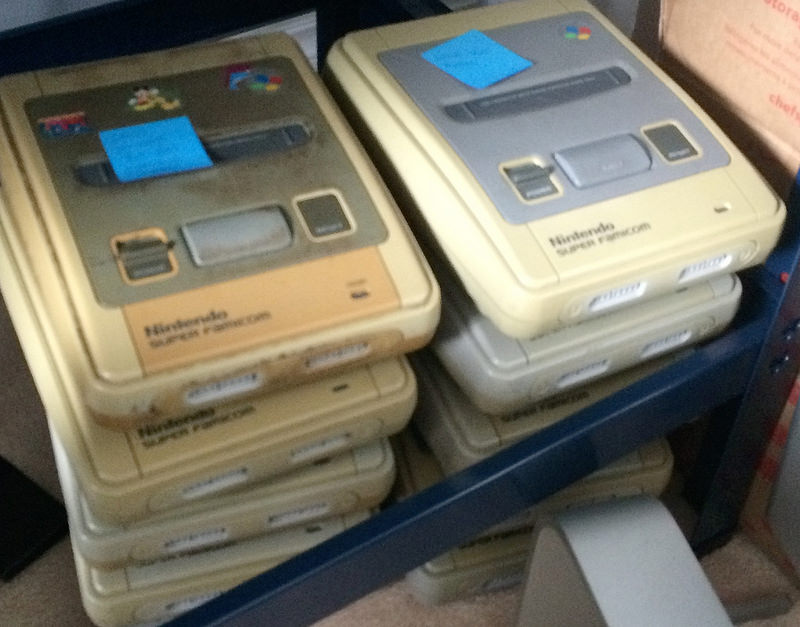
I bought a large lot of Super Famicoms off of Japanese auction for cheap, and set about trying to repair them. Almost all of them had problems.
Dirty Cartridge Slots
This affected almost all the units. Having a dirty cartridge slot usually manifested as not being able to boot. In some cases, I could wiggle the cartridge around in the slot until the game would boot.
The most common culprit is simply good old-fashioned imported dirt, but I also found quite a few slots with green corrosion.
Replacing these slots is easy: unlike the Sega Genesis, Nintendo didn’t solder the slots directly to the board. You can pull them off after dismantling the RF shielding on the board, and swap them between units to test. I grabbed one unit that had trouble doing video synchronization and dropped its slot into a machine that couldn’t boot, and everything worked out.
It’s also great for cleaning them: I pull the connectors off the board, fill them with 99% isopropyl alcohol, and bang them upside down against the desk until enough grit and goo flies out that I’m convinced they are now cleaner.
Unfortunately, there is no really good source for new slots, also unlike the Genesis, which uses a relatively obtainable standard slot. “Clone” systems such as the Retron 5 have sourced similar slots in bulk, but they are not reported to be the same quality as the original Nintendo units.
I am told that not all Super Nintendos have a “removable” slot like this, but every one of these Famicoms I have worked on so far have not had the slot directly soldered to the board. The Nintendo 64 appears to continue this tradition.
Dead Sound Unit
There are at least two major revisions of Super Famicoms in my pile. It seems like Nintendo went back and did a cost-reduced version in 1993-94, where the sound board is integrated into the main board.
Most of the Super Famicoms I have are earlier models, which means that the sound board is on a separate module labelled as the “SHVC Sound Module.” It clips in with a very substantial (24-pin, I think) serial connector.
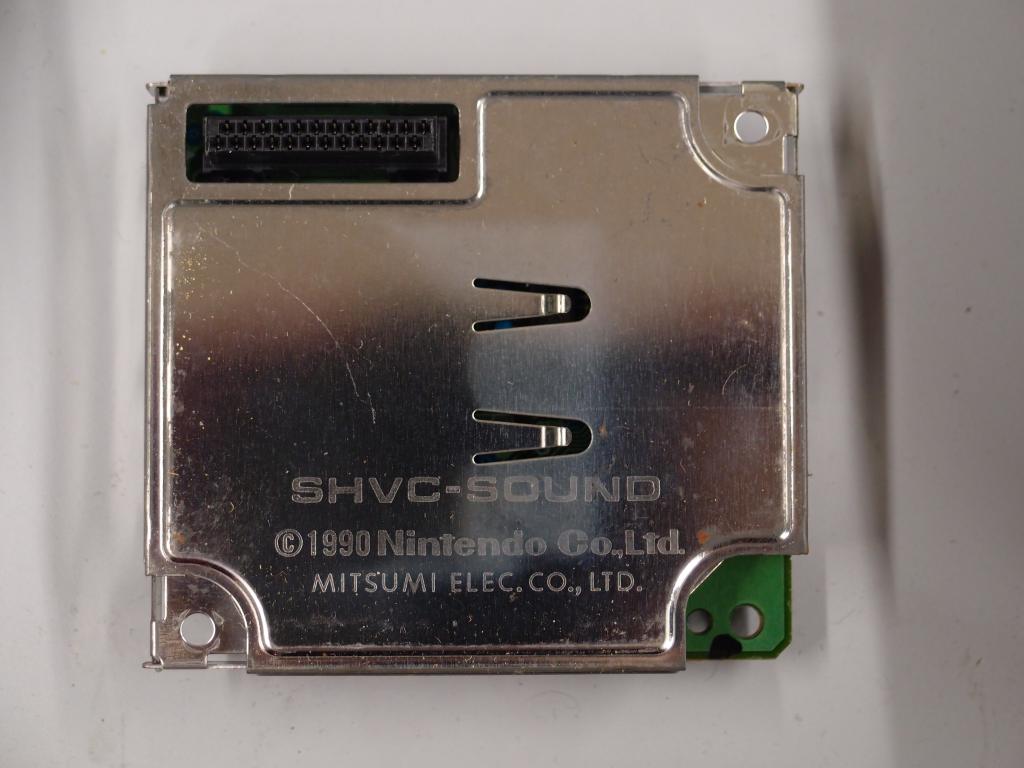
Unfortunately, the only unit I have with no sound and but is otherwise perfectly working is a later revision, so I can’t just pop on a known-good sound board to test it.
Differences between Super Famicoms and Super Nintendos
Unlike the US Super Nintendos I was used to, the Super Famicoms have a lot of weird little differences.
- The Multi-Out AV connector doesn’t fit super well; it feels like the Super Famicom has a slightly smaller port for it. Jamming it in seems to make it work, but it never felt right to me. Maybe they beefed up the plastic for the clumsier North American market?
- The power supply is not the same. Neither the regular SNES nor the SNES Jr power supply tip fits; I ended up using a MK-1602 power adapter from a first-generation Sega Genesis to power the Super Famicoms. Since one of the most common flaws on the US-market Super Nintendo is that their DC jack breaks (I still have yet to find a replacement for the one in my Jr), it is confusing why Nintendo didn’t just keep this tip for the US market. Maybe, again, they wanted to toughen it up.
- The cartridge-eject mechanism for the Super Famicom is an interesting Y-shaped “pickle fork” design, spring-loaded on one side. The Super Nintendo is a T-shaped bar with a much bigger Eject button. Despite what country you come from, all gamers are united by never using the eject button anyway, which is, I’m sure, part of the reason why there are so many damaged connectors out there.
General Weirdness and Tips
The Super Nintendo and Super Famicom seem to be able to hold an incredible amount of charge even after they are unplugged. It’s probably partially because of the frankly enormous 25V/1000uf cap that is installed in them. In order to be safe when working on them, always flip the power switch to “on” after you’ve unplugged it from the wall. The power LED will come on for a worryingly long time!
Which brings me to my next section…
Mistakes
I’m still not sure what I did, but while trying to fix one machine (#9199) with glitchy vertical and horizontal sync, I fired up the loose board with no case attached. Immediately, the ground plane got hot to the touch, which I think might have been a mild electric shock.
I put the board down on the RF shield and must have shorted something out, because the “T1” line filter chip on the DC-in jack immediately burst into a cool-looking spiral of magic smoke and the machine died. Another good reason to make sure your test equipment is always on a switchable power strip!
This machine got parted out and used to save other machines, but as an interesting side effect, it also wiped out the save game on a battery-backed game that was inserted at the time.
Progress Log
I will update this as I fix more machines.
| Serial # | Observed problem | Remedy (if any) |
|---|---|---|
| S10829199 | Bad H + V video sync | ❌ Killed: Blew up the power supply circuitry, parted out. RIP |
| S11838904 | Bad H-sync | ✔️ Had a dirty slot, and I think the TV I was testing it on broke. Works OK on a different TV with many games after cleaning. |
| S12291466 | Game only worked when pressed forward in slot. Shattered top case. | ✔️ Used slot, top case from dead SFC #9199 (see above) |
| S14570229 | Bad H-sync, artifacts, slot | 🤔 Started working better the more times I turned it off and on. Caps? Traded for other stuff. |
| S19351520 | Rolls vertically | ✔️ Another victim of the broken Commodore 1701; seems OK on further testing |
| S19650586 | Ugly case | ✔️ Donated to science: sous-vide retr0brite experiment |
| S20782173 | Disgusting case, no sound | ✔️ SHVC sound module is part of motherboard, couldn’t replace. Traded for other parts. |
| S21156306 | Game never booted no matter how much wiggling - slot rusty | ✔️ Cleaned removed slot from above SFC #1466, works fine. Newer model: no SHVC module. |
| S24720422 | Broken pins in cart slot | ❌ Parted out: had a fantastic case, and the slot was soldered-in (rare!); not currently economical to replace |