Ascending Mount FujiNet
Tags: computer tandy coco fujinet
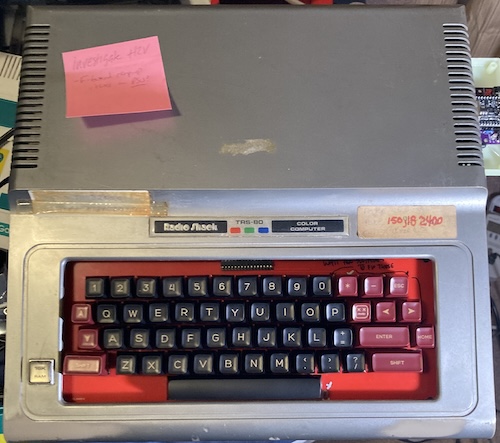
In case you haven’t heard of it, FujiNet is an ambitious open-source community project. Its intent is to be the only peripheral you will ever need to get for your old computer. That’s a lofty goal if ever I’ve heard one. I’ve been in and out of the project over the last few years, but I hadn’t actually gotten (or finished) any FujiNet hardware. Let’s revive my troubled CoCo1 with a cartridge that does it all.
What is the FujiNet?
FujiNet can be a lot of things for old computers – so many things that it becomes actually difficult to explain what it can do if you haven’t tried it yourself.
The most basic explanation is that a FujiNet device adds internet support to an old computer, through wifi. But unlike Contiki or similar projects which have the end goal of “provide a network socket,” FujiNet peripherals are meant to replace as many traditional peripherals as possible on an old computer.
Here’s just some of the things that you can do with a FujiNet:
- SD card access for programs;
- Internet access for programs, including from BASIC on some platforms. Yes, you can parse JSON APIs from BASIC;
- Loading entire programs (disk images, game cartridges, etc) off a network share or SD;
- Cross-platform, multiplayer games like Five Card Stud Poker. Yes, you can play poker on your Apple II against people on their Ataris. There’s even an API to make building this kind of game much easier;
- Unique FujiNet apps like the International Space Station tracker, weather report, election vote tracker, Mastodon client, and news;
- Dial-up modem emulation for things like internet-piped BBS access;
- Online high-score tables for existing games (when modified;)
- And more.
The FujiNet wiki’s “What is FujiNet?” page does a much better job of explaining it than me, but the important thing to know is that you can build this cheap cartridge, jam it into a CoCo, and do a lot of crazy future stuff with it. Everything is open-source, so nothing is stopping you from taking it to the moon if you want. Do CoCos even work on the moon? Good question for NASA. Maybe I can ask them with this thing.
Before we begin, it’s worth pointing out that the CoCo is a very early-stage platform for FujiNet. As a community project, a lot of the software has only started being made, and the hardware still had a few bugs. On top of that, I made things harder for myself by being an idiot and not reading instructions. Not like that’s ever happened before, right?
In the near future, I plan to also build the Coleco Adam and Atari 8-bit versions of FujiNet. Those platforms, having come earlier to the project, are much more mature by now. It’s really incredible how many platforms are supported and how well!
Parts
A pleasant surprise happened when I went over the BOM. This is one of those builds where I had basically all the parts on hand already. I only needed to buy an ESP32, XH pin header, right-angle push buttons, and the specific microSD connector they used. Another triumph of hoarding.
I ordered the Rev000 board, which was almost immediately supplanted by the Rev0000 board after I finished assembling this one. Because the port to this platform is in its youth, I knew that the board would likely have some thrash over the course of my testing, but I went ahead and bravely ordered the expensive ENIG finish in a show of confidence. Hey, it’s not my design, so it’ll probably work!
Assembly
As always, I found it tricky to solder down the surface-mount micro-SD card holder. This is mostly because I got impatient while waiting for it to arrive, and soldered down the tantalum cap in the way first. Contorting my wrists around the cap to hit the solder joints of the micro SD holder was not fun at all. If you build one of these, do the smart thing and put the SD card holder down first.
I had read, but was not able to follow, the part of the CoCo build instructions that tell you to print out a 4mm spacer to raise the ESP32 the exact right height off the board. JLCPCB doesn’t support printing anything smaller than 1cm tall, which makes some sense on their end. Then I totally forgot when it came time to solder the ESP32, and I soldered it directly to the board with inadequate spacing.
Unfortunately, this also meant that my ESP32’s USB port didn’t clear the case anymore. I had to desolder all 40 pins and start over, with an improvised spacer.

I had a bunch of nylon screw spacers, but they wouldn’t fit in between the pins. I decided that I would glue some under the board and use it to lift the ESP off. Unfortunately, I only had 3mm and 4mm spacers, which made the math somewhat complicated. 7mm looked the best with the USB hole in the case, but I think I should have used 6mm so that more of the pins would be sticking through the holes. Even so, I was able to solder them all down and even get decent fillets.
After completing this ugly bodge, I was told that I could have just pulled a pin out of a pin header and gotten a perfectly good 4mm spacer from the remaining plastic. Oops.
The Cable Mess
I ordered a male-male DIN4 cable from Amazon, because somehow that was cheaper than buying two separate male DIN4s and soldering them myself. Unfortunately, this was a mistake. After about a week of not moving, the package was reported to be stuck in customs and then repeatedly, indefinitely delayed.
In the meantime, I made a cable using some bulk ethernet cable and a male DIN4. I used a new strategy for soldering DINs that I learned from a vintage PACE instructional video. By knotting up some short cuts of solder, I can stick them into the connector’s solder cup and easily pre-tin the pins without melting them through the case. That made inserting a wire much easier, as I just have to reflow the solder in the cup and stick the wire in!
This cable build was not nearly as good as it would have been with the pre-made cable, because the hole in the case was too small for the ethernet cable’s bulky insulation to fit through. I ended up zip-tying the bare conductors into the case and then adding a couple extra zipties for strain relief, but this is not a production-quality job and it makes me a bit nervous every time I mess with the cable. I think I’ll remake this pigtail with a thinner 4-conductor cable next time.
Case
I used JLCPCB’s ultra-cheap “X-Resin” mystery box printing method for this case. It’s very cheap, but you don’t know what kind of material you’re going to get, and they don’t bother sanding it for you (they do include some sandpaper in the box, though.)
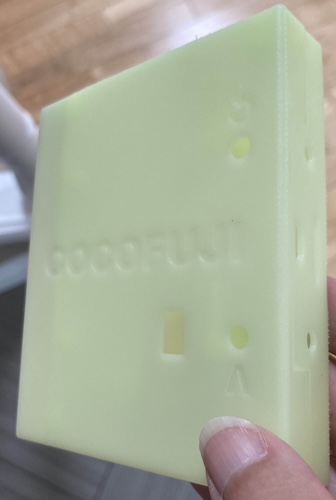
This time, my print seems to have ended up as what they call the “Green” resin, which in my initial excitement I thought was glow-in-the-dark. Sadly, some experimentation proved it isn’t. That would have been cool!
I assembled this before I found out that all the JLCPCB UV-cured resin is vulnerable to yellowing and brittleness with extended exposure to sunlight. It would have been a good idea to paint this before assembling it, but that’s water under the bridge, and possibly a good excuse to buy a traditional FDM printer in the future.
Another issue with resin is that the case is designed to be screwed directly into in order to hold it together. Everyone says that putting screws directly into a resin print is a bad idea, and I didn’t see any reason to argue with it.
My first idea was to use small M3 “pop-it” push rivet clips like the ones that hold annoying car panels together, and this idea actually bore some decent fruit for holding the PCB in. 6.6mm push rivets were just long enough to retain the board into the case. Unfortunately, the top case didn’t give any room for the clip to go through and “mushroom,” so I had to try a different strategy.
Screws, then? Screws. I went very slow and ginger, and somehow the screws all managed to get a decent grip. I definitely did not torque these in very hard.
I think a good (if permanent) idea here would have been to pin it with plastic pins and then hold those in place with some kind of resin or super glue. This might still happen, if the screws fail.
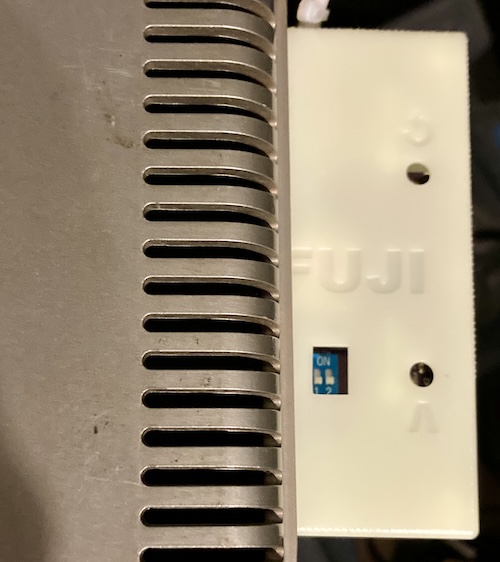
As expected of something made by not-me, the cartridge and case slotted into the CoCo1 on the first try. Looks good!
Firmware Flashing
Like with a lot of the other FujiNet docs, the flasher documentation is easy to read and figure out. At first, I used the FujiNet Flasher website and uploaded the ZIP file of the latest unstable Release (then 1.3) of the firmware. Unfortunately, it didn’t work. After some blinking of lights, the flasher would time out and give up.
Distrustful of a webapp controlling my serial port, I then got the desktop FujiNet Flasher program and ran that instead. This worked, but I had to push the “EN” (Reset) button on the ESP32 itself while it was being flashed. Once it connected, the flasher wrote and verified everything and gave it a clean bill of health before booting into the firmware. I assumed that this hangnail was a first-time flashing problem, and moved on without mentioning it to anyone.
Testing 1
Everything went on the shelf for a few weeks while I cleaned up the work area for another project.
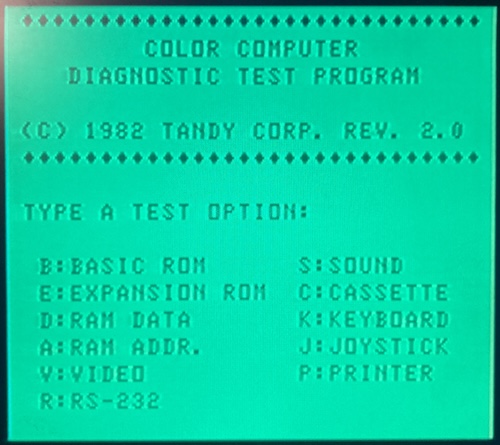
Once I got it revived, I spent awhile looking around for the requisite RF cables and adapters. Then, I got the CoCo connected to a TV and fired it up. I was happy to see that it still worked, and booted the CoCo Diagnostics program off the cartridge.
Unfortunately, I then found out that the keyboard has degraded in the couple of months since I used the CoCo last. More than half the keys don’t work, including really important ones like Enter. This discovery is not really unexpected – the method that I used to fix the keyboard membrane was clearly not viable long-term. Also, the CoCo hasn’t gotten much mileage outside of Tetris lately.
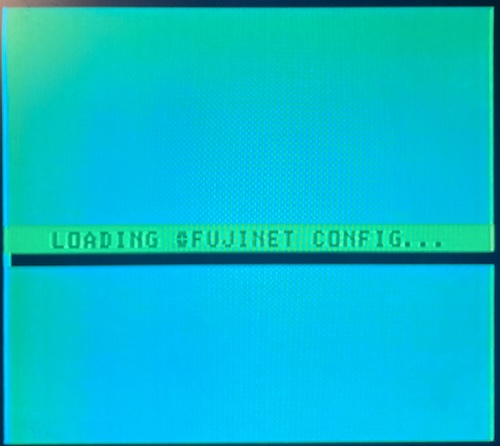
Even so, I soldiered on. The CoCo build of FujiNet’s readme said that the system should immediately jump into running the FujiNet Config program. No matter what position I put the jumper into, it simply was not the case.
I assumed it was the sketchy DriveWire serial cable that I had made. After consulting the pinout in the README, it turns out that I did indeed have pins 1 and 3 transposed (Rx and Tx, naturally.) I depinned and swapped those and tried again. Nothing doing.
After complaining to the FujiNet Discord and rechecking my wiring about five more times, I determined that an “official” build of FujiNet for CoCo - 1.4 - had been released in the interim. Surely a firmware update will fix everything wrong with my life, says everyone who installs a firmware update.
I downloaded this and once again tried to flash it with the web FujiNet Flasher. The same error as before occurred.
I fumbled around with this some more before remembering the EN/reset button trick from the previous attempt at flashing, and I was then able to flash 1.4 onto the ESP32 and boot into the FujiNet firmware. Things were looking up!
Testing 2
However, when I returned to the CoCo, I still had no luck starting the Config program. I connected my modern Mac to the cartridge and then opened the serial debug prompt, but the ESP32 refused to send any messages, not even the debug message telling you that “button A” had been pressed.
Feeling curious, I pushed the “EN” button to reset the ESP32, and then hit the reset button on the CoCo. Suddenly, FujiNet Config began to boot on the Tandy, along with a whole spew of log messages on the Mac’s serial console! It seems that whatever was keeping my ESP32 from flashing properly seemingly was keeping it from running FujiNet properly, too.
The TRS-80 Colour Computer’s wifi was even able to detect my neighbour’s Samsung smart fridge. That’s a whole new sentence, and one that I’m very uncomfortable with. Unfortunately, because the Enter/Return key was not working, I was not able to actually select my wifi network and proceed with FujiNet enjoyment. Let down by a half-ass repair once again, they will engrave on my tombstone.
After this, I could push the reset button on the CoCo as much as I wanted to, and I would keep going back into the FujiNet Config. This is how it’s supposed to work! The cartridge is functional.
At first, I thought this strange behaviour might be related to the fact that the ESP32 was plugged into my Mac when it started to work. This would, of course, mean that it was being powered over USB. Is it a power problem?
To rule that out, I shut down the CoCo, unplugged the USB cable, and waited a few minutes to fire it up again. Once again, it was like the ESP32 wasn’t there at all, until I pushed the EN button to reset the ESP32 and then reset the CoCo. I noticed at this point that when it was in this “non-responsive” state, the cartridge PCB had both activity lights lit up.
The next day, I decided to get down to business figuring out just what was wrong with my cartridge build. I noticed that my supposedly 100nF cap, C1, actually read “105,” meaning I had accidentally put a 1µF in there instead of a 0.1µF. This is just a decoupling cap, though, and probably didn’t impact the reset/bootloader triggering. Swapping it out made no difference as expected.
After some more diagnosing, I was able to determine that if the cartridge were plugged into USB on my Mac before the computer was started, it would reliably be able to kick into FujiNet Config. This was a problem that I remember being mentioned on the Discord previously, specifically with F-board CoCo1s. I have an E-board CoCo, but I began to suspect it was probably a similar class of problem.
As far as I understood it, this phenomenon was that the host computer’s power supply didn’t ramp up fast enough to satisfy the ESP32’s inrush demands, and so instead it became trapped in some kind of extremely grumpy torpor state. That would explain why the reset button magically made it work, but the FujiNet’s “A button” did not soft-reset the ESP.
So: working FujiNet, as long as I hit the reset button on startup. But working computer?
Keyboard
Yup, the keyboard wasn’t working. This wasn’t totally unexpected, because my fix consisted of “draw some special paint on it” and “put some special tape on it.” Over the months in storage, that paint and tape seems to have lost its potency, or simply been flexed to oblivion whenever the thin mylar of the keyboard membrane was jiggled. I would have to fix it again, a concept I was truly dreading.
Imagine my joy when I found out I could just order a new CoCo keyboard membrane. Looks like in the awkward years since I butchered my own membrane to try and “repair” it, there’s at least a few options that have become available other than the CoCoMECH. I also considered the KeyFix2, which is a whole hard PCB including tactile switches. That was the kind of thing I was going to do (albeit with low-profile Choc laptop keyswitches) so that saves me a lot of frustration, measuring, and expensive-PCB-ordering. Kudos to all of you!
While I was away at VCF Midwest, the new CoCo keyboard membrane arrived. Easy swap, right? Shouldn’t take more than five minutes?
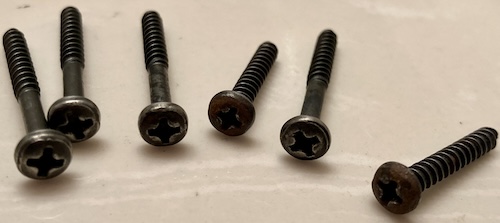
I immediately… started dismantling and cleaning up the CoCo. In my haste to get it fixed before losing motivation last time, I had left all kinds of things half-fixed at best, from rusty keyboard plates, to missing screws, to rusty screws.
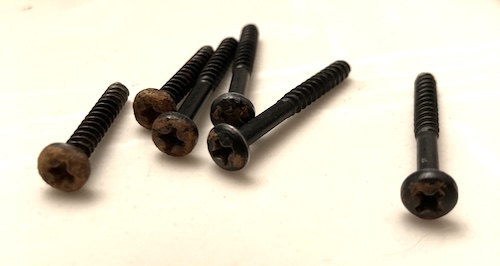
The case screws were very rusty, so much so that they were difficult to get out of the case as the magnetized screwdriver tip wouldn’t pick them up as easily. I threw these into my handy-dandy vibratory tumbler, filled the bowl with some crushed walnut media, and let it eat for a few hours.
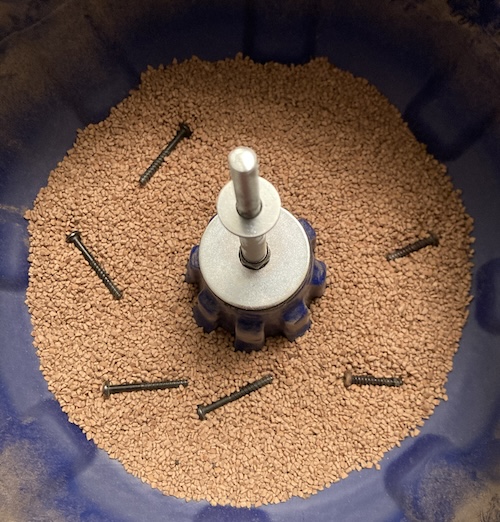
This tumbler is not as good as it could be (there are lots of simple mods on YouTube to improve its performance) but it does eventually get to the point of “making screws slightly nicer.” With limited free time, it’s nice to have tools like this which do work while I’m not around, even if that work is not particularly rapid.
It hasn’t seen use since the Coleco Adam keyboard screws, but it was cheap from Princess Auto so I don’t mind the fact that it spends a lot of time on the shelf.
After a couple hours, though, it had basically done nothing at all to the screws. So I swapped media to using little green resin pyramids. I added some water and Dawn dish soap to help lubricate the works.
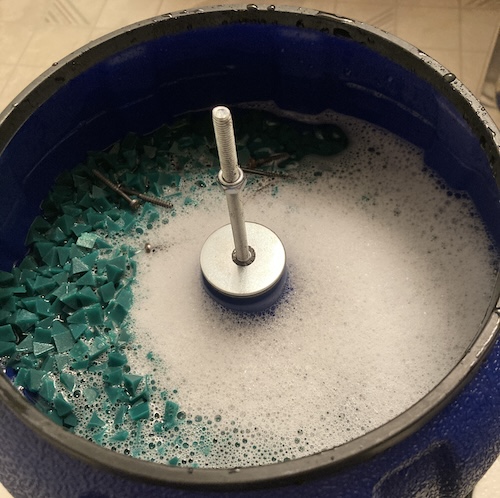
After an hour of that, I looked in to see that they looked much better. This is definitely the recipe for cleaning up these kinds of screws: the grotty, scaly rust in the heads is all gone, unfortunately along with some of the oxide coating on them. Two of the screws still had some surface rust stains, but I decided that they were probably fine enough to go back in.
Since the rusty keyboard plate had to come out to replace the membrane, I scuffed the plate with a Scotchbrite pad and sprayed it with some decade-old black acrylic spray paint I had lying on the shelf. And then it started to rain. As you might expect, this combination of incompetence then took approximately forever for the paint to cure. I find that with paint, you can usually get away with one or two shortcuts, but this was at least four.

When I went to reassemble the keyboard, I found another problem: this time, with the new membrane.
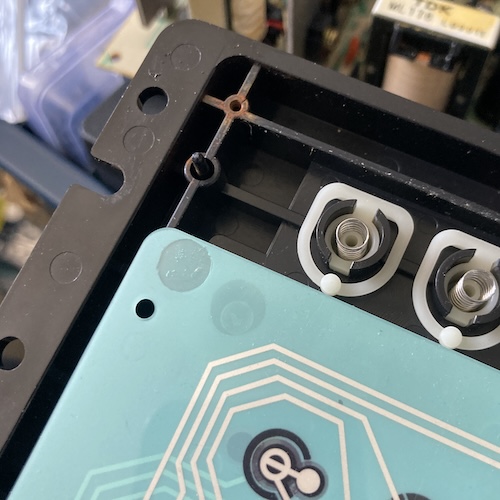
My old keyboard membrane (JFK8002-04A, apparently made by Jelco) has two holes on each side at the top, one of which goes into a plastic alignment pin. This new one only has one hole, which means the pins have nowhere to go. All the screw holes and keys lined up, so I was pretty sure that this keyboard was out of a CoCo2 and should accept a CoCo2 membrane.
After talking it over with Jake at Retro Fuzion, he ended up giving me a full refund, as it was a new kind of CoCo keyboard he hadn’t encountered before. I didn’t have to send the membrane back, which is very nice of him. I’ll be giving them some business in the future, even though this particular case didn’t work out. For instance, they make an Atari 800XL membrane that I’ll probably need eventually.
Project: Keyboard
Taking all of this in, I decided that I would simply get back to an old project: building an entire mechanical keyboard for the CoCo.
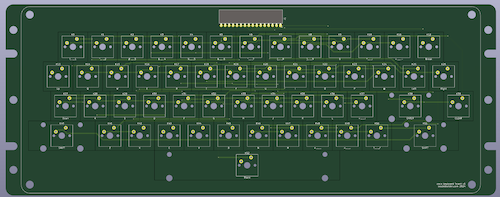
Sure, it would be expensive. Yes, it would lead to accelerated hair loss. Yes, it would take another two months before getting to play with FujiNet. And probably I’d get really mad halfway through soldering all the switches. All those things happened. But life is about taking risks.
Yeah, somehow I turned “assemble someone else’s cartridge PCB, put it into the computer, play games” into “months-long fabrication project.” This kind of thing happens a lot around here.
I have a future post on the way about the construction of this keyboard, don’t worry. Now let’s get back to the FujiNetting.
FujiNetting
Once the brand-new keyboard was assembled well enough to type in my wifi password, I was able to mess around with FujiNet Config.
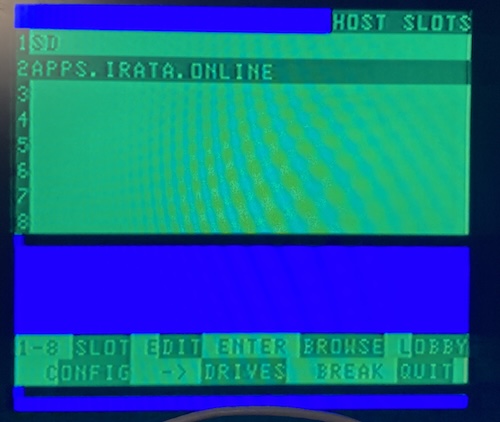
One of the first things I did was look for some software on the Irata archive. This server is added as a default bookmark in the FujiNet Config software, but you can easily point FujiNet to your own repository.
A good use for this would be to test software you’re developing. You could run a TNFS server on your modern computer, and then do builds that dump out into that server. Hit reset on your CoCo, and you can load the latest build of whatever you’re working on over wifi. No need to burn any ROMs!
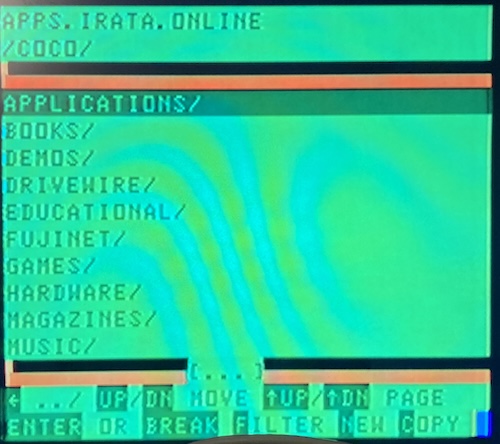
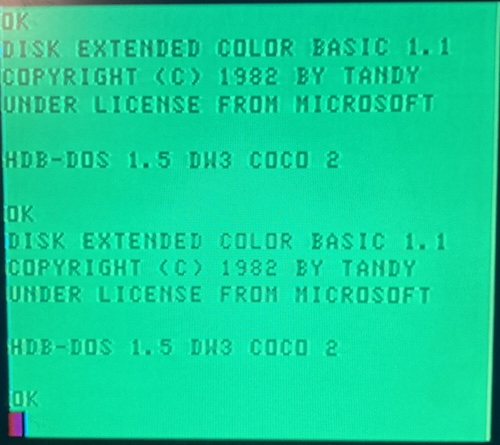
To load software, I picked a disk image and assigned it to a “slot.” Then I smacked the BREAK key a few times until I was back in CoCo Extended Disk BASIC1. Like when mounting a disk image using DriveWire, DIR listed the files on the disk, and RUN "AERIAL" loaded and ran the software.
As you might have guessed, I’ve decided to load Inufuto’s Aerial. I liked that game on PC-6001!
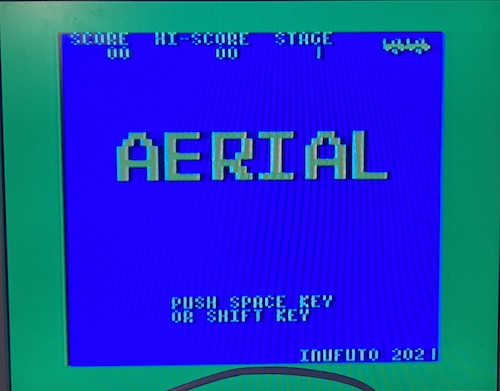
Still just as good – maybe even better – on CoCo, although having the up/down arrow keys on one side and the left/right arrow keys on the other side of the keyboard is kind of awkward. What idiot decided to spend a bunch of money and time to end up with the original CoCo keyboard layout anyway? Oh. Right.
I loaded the entire disk image off the internet via the wifi in my house on a TRS-80 CoCo from 1982. That’s pretty cool, if you ask me. Let’s go see what else it can do.
Advanced FujiNetting
Now that I know I can load regular single-player games on my CoCo, how about doing something that takes better advantage of the FujiNet’s internet connection?
For instance, I’m kinda curious what’s going on with the International Space Station. Where is it right now?
To find out, I mapped the ISS disk image from the FUJINET folder on the TNFS share, and then typed RUNM"ISS" to load it. Soon, I had a very snowy world map. Clearly there’s a lot of RF interference going on in my house today.
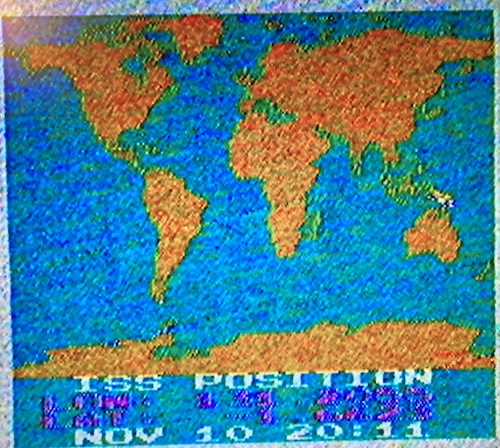
I think that’s it floating over Australia. Boy, I need to do a composite mod.
Next, I decided to check news. At the time I was taking pictures for this article, the news site that the FujiNet service is scraping started to implement a captcha, which broke the news program’s ability to look at, well, news. Still, I wanted to see if it would load at all.
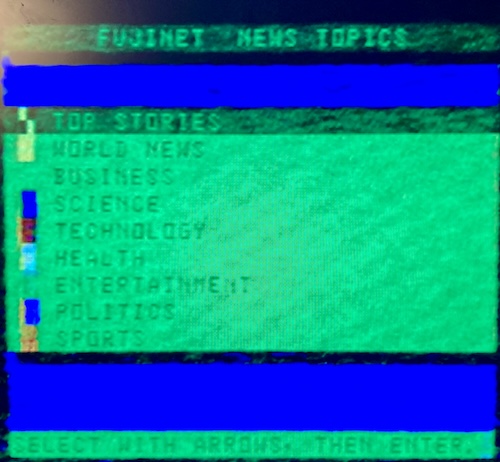
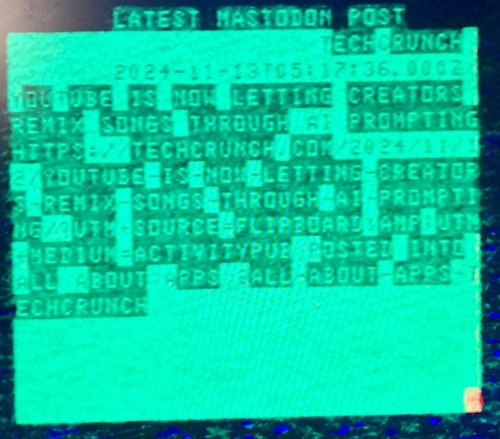
As expected, fetching news posts still was not working quite right, printing only a “Sorry” for each category. I decided instead that Mastodon was the best place to get the hottest news:
Fujitzee
Eric Carr came into the FujiNet Discord and mentioned that he had a nice build of Fujitzee working for CoCo. Fujitzee is the FujiNet-ified version of the classic dice game Yahtzee.
I was able to quickly add his TNFS development server to my bookmarks list, dial it up, and run the game client.
Also, I found out that the RF cable was just loose for the previous shots. Oops!
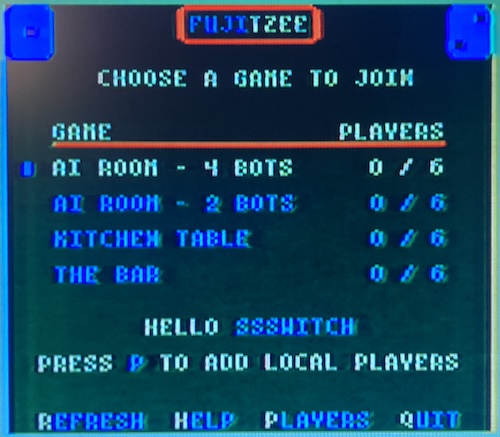
Like with the earlier Five Card Stud Poker game, you can play it cross-platform. It’s a good idea, as despite some people picking the wrong systems in life, us weird retrocomputing folks are more alike than different.
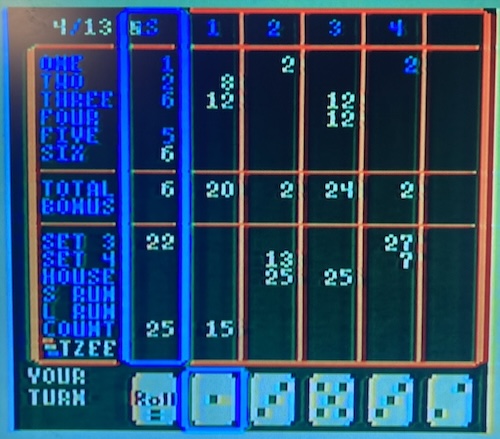
Since everyone else was busy, I ended up playing with bots. Considering I couldn’t remember the scoring rules for Yahtzee, it’s a miracle I didn’t come in last place. Even though this version of the client is very new, it’s very well polished: good input handling, fun sounds, and nice animations.
I don’t even mind that one of the bots got yahtzee twice, how does that even happen?
More to Come
Since the CoCo is such an early-stage platform for FujiNet, I’m excited to see what future developments are in store in the next year or so. Since so much of FujiNet is driven by the community, it’s likely that we might even see some wacky, unexpected new thing emerge.
Personally, my next step is going to be playing a lot of games. Then I might sit down for awhile and try to understand what’s going on with the reset bug. It would be nice to be able to put the lid back on the cartridge!
Outside of that, I am thinking of ways to use the FujiNet as a development tool. While the CoCo is not the machine that holds my interest the most, I think there’s a lot of potential on using it as a platform to learn 6809 and 6847 programming, so I can take those lessons to the Fujitsu FM-7 and PC-6001. Anything that reduces this friction is a good idea in my book, and it’s just plain cool to be able to wirelessly beam the code you just assembled on your brand-new computer to a decades-old thing that got pulled out of a muddy shed.