I don't know you from Adam
Tags: computer coleco coleco-adam colecovision pickups keyboard power-supply homemade-hardware
No self-respecting Coleco owner’s collection is complete without the machine that was their ultimate undoing: the Coleco Adam. Adam’s a game console. Adam’s a computer. Adam’s a bizarre hash of over-engineering and under-manufacturing. It’s all of those things, and more, which would make it perfect for this blog even if I wasn’t knee-deep in ColecoVision construction.
Super Gettin’
This particular Adam came from Facebook Marketplace, courtesy of a friend noticing it and passing the details along. Meeting the seller was an interesting experience. We were the same age, and he was a software developer as well. Where things got weird is: his apartment was stocked with multiple Coleco Adams and no other classic computers or game consoles, not even a ColecoVision.
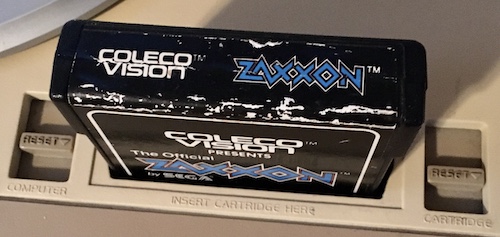
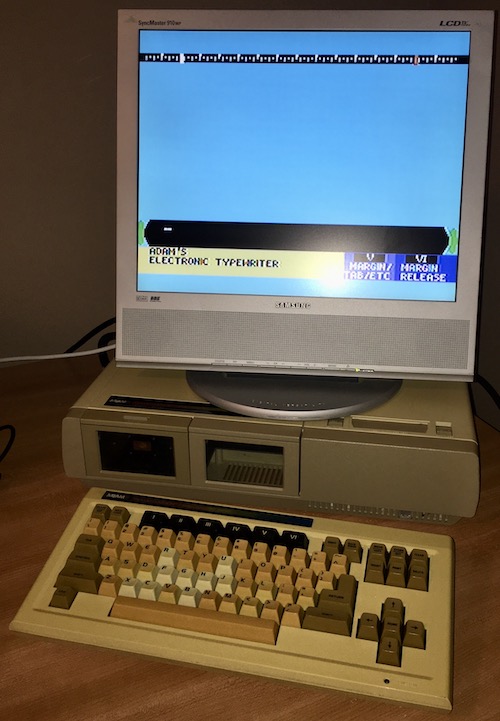
According to him, he had purchased this Adam for its keyboard and power supply, and didn’t need another base unit. He showed me that it booted and ran the Zaxxon “Super Game1,” and then sent me on my way with a small collection of tapes. As I was heading out, he advised that I could probably buy a replacement power supply and keyboard on eBay for cheap. Buy?
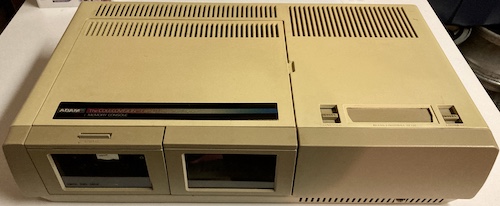
The base unit of the Adam is fascinating. It’s got the same footprint as a ColecoVision, but the empty space the console dedicated to controllers is now taken up by places to put expansion cards. Two software-controlled “Digital Data Pack” tape cassette drives can be installed in the front bay, although mine only comes with one. The other is just a window, staring inside the system.
The Adam’s multiple-personality disorder is on display even on the outside of the case. There’s two reset switches, one that kicks you into the “computer” (Adam) and the other into the “cartridge” (ColecoVision) mode.
To use this Adam, I’d need a power supply. In order to use this Adam as more than just a very weird-looking ColecoVision, I’d also need a keyboard. I immediately started researching how the keyboard works, which led me down a rabbit hole of studying the “AdamNet” system.

Similarly to the later Apple Desktop Bus, Adam peripherals communicate with the computer through a shared serial interface called AdamNet. The keyboard, printer, tape drive(s), floppy drive, and the unreleased serial interface all contain a Motorola 6801 microcontroller2 (with software burned into mask ROM3) that communicate with a “master” 6801 inside the Adam unit itself. To make things less onerous on the Adam’s Z80 CPU, it appears that the master 6801 has some primitive DMA as well, likely controlled by the mysterious Memory Input Output Controller (MIOC.)
Unlike Apple’s ADB, where devices nominate themselves to have a certain address, and then back off and try another one if there’s a conflict, AdamNet’s device IDs seem to be “hard-coded,” and only 4 bits long. For instance, $01 is always the keyboard, and $00 is the master 6801.
It’s unclear what Coleco were planning to do if this architecture kept going long enough that new devices were invented for which they would have to add more IDs. The four-bit “packet code” has two unused definitions, so perhaps they could have implemented some sort of switching mechanism there, although it seems like that would require revisions to the master 6801 firmware anyway. “Make a whole new computer” is maybe not such a bad answer for 1983…
Keyboard
After a few nights of reading, I was getting a little bit excited about making a new Adam keyboard, or at least a converter. Building a keyboard PCB is getting easier all the time, what with all the cool generators being built by mechanical-keyboard nerds these days. However, I’d have to get to grips with AdamNet, and specifically what the 6801 inside the Adam that serves the keyboard is expecting.
Since all the source code for the keyboard’s 6801 is available, it would be feasible to port to a more modern microcontroller. However, I kept coming up with little glitches and gotchas during the design phase. For instance, AdamNet depends on the special 6801 “serial status and control” register, which would need to be emulated on any other device4. On the Adam, this register is set in order to make peripherals ignore messages that aren’t intended for them until the bus is “reset.”
Luckily for my sanity, free time, and wallet, someone else had a keyboard for sale, so I bought it. Sorry to get your hopes up. Maybe I’ll build one later.

By asking around the Adam community, I was able to find a $10 2410KB Adam keyboard shipped from Ontario. The seller had a couple of them on hand, so of course I asked for the worst-condition one.
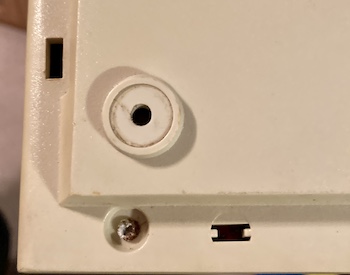
From the outside, besides the remarkable (and somehow uneven) yellowing, the only major problem is a missing foot. I replaced it with a 1/2” 3M-brand rubber foot that I had lying around from doing the X68000 ACE, and then realized that the new rubber foot was not the same height as the old ones.
I peeled off the rest of the feet, and then realized that the inside of the keyboard was filled with what could best be described as “gunk.” I took apart the rusty screws (thankfully all the same length) and got ready for a cleaning session.

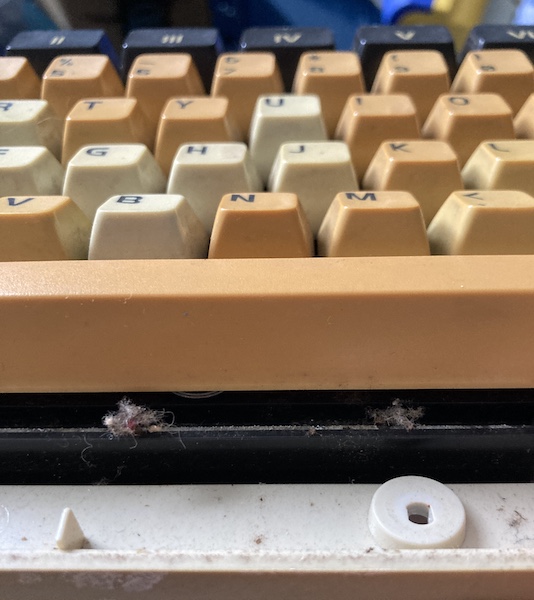
I did notice these two hidden keyswitch “pads” under the plastic cover. It seems like Coleco planned to have two other buttons, but never actually made them work. After asking around some more, it sounds like these were most likely for a soft-eject feature for the tape drive that never happened.
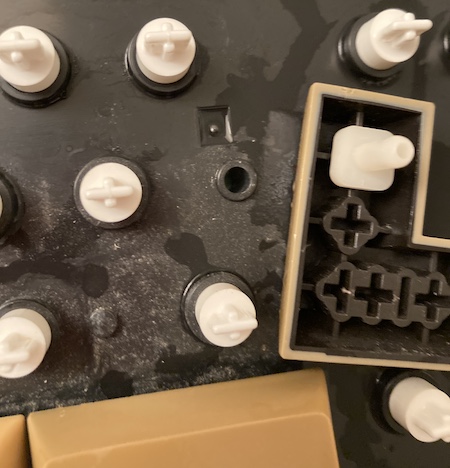
The keyboard is kind of unique. For instance, the L-shaped return key has this male stabilizer pin that slots into an empty hole on the backing plate. The shift keys also have this hole on the plate, but no corresponding pins are installed.
I popped the exterior and interior screws into my cheapo ultrasonic and let it vibrate them all day long. Did anything happen? Not really. This gave me an excuse to buy a vibratory tumbler from Princess Auto, at least. One hundred bucks later, the screws were dull metal and pitted where they were formerly rusty. I’ll be using this sucker a lot more from now on.
Being careful to watch the paper serial-number sticker on the back, I gave the case a quick hose-down and scrubbing with a boar hair brush. Lots of dirt came out, but the exterior was still stained and yellowed even after a few passes of the toothbrush with oxy-clean paste.
Working in batches, I washed all the keys and ended up with some grimy yellow water and a surprisingly filthy paper towel. Nothing really gave me any trouble, but the stabilizer on the spacebar (mounted towards the front of the keyboard) was pretty oxidized. It also took a trip into the tumbler.
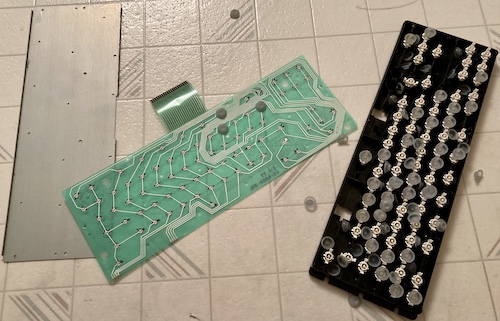
Then I went around back to disassemble the frame of the board – it’s held together with 7/32” nuts and a very awkward arrangement of bolts and fold-over tabs. Be careful to not work over a drain because there are a few tiny lock washers that are sandwiched between the PCB and the RF shield, for some reason.

Once the PCB was exposed, I took a look. It stunk in that familiar 80s-single-sided-PCB way, but it had some interesting elements. From the research I’d already done, I know that the Motorola SC85262P here must be a 6801 microcontroller with a mask ROM. It knows how to speak AdamNet. I’m not so sure what the LM339 and the transistors are doing. I’m guessing from the large-gauge power and ground wires that they must have had some trouble with the quality of the power supplied to the keyboard over a long phone cord.
Last task was to remove a small army of tiny screws and take the membrane out. I regretted this instantly. Not only are there a ton of tiny Atari ST-esque rubber domes, but the membrane itself felt crunchy.
Not fragile, but definitely unpleasant to handle. I decided against a robust cleaning regimen for it, and gave it a quick rinse and dry. Outside of some wear on the insulation of the membrane tail, it generally looked okay. Even so, the black plastic plate had lots of hair and gunk in it, and got a thorough dunking.
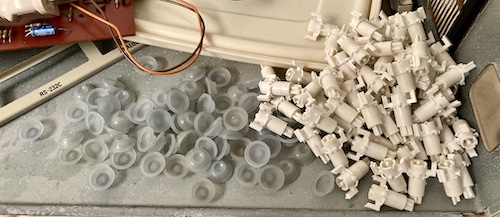
This was annoying, and I quickly changed my objective from “great restoration” to “don’t lose any of the domes or plungers”. It’s interesting that the SHIFT plungers point a different direction than the others. The black plastic frame is still very crisp and well-defined, with hard edges everywhere. That’s one side benefit to not selling very many units of your computer: you don’t wear the dies out as quickly.
Spending half an hour sticking each key back in, one at a time, is pretty boring. In the end, I had a much cleaner (but still very yellowed) keyboard, and two leftover lock washers.
Power Supply
The Adam is notorious for placing the computer’s power supply inside the printer. As shipped, you need the bulky, fragile, expensive-to-ship “SmartWriter” printer to run the system. Like many other annoying Coleco design decisions, this idea makes some degree of sense, because the printer already contains a perfectly good power supply to run all the printer-y motor bits, so why not just beef it up a little and pass the savings onto the customer?
Although the power supply rating sticker that comes with the Adam originally claims the machine has an insatiable thirst for current, most of that is going to the printer. I have no intention of ever buying or using the printer.
If you check the technical reference manual, the amount rated for the “computer part” is not really that much:
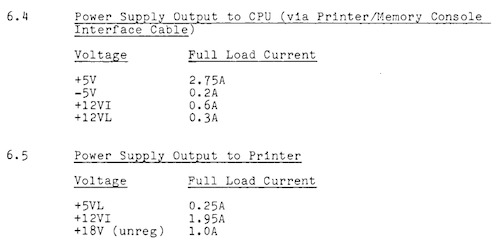
| Rail | Maximum current |
|---|---|
| +5VDC | 2.75A |
| -5VDC | 0.2A |
| +12VDC, inductive5 | 0.6A |
| +12VDC, logic | 0.3A |
And that’s good, because I didn’t trust tiny little DE9 pins with massive current. The amount it’s asking for is already making me a little nervous, since by common wire gauge current-handling tables, you need at least a 17 AWG wire to safely transfer 2.75A, which seemed pretty close to the diameter of the pin on a DE9 connector to me. However, a quick perusal of several female-DE9 datasheets showed that the suppliers are often rating them for at least 5A, and an 18AWG test wire just barely fit into the solder cups.
For the power supply itself, I picked a 45W Meanwell RQ-50B. It had many great attributes, such as the fact that I already owned one. With so little power required – around 25W, if my math is correct – the Adam might also be a good target for an internal USB-C PD power supply in the future.
Harnessing the Power
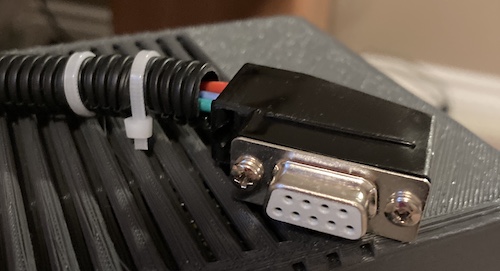
Putting the harness together took longer than I wanted it to, and it’s because I had to deal with a fancy right-angle shroud to make the whole thing look nicer. Hopefully it was worth it!
I chose 18AWG silicone-insulated stranded wire for the medium, and used a solder-cup female DE9 connector (specifically an Assmann A-DF 09 LL/Z) screwed into a plastic right-angle backshell (165X10439XE.) I also bought some day-glo orange 8mm-diameter braided-loom wire wrap to keep it all looking pretty, but that fancy loom kept fraying as I was putting it on, so I ended up using cheap black plastic split-loom instead.
I was a bit of an idiot when I put the harness together - I soldered the wires to the female DE9 connector before feeding them through the right-angle shroud. Turns out it’s very easy to feed the wires into the shroud, and very hard to feed them out of the shroud, because they have to turn. So don’t be like me. Thread the shroud on the wires before you solder or crimp them to anything.
In keeping with my newfound enthusiasm for ferrules, I crimped them onto the end of the power wires. Compared to just bare stranded wires, ferrules will make better contact with the screw terminals of the Meanwell, not have a risk of fraying wires to adjacent terminals, and they just look cooler. I actually caused enough damage to the wires pulling them through the aforementioned DE9 shield that some of the ferrules fell off, with strands of wire still stuck inside them. Oops, but at least I know they’re a pretty strong crimp.
The pinout is fairly simple, and I found it from this AtariAge thread:
| Pin number | Signal |
| 1 | +12V |
| 2 | +12V |
| 3 | +5V |
| 4 | -5V |
| 5 | Ground |
On a male DE9 connector, pin 1 is all the way on the left when the connector is facing you. On a female DE9, like the Adam’s connector, it’s flipped. When in doubt, you can use a continuity test with a multimeter from the Adam’s power connector to a known ground to figure out which pin is number 5.
If I did the harness again, I would have added a thicker ground wire in order to provide more meat in the ground path in relation to the power rails. There’s no such thing as overkill with grounds! However, I haven’t run into any issues so far, and without the printer’s motors to demand high-current +12V, I may never do so.
Boxing up the Power
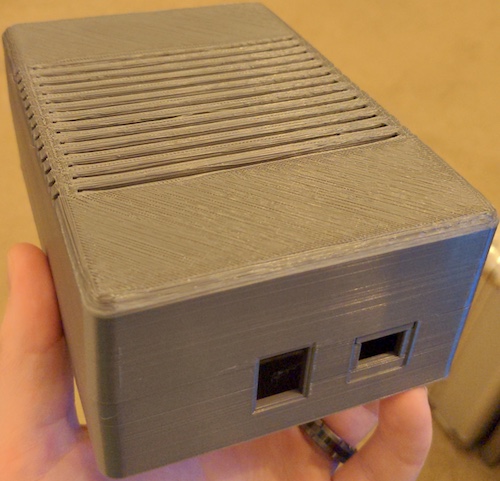
Knowing that I would probably be building the supply around the Meanwell RQ-50B that I had lying around, I did a quick search for 3D-printed enclosures that would fit that module. This enclosure meant for an Amiga 500 popped out at me as being a relatively well-tested and well-revised design, so I grabbed the files and called in a favour to a friend to print one out.
Well, maybe print three or four out. He had issues with the vented half not adhering properly to his print bed, and ended up spending a couple days’ worth of hobby time cleaning the bed and getting everything just so.
Once I was able to pick up the enclosure from my buddy, the next problem was trying to find an appropriate power switch. Since the enclosure is meant to replace an existing Amiga supply, the build instructions simply say to reuse the old power switch from the supply.
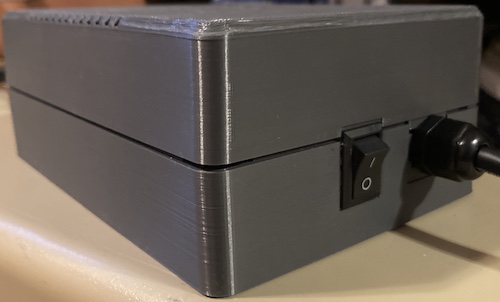
That’s great – if you’re not building this from scratch. I ended up taking some caliper measurements, and playing the “close enough” game on Digi-Key. Eventually I found that the Adam Tech SW-R2-1A-F-1-0 fit. It’s a snap-in switch, but there is no recess in the supply case to snap it into – the snaps are on the wrong axis of the switch. That said, with the clamshell closed, it was retained really well, although I did end up giving it some generous globs of two-part epoxy on the inside to make sure it didn’t accidentally fall out and expose mains power in the future.
Wiring-wise, the switch uses 0.187”6 quick-connect spade connectors. I grabbed some fully-insulated ones and crimped them on, rather than soldering to the switch, in keeping with Canadian electrical code… and also my own irritation at having to desolder power switches in order to fix things in the past. I thought they were heat-shrink, but a quick visit to the heat gun proved that they were in fact not.
The prongs on the switch are quite long, so much so that the female end of the spade connector will interfere with the metal case of the Meanwell. This isn’t a problem with the original soldered switch, because a soldered wire just needs to clear the prongs, but I have additional clearance required for the body of the spade.
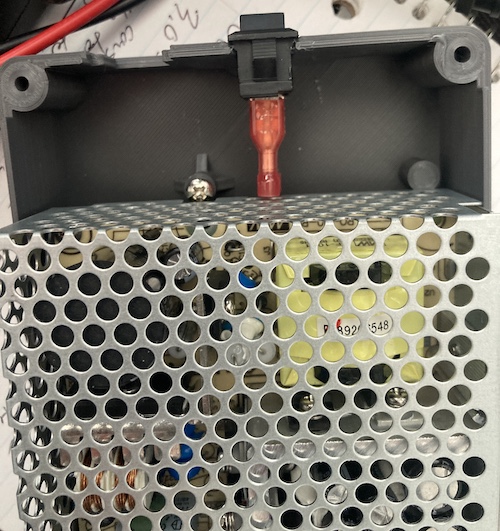
I decided to gently bend the prongs to clear.
It would have been nice to add in a power LED, but the case was already getting pretty packed on the output side of the supply. I can always drill a hole for one later, if I can find some good mounting grommets for LEDs. The Meanwell has its own power LED, as well, which you can kind of see through the vents in a dark room.
This time around, I tried something different to source my power cord. Rather than scavenge an old Apple extension cord, or use a heavy garburetor cord, I just went on Digi-Key and bought a new one. A two-meter cord was only $6, which is a lot cheaper than the $18 I paid for the two-meter garburetor cord on the supergun. The insulation was a decent thickness, the cord flexed just like any other cord, and it was ready to go after stripping back the insulation a few inches. I don’t know why I didn’t do this before; I just assumed it would be more expensive on Digi-Key.
Finding a grommet that fit the case was a problem here. Although the grommets that I had bought for the X68000 power supplies fit fine on the output side, Commodore must have specified a very big grommet for their wall cord. The hole in the case measured out to be roughly 13x10mm!
I eventually found some round “waterproof” screw-down grommets. They’re very complicated inside! And they made my house smell like a tire factory for several days after opening the bag.
After a lot of puzzled stares and experiments, I figured out how to take it apart so that I could slip the gland part over the wire and then tighten it down with the top nut. After a little more finagling and insulation-stripping, I now had the power cord ready to go, with the live wire switched.
Naturally, I didn’t forget the underwriter’s knot between live and neutral! The more precautions I can take with this thing, the better.
Once it was all done up, I plugged it into the wall and then used a male DE9 connector to check the pinout was correct. All of the voltages showed up in the right places, so I was satisfied.
Unfortunately, I had a rough time getting the screws in there. Even though I used thread-chasing screws, I never got a tight fastening and even broke one of the standoffs trying to torque it down. Ultimately, I got the Meanwell bolted down, and then I decided that I would use clear RTV to seal the top of the case.
Flippin’ On
Of course, I misplaced the cable I had bought for the keyboard months before, so I couldn’t test it right at that moment. Instead, I plugged in a cartridge and pulled the “cartridge reset” switch.
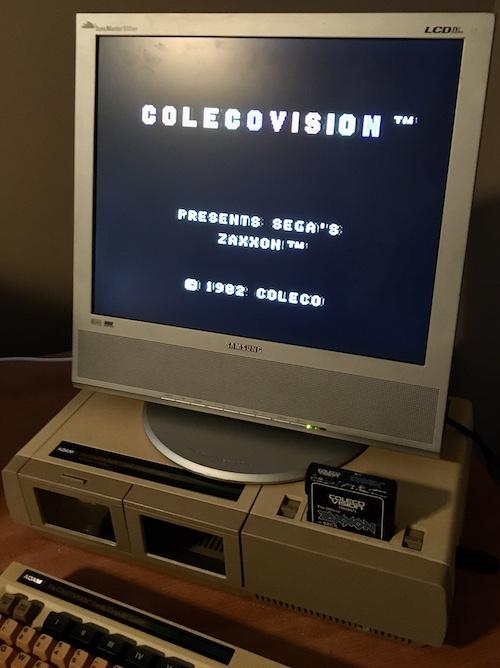
Everything proceeded normally.

Composite video quality isn’t great, but it’s not bad either. Colours are solid, but there’s some luma ringing that makes me wonder if something in the output path is dried up. There’s also some luma flicker in the signal when the tape drive is really going for it. Then again, it is being tested on my long-suffering 910MP, which loves to insert artifacts into composite video. Maybe I should recap that, instead.
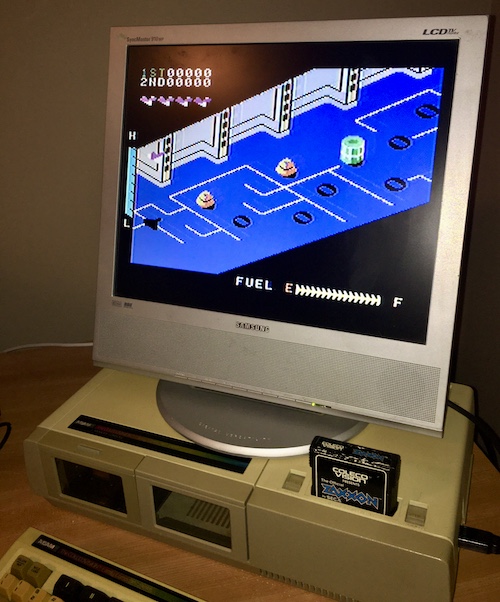
It was a little hard to play! Not because of the system, though. My Super Action Controller still has a finicky “up” direction. It hasn’t been fixed since the last time we used it.
Okay, let’s try a tape. I grabbed B.C. II: Grog’s Revenge out of the box of ColecoVision cartridges and Adam tapes that I got years ago. As you might imagine, this is the sequel to Quest for Tires, which is a critically acclaimed ColecoVision game that I have not yet bothered to play.
Making sure not to leave the tape in the machine while it was switched on, I pulled the “computer” reset switch and then waited a while as the tape drive went berserk, hopefully loading the program in.

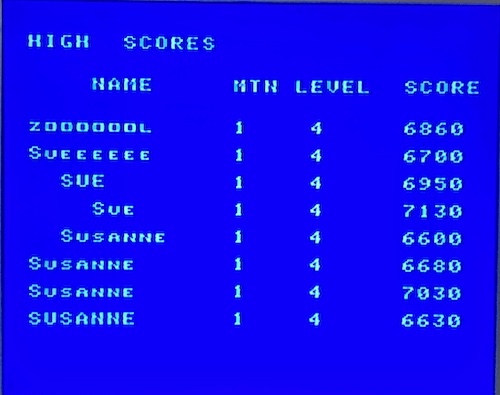
There’s the title screen! Judging from the high score screen, it looks like “Susanne” played this game a lot. I wonder what she’s doing now?
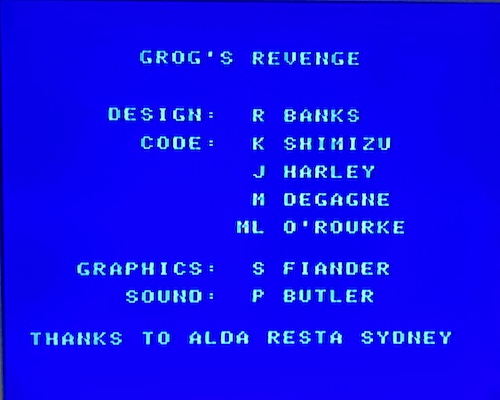
The credits screen is very interesting. It’s kind of rare to see an 80s computer game with four people on the programming team, especially one that seems this simple. Maybe one of these individuals was the one who made the original version of the game (MSX?) and everyone else ported it.
I also got four application, education, and entertainment pack tapes with the Adam. I tried one of these, but I couldn’t get it to work: on reset, the computer spun the tape for a short period and then returned to the typewriter mode. I’m hoping that, since there’s more than one program on them, the programs have to be loaded from the Coleco BASIC tape, which I don’t have.
Finally Keyboardin’
After I ordered a second “reversed” RJ12 cable to replace the one I misplaced, I was finally able to use the keyboard. It’s not bad, honestly – much better-feeling than I was expecting, and all the keys work just as the seller claimed they would. The electronic typewriter is really, really bad though.
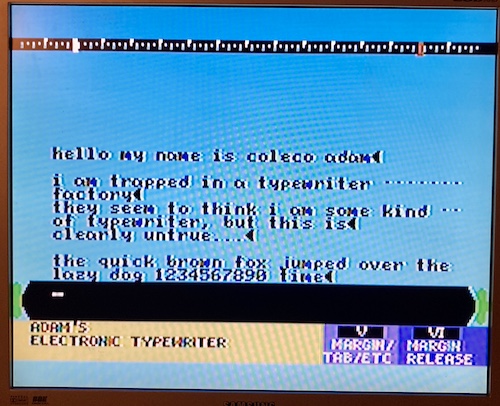
Later, I figured out how to put it in “word processor” mode, which is a more traditional experience than the fake typewriter. That said, it’s still not great. Maximum line length is shorter than my average run-on sentence, and it feels like it’s difficult to keep track of where I am in the document. Maybe I’m just biased from all that time I’ve been spending lately with the NEC word processors. Still, this is probably a better word processor than I could have written for a TMS99xx-based system, and I can only imagine how quickly they had to get it out the door to hit the deadline.
Conclusion
Although it took a long time (over a year from purchase to boot,) I had a lot of fun setting the Adam up. There’s nothing quite like the Coleco Adam – whether that’s a good thing or not, I leave up to you to decide – but half the fun of old computers for me is finding platypuses like this machine.
I have a couple projects I’d like to do with this machine.
First, I’d like to get a FujiNet expansion installed, so that I can easily download and run software and games. My friend Kate has rigged up a whole system to assemble games, build a tape image, and then host that tape image for the FujiNet to pull down and test on the Adam, so I’d like to get that working in order to port some of my Soggy software.
I should also build a video cable. The back of the Adam has a composite-output RCA jack, but that jack of course only carries the video, which means my Adam currently has no sound. There is also a DIN connector on the back, which carries composite and sound. It also has three unpopulated pins, which makes me think that the system could be modified into letting those three extra pins carry S-Video, YCbCr, or even RGB with composite sync. Then, I could wire the system into a nice monitor, or my upscaler, and enjoy razor sharp Coleco Adam video. With sound, of course.
I’d also like to try out CP/M. Whether that takes the form of a bootleg cartridge or simply booting it off the FujiNet, I haven’t decided. It will certainly make the machine more useful, although to be honest, a lot of my curiosity about the system is actually about the Adam’s own operating system, EOS, and I’m fairly sure that the CP/M assembler won’t include the Z80-specific OUT opcode, making directly programming the TMS9928 VDP more than a little bit painful.
Finally, I would like to use this machine as a reference to start designing a clone. More people deserve to have access to the Adam!
Although there are scans of the Coleco schematics, and the aforementioned MIOC has recently been decapped and imaged, there’s still a lot of question marks for me around the 6801, and sometimes the best way to deal with that kind of thing is to put a logic analyzer on it.
For now, though, I’m gonna see if I can find a copy of the Zaxxon Super Game. It looked pretty good.
-
A bunch of ColecoVision games got upgraded versions on the Coleco Adam, dubbed as the largely-un-Google-able “Super Games.” The Donkey Kong Super Game adds the
piecement factory back in, for instance. ↩ -
Although I don’t have one to check, reportedly the floppy drive contains a 6803, which is a 6801 with an external ROM IC. ↩
-
Out of pure luck, someone in the community found the original source listings for many of the Adam peripherals’ 6801s lying around a back office at Sierra, and did the right thing by taking them home to share with us. In theory, these can be written onto a re-programmable Motorola 68701 and plugged in with an adapter to revive a sickly Adam. ↩
-
FujiNet deals with this by just waiting around until the bus has been quiet for awhile, which is surprisingly effective. ↩
-
This inductive 12V rail seems to be primarily used for the Data Pack cassette tape drives. ↩
-
Infuriatingly, this isn’t even a round number in millimeters, either (4.75mm.) Who picked this size?? ↩