Junior Senior, Can't Defeat
Tags: console atari atari2600 pickups repair
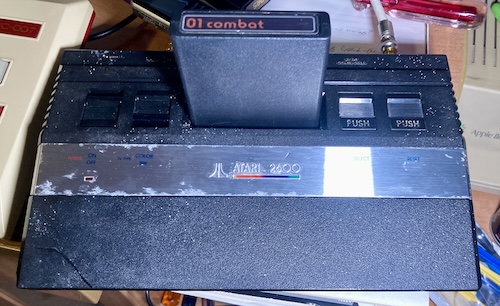
Everyone gets everything they want. I wanted the cheapest Atari 2600 Jr on eBay, and for my sins, they sold me one. Brought it to my front door like parcel delivery. It was a real choice console, and when it was over, I still wanted a couple more.
The Atari 2600 Jr is the final revision of the Atari 2600 hardware. It was cost-reduced and styled to look like the then-current 7800, in 1986 – nearly ten years after the 2600’s release. In a very Tramiel-esque move, the advertising for the 2600 Jr focused on the fact that, by buying behind the curve of technological splendor, you could pick up a shedload of great 2600 games. Remarkably, Atari also decided to support this revival of their now-budget system with a small handful of new 2600 games, such as Midnight Magic and Jr. Pac-Man.
From a hardware perspective, there’s not much to write home about, but we’ll get around to opening it up and poking at the chips later. What’s important is that this 2600 Jr is sad, and it needs our help.
Studyin’ It
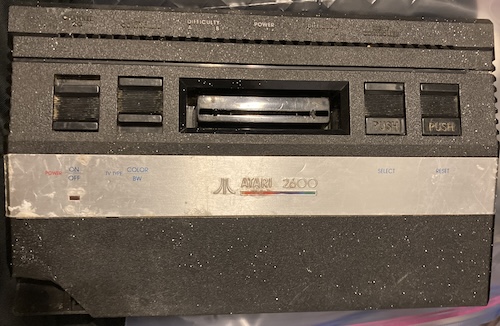
This Atari 2600 Jr was relatively inexpensive, mostly because it has a gaping hole in the side. There’s other problems too: it’s filthy, full of some kind of nature gunk, and it looks like someone spilled flecks of paint on it.
It was sold as dead, and the seller accepted a frankly rude Best Offer in order to send it to me. Probably he regretted doing so, because he didn’t pack it very well. Incompetence or indifference on the part of the seller also broke off more pieces of the case in shipping, which thankfully were caught inside a bag, so I could glue them back on.
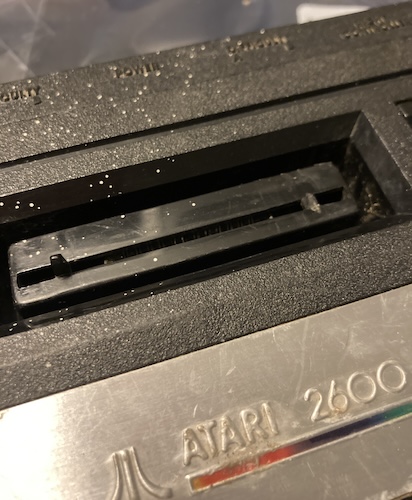
The cartridge slot is missing one of its two plastic “teeth.” There’s a variety of 3D-printable repair kits for this, so I wasn’t too worried. Without these teeth, the spring-loaded Atari cartridges cannot be opened and therefore cannot be inserted into the console to be played. Without cartridges, a 2600 is kind of a boring party guest.
First, though, I wanted to glue the pieces that fell off back on. While I don’t have every missing piece, it felt rude to not at least reattach the pieces that I did have. First, I had to defeat these rusty screws:
One of the posts broke off at this point, and spun endlessly inside the case. I had to grab it with pliers so I could take the screw out, and save the post so it could be glued back in later.

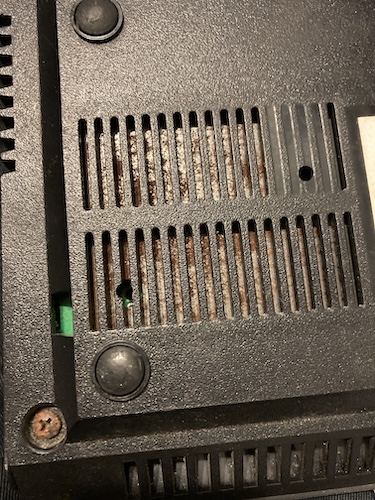
Inside the case, I saw a dirty motherboard. Big surprise. I was a little disappointed to find out this wasn’t a 1-chip 2600 Jr; I really wanted one of those uncommon beasts. Whatever was living in this thing over the years made a huge mess around the channel selector. The switch wouldn’t even move until I gave it a couple episodes of Deoxit and then an application of the pliers, and it was stuck halfway where it wouldn’t have generated any video.
Fixing the loose pieces
I started with the large corner piece, because it was the largest. It’s also the most obvious, so if I screwed up, everyone is gonna see it right away.
Going on the assumption that 1980s black consumer plastic is usually ABS, I used Tamiya ABS cement to initially join the pieces together. Usually, the Tamiya cement does not work especially well unless you also clamp the workpiece, but I didn’t have anywhere good to clamp the corner with, so I ended up sort of wedging it with some sticky tack and hoping for the best.
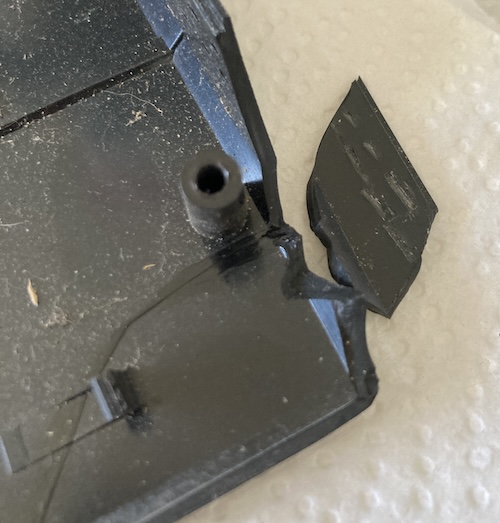
This seemed durable, but I was still missing a corner of the case.
I assume that broke off somewhere prior to shipment. Without that corner, it seemed likely that this repair would snag and break off again, which isn’t great. If this breaks again in the future, I think I will use fibreglass tape1 and epoxy.
Another good way to fix this plastic would be to use a junk soldering iron tip and melt the plastic from the backside. I’ve had good luck with this method before, but it is very stinky and I can never remember which of my tips are “bad” without spending an afternoon trying them all and nearly burning my fingers to swap them. Note to self: buy a “bad soldering iron tips” container and put the tips in there when they wear out.
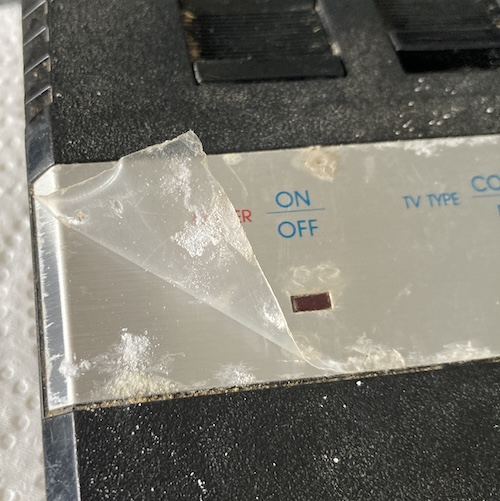
I also wanted to clean up the shiny logo band on the front of the case. I was surprised to find that the original protective film is still stuck to it! Unfortunately, the white gunk wasn’t entirely removed along with the old film. I had to go very carefully through here, because I was worried that isopropyl alcohol would damage the screen printing.
I used a baby wipe on the rest of the case, and it did shift a lot of gunk out of the tight corners and moulding lines, but it didn’t do much to this corrosion.
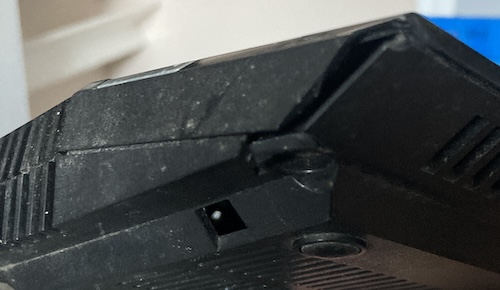
Fixing the cartridge slot pin
The next stop on my journey of case repair was to take a look at this missing pin in the cartridge slot. Normally, there are two of these plastic nubs, and they go into the cartridge when it’s inserted. But why?

Atari 2600/5200 carts have a sliding dust cover. Normally, it’s held down by a spring and retained by a swinging door. Pushing something into these holes pushes aside the swinging door to expose the edge connector2, and lets the dust cover slide up, so that the edge connector of the cartridge PCB can slide through it and mate with the Atari’s motherboard cartridge slot. Then: video games!
You only technically need one of these pins to shove the rocker aside, so it should work anyway, but the loss of symmetry probably puts a lot of strain on the remaining pin. I decided I’d glue another one on, but the shape and size is important. Too wide, and it’ll foul on the bottom of the carts. Too thin, and it would probably snap right off.
Continuing on the assumption that the top case was ABS plastic, I knew that some 3D-printer filament was also ABS. I asked my brother if he had any black ABS filament lying around. Turns out he had an entire reel that he doesn’t use because it stinks up the place. Being a helpful brother, I took home a couple feet of this excess filament (hey, you never know when I might have to fix something else) and got started shaping a little bit of the end into a replacement ejector pin.
This didn’t work: the ABS filament was too spongy and wouldn’t stay rigid. Instead, I ended up clipping a bit of plastic off of a flux syringe’s cover thing. I installed it in place with super glue and then smeared some ABS cement around the base to try and blend the two plastics better together. That worked much better, and was able to open my test cartridge well a few dozen times without breaking off.
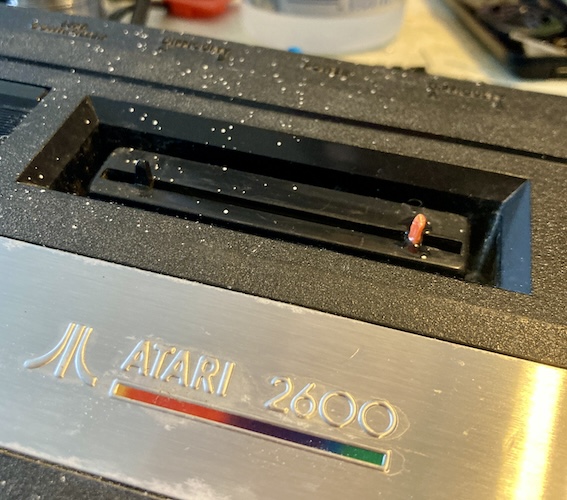
Of course, it was bright orange. It’s also not as pretty as the original part, because I couldn’t shape a nice domed top onto it with my files. But it works, and I can always cover it up later with some black paint.
Board cleaning
Finally, something that’s easy. After bending all the various tabs to get the RF shields removed, it was just a matter of getting rid of the crap all over the board.
To do so, I ran the sink and used an old toothbrush to clean off the various accumulated gunk. This didn’t take very long, but it did show some worrying damage to the plating on the cartridge slot’s fingers. I decided I’d throw some Deoxit on there and hope for the best – the Foxconn-made two-layer connector looked extremely custom and there’s little chance I’d be able to replace it without a parts unit.
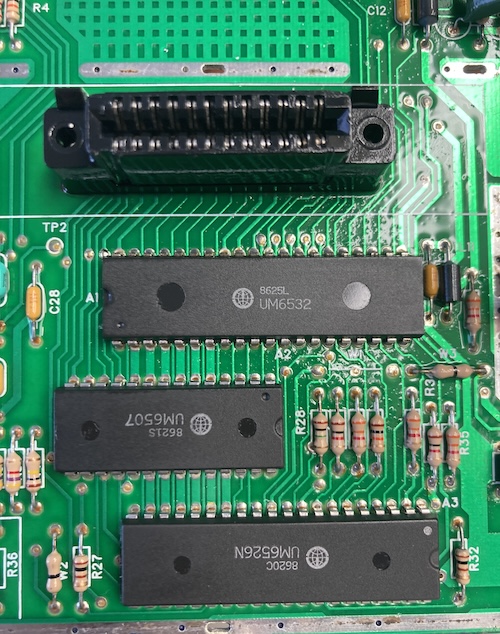
This came out great. I was surprised to see that this Jr had a bunch of UMC parts in it. For some reason, I had expected Rockwell to be running even this late. It’s not a super cool 1-chip, either, which I was hoping for.
In case you’re curious, the three big ICs here are:
- UM6507: 8-bit 6502-compatible CPU. A 6507 is not exactly the same as a 6502, as a lot of the upper address lines are missing, along with about 12 pins.
- UM6532: A “RIOT” chip, which stands for RAM, I/O, Timer. As you can guess, it handles the digital joystick directional inputs, the difficulty/colour/start/reset front panel switches, holds the work RAM, and has a programmable timer. You could buy these from a couple vendors, which Coleco, for instance, did on the Gemini and the ColecoVision’s Atari expansion.
- UM6526: The TIA, or Television Interface Adapter. The magic part that cranks out pictures and sound, and also reads paddle controllers, just to be a real show-off about it. For some reason, it also handles the joystick fire buttons.
Except for the TIA, these part numbers are roughly equivalent to the MOS parts – UMC was a second source for these parts, which is probably part of why they also extended themselves into making CPUs for Famiclones. A MOS 6526 is a somewhat sophisticated parallel/serial/clock/glue chip known as the CIA. A 2600 definitely does not have a CIA.
Now the motherboard is clean, so it should probably work, right? Just to be sure, I reflowed all the solder joints for the connectors and switches, and worked all the switches while dripping Deoxit into them.
Test fire
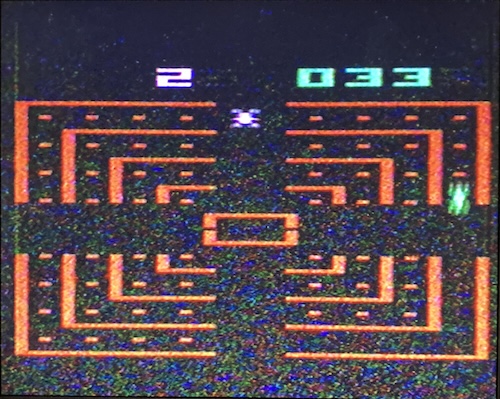
After all this was completed, I put everything together loosely and introduced it to my television set. There, in snowy, poorly scaled glory, was Dodge ‘Em. I hooked up my DIY ColecoVision joystick and played a few frustrating rounds. The joystick worked in both ports, showing that the RIOT was intact, at least.
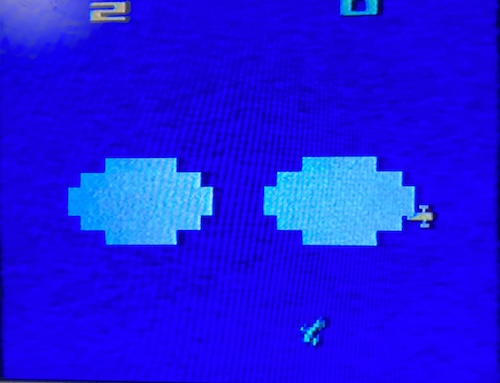
I needed to test the ejector pin to make sure it wouldn’t snap off opening a spring-loaded cartridge. What about my favourite Atari 2600 game, Combat?
When I was growing up, my buddy Greg and I would play the fighter-versus-fighter and fighter-versus-bombers modes of Combat quite a lot. I’d hide in the cloud on the left and just do constant loop-de-loops until I emerged into the sky in a random direction. I am sure that I haven’t gotten any less infuriating to play against since.
Good memories. We did a lot of Ice Hockey too, but for some reason I don’t have a copy of that. Please don’t take my Canadian citizenship away.
More cleaning
Although I was happy the system worked, I was disappointed to find that the power switch was really hard to move. To fix this, I decided to take it apart once again and see if I could extract the switch sliders for a more thorough cleaning. This was easier if I was willing to twist the top case quite a bit to force them out, and they popped out.
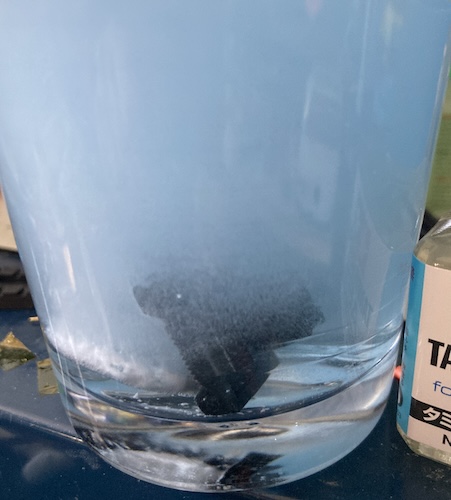
Computer keycaps are cleaned easily using denture cleaning tablets. Since these are basically the same thing, I mixed up a batch of Polident for retainers and chucked these suckers in with it. I can’t wait to see the great blue colour that it made. Hooray, man!
After cleaning, I noticed that there were some signs of stress on the clips holding the sliders in. If I had to do this again, I probably would not have removed the sliders to clean them, but you can’t argue with the results. Before reinstalling them, I applied a thin film of silicone lube to the face of the top case so that the sliders could move a little more smoothly from now on.
The mud(?) on these sliders was really tenacious: even after a couple days of soaking in the Polident, I still had to scrape the last little bits of residue out of the finger grooves with a toothpick. I finished up by scrubbing the tight gap in front of the cartridge slot using some long foam swabs.
With the silicone oil applied and the recesses thoroughly cleaned, the power and channel switches slid like a dream. I thought about doing reset/start, but I had a working membrane3, and I didn’t want to risk removing it and ending up with a non-working membrane. Those are annoying to replace.
That’s enough for now
Getting rid of the spattered paint, which I think is the biggest flaw on this machine, seems difficult. Nothing in my collection of mild solvents was able to shift it. I considered moving on to a modern non-acetone paint stripper, but I’m worried about damaging the surface texture in the process. The same goes for smoothing out the rough edges of the mended corner crack.
I’m going to call it a day for the time being. The Atari 2600 Jr works, and is all one piece. Ending up in a better condition than it arrived in is a big success!
My next step with this poor battered Atari will be to research composite mods, because I’m sick of having to jiggle the cables to get decent RF output. I’m leaning towards the famous Ultimate Atari Video (UAV,) but I also saw a cool quick-solder-board mod that is specific to the 2600 Jr.
-
Ultimate cheap-ass pro-tip: if you need cheap fibreglass reinforcement mesh, you can buy meters-long rolls of screen door screen mesh for very cheap at your local hardware store. It’s the same stuff, or maybe even better, than the $15/m chunks of fibreglass mesh you can buy from the very same store. ↩
-
In this cartridge, the spring helpfully broke, so I can slide the dust cover up by myself for the purposes of this photo. ↩
-
If your Reset and Start buttons don’t work on your 2600 Jr, it’s probably because your membrane is damaged, or that the buttons are stuck or making poor contact. There are lots of new membranes out there, but try popping the buttons out and checking them first. ↩