Bridge Companion Becomes Block Companion
Tags: console bbc bbc-bridge-companion homemade-software
Soon, you will know all the secrets of Z80 game programming. Or at least all the ones I didn’t know before I decided to port Tetris to a game console made to teach pensioners how to play cards. Things only get weirder from here, if you can believe that.
Let’s All Become Development-Environmentally Conscious
Since I don’t live in the UK, I’m not swimming in surplus Bridge Companions. There were a few eBay UK sellers willing to ship if asked, but only for ridiculous sums like £50.
When I first considered this stupid project, it seemed unlikely that I’d be able to get one of these little miracles to my door for less than $175 CAD all-in. I’d hate to spend that much money and then have the console sit while I developed the software, not to mention modifying it for NTSC composite, finding an appropriate 120V power supply, and hacking up the cartridge to use as a test module. Much better to develop the software first, and then trick someone I know over there to sending me a parcel without the eBay margins.
Out of prudence for my pocketbook, I decided to do my first experiments in an emulator. If I couldn’t make software work there, there was no point in involving the messy fun of real hardware.
That emulator is MAME, of course, which is usually my first stop for emulating any oddball system. The driver is bbcbc, and by reading over the source code for the BBC Bridge Companion driver, we can learn a lot about the console. Thanks for going first, MAME authors!
First off, the memory map and Z80 I/O map:
| Memory region | What is it? | Comments |
|---|---|---|
| $0000 –$3fff | BIOS ROM | Sometimes two 8kB ROM ICs at $0000 , $2000 |
| $4000 –$bfff | Cartridge slot | |
| $e000 –$e7ff | RAM |
| I/O port region | What is it? | Comments |
|---|---|---|
| $00–$7f | Z80 PIO | Controller inputs, primarily. MAME source says only $00, $20, $40, and $60 are actually used. |
| $80–$81 | TMS9129 | VDP registers |
With this information, I figured I could probably set up a decent Z80 assembly setup and start writing a Hello World for the emulated Companion. I didn’t understand the PIO well enough to use it, but I assumed that the BIOS would have wrapped some functions for that that could be determined later by reverse-engineering the legitimate cartridges.
First, I decided I would set up an emulator. After borrowing the BIOS ROM and a couple cartridge images from a certain internet library, I took an off-the-shelf build of MAME and ran the bbcbc driver with it.
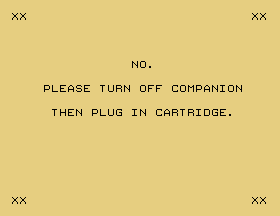
Oops! I guess I need a cartridge. This is somewhat more blunt than the ColecoVision screen for the same error was:
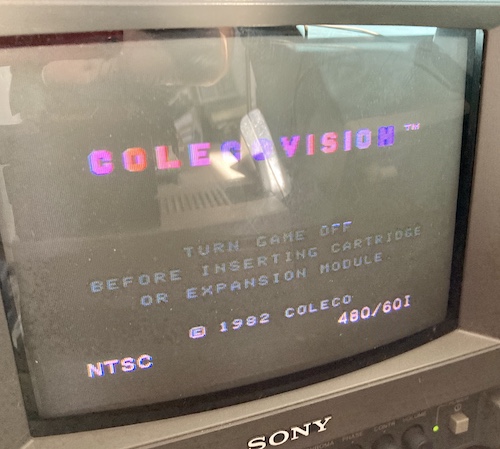
What to play…? How about Bridge Builder? There, that’s much better.
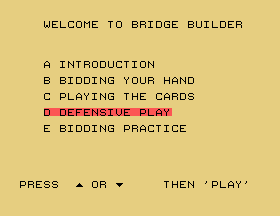
Great, the emulator is working. I decided I would build my first program for the Bridge Companion, but despite the bravado spouted earlier in this post, I didn’t actually know how to program a Z80 with a TMS VDP. Sure, I’d experimented with Z80 assembly in high school and college, we all did, but that was just a phase.
First, I checked if it was supported by z88dk (which already supports virtually everything under the sun,) but unfortunately it was not.
Would it be easier to port z88dk than to just write my game in assembly? In order to know how to port z88dk to something, I assumed I’d first have to learn how to write assembly for it, so I set about re-teaching myself Z80 in general and the Bridge in particular.
I had some big questions:
- How do I set up a cartridge that the console would identify as legitimate?
- Where do I put my code?
- Does the Companion’s BIOS offer any utility code to call that would make my life much easier? The ColecoVision had tons of BIOS subroutines, including controller scanning and writing buffers to VRAM.
To get started, I set up the two BIOS ROMs and the cartridge ROM in Ghidra at their appropriate offsets in the memory map, using the “Add to Program” option.
The Reversible Engineer
The cartridge ROM was looking very weird in Ghidra, which refused to disassemble most of the file. After poking around a bit, I wondered if the cartridge even contained Z80 code, as opposed to some sort of high-level scripting logic like TI GPL. It is a pretty specialized machine, after all, and the BIOS ROM is relatively huge at 16kB.
Maybe the best way to figure this out is to just run it and see what happens. I ran the Advanced Defence cartridge in MAME, with the debugger attached, using the following arguments:
% ./mame64 -debug bbcbc -cart advdefnc
Then I set the MAME debugger to pause execution whenever memory was accessed in the cartridge space and started the game with the following commands1:
wpset 4000,4000,rw
g
I used “watchpoints” (wp), which are meant to detect access to arbitrary memory, instead of “breakpoints” (bp), which are meant to detect the program counter hitting a specific address. This is because, in MAME, breakpoints have to be set at a specific address as opposed to a range. In effect, this meant that I had to press g a whole bunch to skip past all the accesses to the cartridge before the program counter jumped into it.
I eventually found out that the program counter first landed in the $4000 to $7fff range at the address $401f . Popping back to Ghidra and starting to disassemble from that address, I now saw something that indeed looked like sane Z80 code. I confirmed this address with another cartridge (Advanced Bidding). It would appear we’ve got an entry point!
Since it didn’t seem that this entry point was hardcoded, I figured it would be worth understanding how it was arrived at by the BIOS. Probably the cartridge ROM has it somewhere… and indeed the bytes $1f and $40 were written at $401e and $401d , which are the first two cartridge addresses looked at by the BIOS. Thanks, MAME debugger!
I chopped the first $1e bytes off the Advanced Defence ROM and shoved them into a file and built them with z80asm:
; header - tell bios where we live
; copied from advanced defence, who knows what all this does?
dm 0x8b, 0xe6, 0x52, 0x1d, 0x40, 0x00, 0x00, 0x4e, 0x40, 0x26, 0x45, 0x00, 0x00, 0x1c, 0xe3, 0x00
dm 0x00, 0x00, 0x00, 0x00, 0x00, 0x00, 0x00, 0xc9, 0x00, 0x00, 0xc9, 0x00, 0x00, 0x1f, 0x40

; main loop - at 0x401f
org 0x401f
run:
ld a, 0x10
inc a
jp run
And looking at it in the MAME debugger, I was able to hit the breakpoint at 0x401f and watch the A register get set to $10 , increment to $11 , and start all over again at the top of the run loop. Fantastic! I was now running my code on an (emulated) BBC Bridge Companion.
I had a lot of wrestling with the assembler I chose initially, z80asm. It seemed like its macro support had broken, or was not working properly, and there was no option to relocate code inside the produced binary. Even so, it just meant that the code got hairier and uglier than it really had to be. I asked around and then switched to zasm, which is much more pleasant, albeit still with its share of confusing error messages.
First Tile!
After a couple of aggravating evenings, I pulled together some example TMS99xx initialization code from an MSX-oriented tutorial with a super-helpful Z80 REPL and a very solid instruction reference. A few hours later, I had a blank screen with a single colour-shifting tile on it, and now I was off to the races.
Getting my (probably too fancy) initialization code to work just took a lot of debugging of stupid mistakes on my part, including but not limited to:
dec hldoesn’t set any flags, especially not the zero flag; you have to dismantle the 16-bit register into two 8-bit registers and compare them in a loop countercp a, (hl)is not the same thing asa = *hl; I meant to sayldbut presumably was instead thinking about copying files in unix- In whatever the default mode I had it in was, zasm apparently won’t assemble any instruction that isn’t indented, so outdenting
reton one critical call meant that the program just shot off the end of the ROM and into outer space - A 32x24 screen means that the formula for targeting a coordinate in the VDP’s tile buffer is not
TILES_BASE + (y * 24 + x)butTILES_BASE + (y * 32 + x). I swear I used to know how to program.
There’s not much I can say to defend myself. Don’t write code at 3am?

Look!! Something is actually on the screen.
Tiling My Shower
Now to make up some test tiles. At first, I wanted to use the font out of the BIOS ROM, but it’s in a strange, non-contiguous order for some reason.
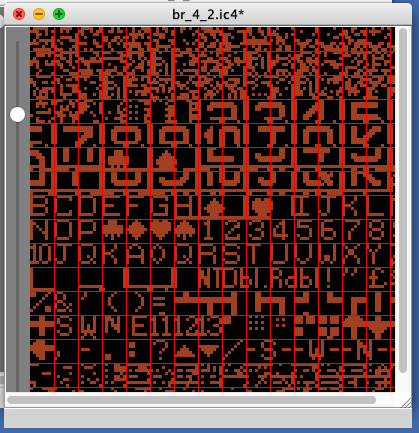
Tile Molester (ugh) is starting to show its age in a lot of ways, so I ended up writing a cheap-and-nasty tilemap extractor in Python instead. I wanted to do it in Nim because I had such a good result using that language’s struct sugar with the PC-6601SR disk utilities, but the available image libraries were underdocumented or just plain didn’t compile. Back to Pillow!
Once my dumper extracted the tiles and turned them into an image, it was a lot easier to see how they are stored in the BIOS:

One slightly surprising aspect of the BIOS font is that there’s no character for “zero.” There are ones for “10,” “11,” and “12,” which I guess makes sense if you’re talking about cards.

The order of these letters inside the ROM is very strange indeed; letters are crammed into groups of eight and symbols are seemingly jammed in between them.
After thinking about it some more, though, it made sense: in the VDP mode I’m running in, you can only choose one set of colours for each set of eight tile graphics. Which means that if you need both red and black numbers (or J, Q, K, A) in the same frame, you have to duplicate them into different segments of the pattern description table. The order is confusing, as you would expect all the symbols and numbers to be front-loaded and all the letters to come in a contiguous block in ROM, even if not so when stored in VRAM. Maybe it makes the pointer arithmetic to go from card face number to “tile index” a little easier somehow?
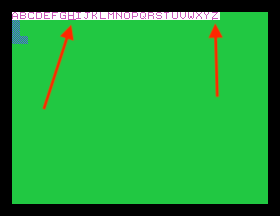
The letter “H” at $2830 also had a weird line underneath it, as did “Z.” It’s probable the BIOS and games do something subtle about various characters being “shifted” by a row or column in each direction, because some of the card characters are also shifted horizontally. Although reading at an eight-byte alignment seems to have worked for twenty-four of the letters, two of them just decided to be jerks. Jerks.
I ended up redrawing2 those two letters, as truncating them to 7 rows would have meant having to tweak the copy loop to bump the VDP pointer twice (skipping over the last row.) It was a little faster (if lazy and inefficient) that way.
Either way, setting up a quick pointer table and loading those into the VDP memory as well was cake itself, and only chewed up a few bytes of my (at this point) spacious ROM.
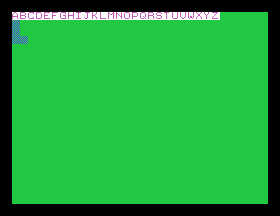
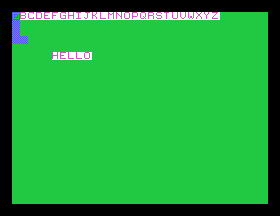
I could have spent a little more time trying to find the print routine in the BIOS, but I figured it would be easy enough to just write my own, since I’m primarily dealing with hardcoded strings (outside of the eventual score display) and I was feeling too lazy to reverse engineer the VRAM layout of the original games… even though discarding it ended up taking more time than that probably would have.
I also did a little bit of guess-and-checking between the MAME source. At first, I tried to do it the “natural” way by reading the Z80 PIO datasheets and manuals, and trying to set up interrupt handlers, but I figured I would cheat and look at how MAME does things.
Taking a big assumption that this was the right way, I wrote sort of the following input read code, which set the lower nibble on the A register, depending on the button state (0 = button pushed, 1 = not pushed:)
#define BBC_JOYSTICK_REGISTER $20
#define BUTTON_SET_1 $ef ; pass, spades, clubs, rdbl
[...]
    ; write $ef to the PIO
    ld a, BUTTON_SET_1
    out (BBC_JOYSTICK_REGISTER), a
    ; read the PIO's status
    in a, (BBC_JOYSTICK_REGISTER)
    bit 0, a            ; check bit zero of the register, if that bit is 0, set the "Z" flag
    jp z, PassWasPushed ; jump if the "Z" (zero) flag is set
Probably not the most efficient method (especially if I wanted to check all 12 buttons in a loop,) but it seemed to be working so far. We have interactivity!
After that, a bunch of utility-code-writing happened until I had a sizeable library and no further excuse for procrastination.
A Game Has Rules
Now that I had a good base set of code, a running console with a working cartridge slot, a working cartridge PCB to take my ROMs, and a composite mod so I could play the game on my bench TV, all that I had to do now was write Tetris. No problem, right?
I figured that I would keep the game’s feature list short, and not get too crazy. Although I’d written Tetris clones before, they were in much higher-level languages such as C and Rust, so I had to think about how to program common structures in Z80.
Wiebo de Wit’s blog series on writing 6502 Tetris was very helpful. Reading it allowed me to see how someone more experienced tackled the major problems like “rotating pieces,” scoring, and collision detection.
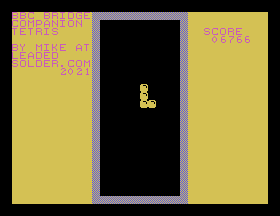
I was also trying not to get mired in “analysis paralysis,” or worrying too much about doing things the fastest/coolest way. I admit that the final assembly program is very caveman-like, slow, and is probably at least three times as long as it should be, but it’s there. At least I probably don’t have to worry too much about making my code too fast and overwhelming the VDP.
A lot of games only update the video memory during the vertical blank period, so as to avoid tearing. I didn’t notice much tearing, and I don’t need maximum performance, so I ended up doing things the lazy way.
In practice, the “lazy way” was writing to video memory whenever I wanted to, but with some NOPs after each write to make sure that the VDP had time to catch up before the next write attempt. This pattern is done on a lot of homebrew ColecoVision games, so I was fairly sure it would work here as well.
Still, I would like to one day experiment with deferring all the video updates to vblank in the future. It seems like the way that TI wants you to do it.
Collision detection was something I put off for weeks, but only took me about 45 minutes plus another 45 minutes of debugging to figure out. As with any programming, breaking it into smaller pieces is the way to go for Z80 assembly – there are just fewer structures provided with which to do so.
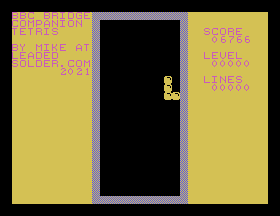
And rotation came shortly after, then stacking:
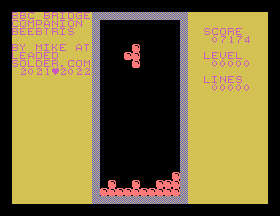
Piece selection is one of those things you don’t think about, but it’s actually very complex. “Real” Tetris implementations have a dizzying array of “grab bagging” methods, where they try to spread out the distribution of pieces, so that it’s more fun for the player, and less random. There are often even sub-methods inside the main method, in order to provide even more nuanced selection. I recommend reading the linked wiki page, it is very interesting.
I first started with a pure random selection, just to try and get anything down on the board. Once I had all seven of the pieces going, I had a weird bug where the “S” shape would transform into the “T” shape in one of its frames. It turns out that the definition was only 15 bytes long instead of 16, due to missing a space when I was trying to define the piece in ASCII.
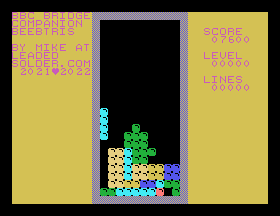
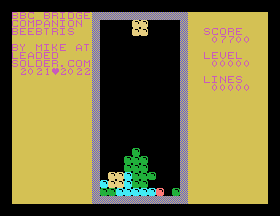
Shortly after that, I got my first tetris:
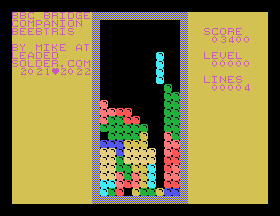
Which exposed a bug in my “shift lines down” code:
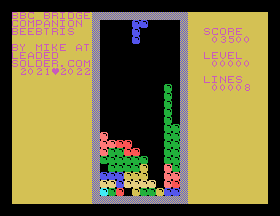
After sleeping on it, I realized I had been using the A accumulator register to store an important value, and then calling out to a function that obliterates it. As a result, when I used that A register a little bit later to calculate a counter, the counter value ended up being somewhat wrong.
Since the accumulator is so important in an accumulator CPU like the Z80, it’s hard to write a function that doesn’t overwrite it. Lesson learned, again: don’t use “A” in anything that I’m going to do a CALL instruction inside.
A large portion of bugs I made on this project originated in not paying attention to subfunctions stomping on my registers. I will try to use memory more often from now on, instead of being quite as ruthless of a premature optimizer.
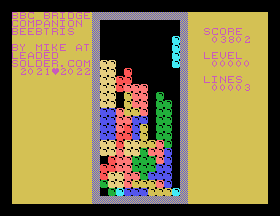
Ahh, that’s better.
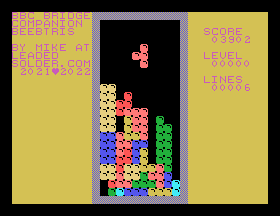
Back to “grab-bagging” the pieces now. I knew it’s a fixed array of all possible piece types, shuffled. Through channelling my largely-wasted computer science education, I remembered the Fisher-Yates array shuffle algorithm, which worked out.
Man, we have algorithm names on this blog now? I should stitch some leather elbows on my stained car hoodie.
After a bit of debugging, I got it to grab-bag successfully. And they’re right: this is more fun than pure random.
A Weird Problem Emerges
As I started putting in the line-clearing animation, I ran into a strange phenomenon. Adding any more code past a certain point would cause the game to crash on startup, infinite-looped on the solid yellow screen of the BIOS. If I made the ROM really, really long by padding it with NOPs, the BIOS would show a weird “WHAT DO YOU BID?” screen and keyboard prompt.
Through experimentation, I figured out that it seemed to be happening when the code passed the 4800-ish byte range. I made a “broken” and a “working” ROM and then tested them in the MAME debugger, by setting a watch point for any read to the cartridge space:
wpset 0x4000,2000,r
After stepping through each one, I found that the cartridge reading was identical up until the BIOS reached out to a fixed address on the cartridge, $52e6 . The execution differed at that point.On my bad ROM, it would read a very long array of garbage and then start executing at a strange spot inside the BIOS. On my good ROM, it would read $00 within one or two bytes and then boot the main function in my ROM. $52e6 clearly was expected by the BIOS to contain some information.
What value is $52e6 in decimal? It’s 4,838, or about the number of bytes that my ROM was before things started to go haywire. Ah ha.
I picked apart some commercially-released ROMs in the hex editor, and found that all of them – every single one – just put $00 at this location. As a result, I’m not sure what this is for, but I’m guessing because it’s null-terminated, it is meant to be some kind of special string or perhaps even a miniature scripting language to tell the BIOS to set up some environment. Further, my guess is that because my string was “too long,” it ended up smashing the stack or causing some other malevolent state problem that confused the BIOS too much to be able to boot my game.
I instructed zasm to place a $00 value at $52e6 , and then tested with the “bad” ROM’s source code. Now it booted reliably, even after I added a bunch of garbage to it.
So why $52e6 ? It was one of the magic numbers I copied into my ROM from Advanced Defence, and those values are read by the BIOS on initialization. Because I didn’t want to re-organize my program layout, I quickly changed that magic number to point to $4010 , a part of the header that I knew would always be zero – because I also copied it out of the Advanced Defence ROM.
Well, now we know what that part of the header is: a pointer to some kind of null-terminated array for some unknown purpose. Specific, I know.
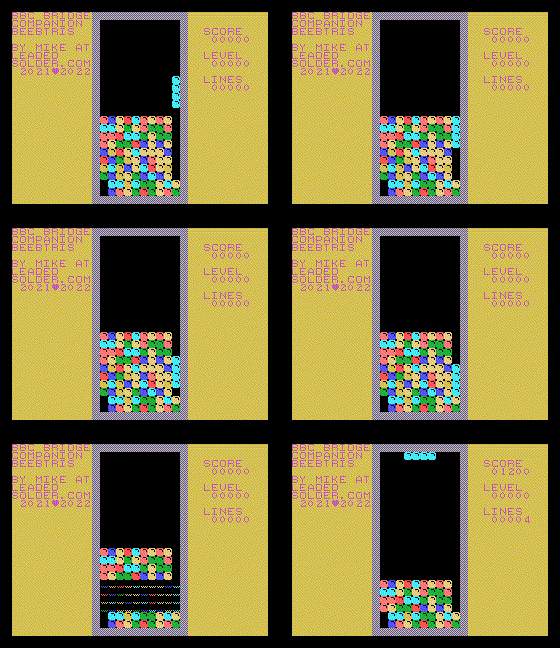
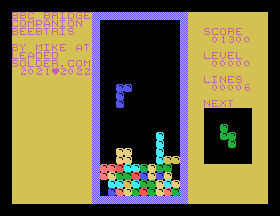
Adding the “Next” preview was straightforward, but laborious. Although I wanted to do things the fancy way, I ended up copy-and-pasting code and wasting a little bit of memory to make it happen.
Attract Mode
One of the biggest things I procrastinated on was the title screen. If you’ve ever done games, you know that exiting from the game into the “outer game” is a very annoying process. And I’d stacked up a bunch of ugly spaghetti code on my way to the Game Over, so returning to the title screen isn’t particularly easy.
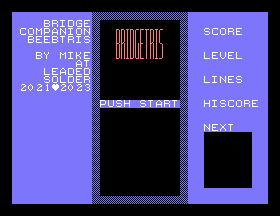
I decided to get over this slothful hump by making the title screen pretty(ish), so I’d want to see it. Then I solved the problem by writing down where the stack pointer was when I started the game ($e7fe ) and then just forcibly resetting the stack pointer to that when I was cleaning up at the end of a game over. Who needs memory management?
I think when I do my next Z80/TMS99xx game – and there will be another, but likely not for the Companion – I’ll do a much better job of organizing game states and only having one big main loop. In other words, I’ll try not to paint myself into a corner next time. Hey, if it didn’t have one or two or fifteen hack-jobs in it somewhere, it wouldn’t be a real game.
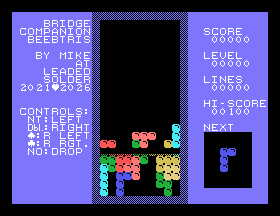
I also added some (cryptic) sidebar info to explain how to play the game, because nobody is expected to look at a manual to figure it out. If I ever display this game publicly, I’ll probably put tape labels over the top of the Companion. The hand position required to play it is somewhat awkward, but believe me that it was the best I could come up with. The control panel is simply not designed for a two-handed, fast action game!
It Goes Back Home
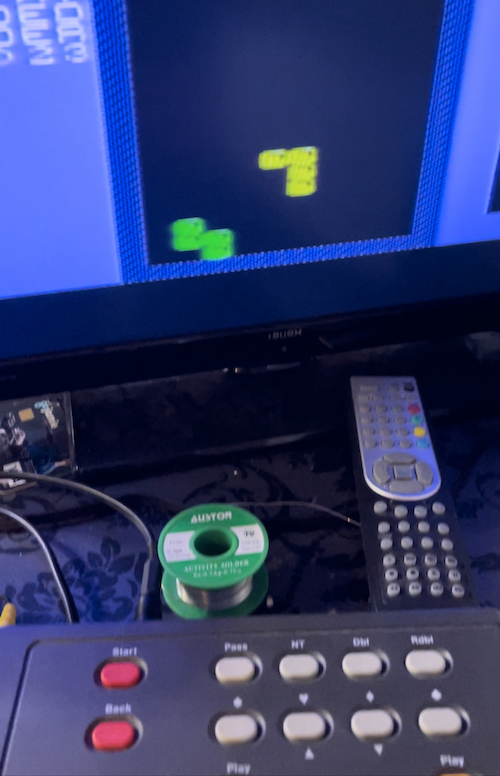 Nearing the end of development, Pete Golding offered to test. You may remember him as the individual that started this whole mess in the first place, so it’s only fair that he helps out a little. He bravely tested the game on his BBC Bridge Companion (and UK PAL TV) and confirmed that it worked. It looks good even with the widescreen stretch and RF noise!
What about Canada?
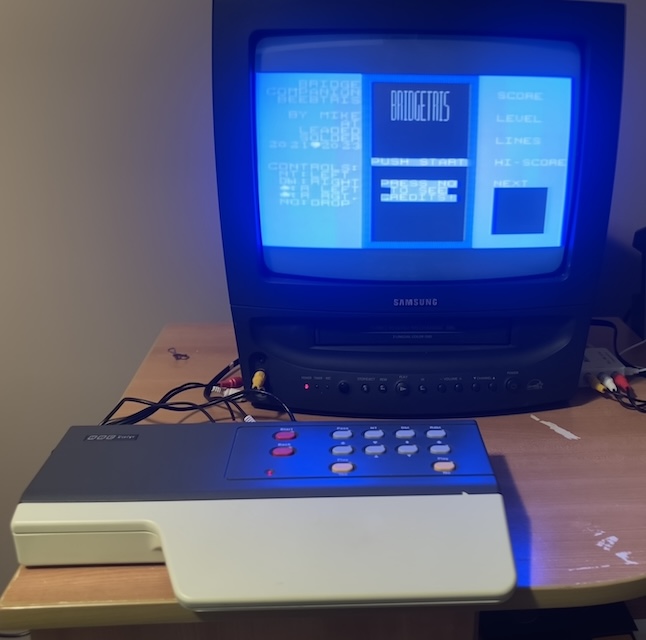
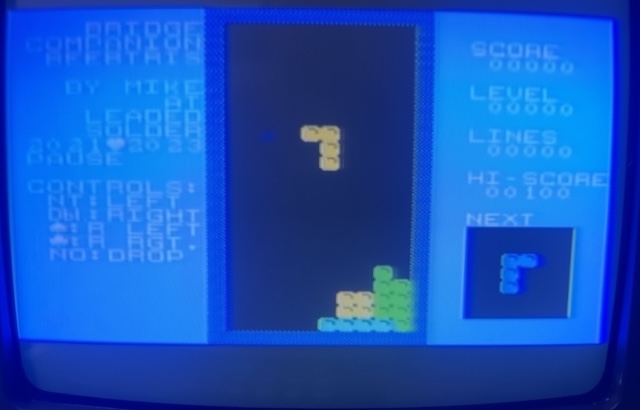
Playing it on my own television, through a cheap PAL-to-NTSC AliExpress converter, is a little bit less pleasant. Although text is legible, there’s a lot of “swimming” in the patterns, and it’s hard to read things on the blue background. The game is very playable, however. I had a lot of fun!
What’s Next?
Now that the game works to my satisfaction, I am preparing to release it to the general public. As you can tell from the copyright date in the screenshots, this thing has been five long years of mostly procrastination on my part.
Because of some work and personal obligations, I haven’t quite had enough time to finish this stuff along with my originally planned release schedule. The next article on the blog will take a momentary break from the BBC Bridge Companion theme, but I’ll have a new story before the end of the year about the last push to get the ROM released and playable.
I wanted to wait until the embedded MAME on the Internet Archive could play it, so that nobody would be forced to embed an emulator, but I wasn’t yet able to figure out how to get that to work.
Once I do figure that out, or more realistically, ask someone for help, I will be sure to provide a link here to play it. That might be an entirely different project, too!
Although I don’t plan on making any fixes unless there are bugs (and there are probably tons,) I would like to provide a variant of the game where it’s sped up quite a bit. The first couple levels are a little boring, but I wanted to err on the side of letting rookies figure out how to use the awkward control panel to operate the game, rather than be instantly obliterated.
As this article series was being published, porchy on BlueSky told me about a 3D-printable BBC Bridge Companion cartridge shell. This shell looks like it has most of the original measurements intact – I think I might just make myself one for this game as a shelf trophy.
Thank you for taking the time to come and read about my weird little game, on this relatively unknown little system. I hope you can also do fun stuff in unexpected places in your own life – let me know about it when you do.
-
I didn’t find this out until the project was almost done, but you can get MAME to pre-load a bunch of commands into the debugger using the
-debugscriptcommand. This would have been useful for me to synthesize during the build process, rather than manually keeping notes of where various symbols ended up. You live and you learn. ↩ -
“Redrawing” makes me sound less lazy than I am. I made my Python script generate the zasm directive to produce these letters, copied it into my source file, and then just changed the bad line – $ff for H, and $80 for Z – to $00 . ↩