Mini updates 3 - PC98 A-Train III, Atari ST keyboard fix, FM-7 video adapter
Tags: computer nec pc98 pc9821 games atarist atari keyboard fujitsu fm7 video repair artdink
Some more mini updates for things that weren’t big enough to merit a full update on their own. In this entry, we’ll finally get A-Train III running on my PC98, fix an Atari ST keyboard, and ship new hardware for a whole new brand of Japanese 8-bit computer.
The PC98 gets A-Train III
One of my goals for the PC98 was to be able to play all of the games Artdink made for the platform. If their console stuff was weird, then surely the computer stuff must be even weirder. However, probably the least weird game of theirs, A-Train III, was surprisingly difficult to install and run. I finally got it to work, and I still don’t understand why.
Installing alone is surprisingly difficult:
- Boot off a DOS floppy, not the hard drive. The PC98 always assigns the boot volume to be drive “A:,” which means the hard drive would then become the “B:” drive. The A-Train III installer is hardcoded to install from A: to B:.
- Switch floppies to the A-Train III System Disk
- Run the
INSTALLscript and swap to the other two data floppies as needed. - Insert a formatted, prepared MSDOS boot floppy into the drive when asked to create a boot disk.
- The installer will write little
CONFIG.SYSandAUTOEXEC.BATfiles.
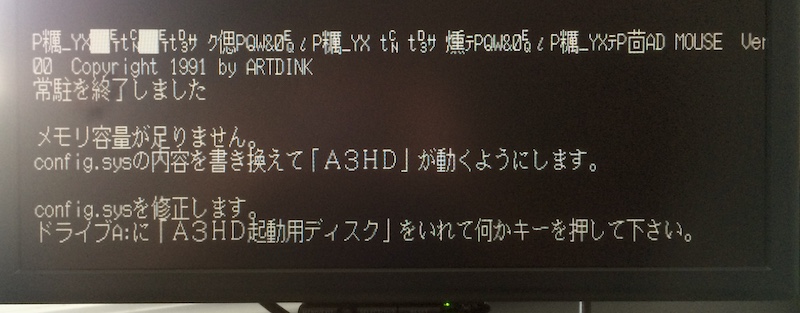
No matter if I booted off the boot floppy or the hard drive, the game would crash almost immediately. Once in a blue moon, I would get the title screen and main menu, but then it would crash out afterward with “memory capacity is insufficient” or just a screen full of double-byte text mode garbage.
It worked great on emulators with no changes to the CONFIG.SYS or anything; I was confused for weeks. Finally, I asked someone for help, and they suggested changing the “A20” options.
History Lesson
In case you’re not familiar, the “A20” option refers to the behaviour of the 21st address line off the CPU on Intel machines. In IBM PC DOS (DOS/V) land, early machines didn’t have 220 bytes of RAM and could not even physically access them, since they only had 20 address lines. So that means most of an address was just completely unused; the CPU would just ignore those bits when it was doing memory access, effectively wrapping the memory space around when you ran off the end.
Naturally, once you give programmers something like this, they’re going to exploit the hell out of it. Extra stuff got tucked into the “unused” bits of memory addresses, and pointer math was done without regard for keeping the high bits sane. Then, once the 80286 came around, they were a little surprised (just one of the many reasons the 80286 is an underrated chip). Now, the 21st bit in an address (A20) actually meant something! Instead of wrapping around, your application hits invalid memory, and (at best) crashes. IBM solved this problem by just hacking the motherboard and adding a BIOS-controlled logic gate that pulls A20 to zero for compatibility. Everything works great again! New operating systems/apps can turn on A20 for that sweet extra memory, and old stuff will just keep working.
Apparently, the same thing happened on the PC98, because mine has a ton of BIOS options for enabling and disabling the A20 line. However, changing those options didn’t make A-Train III work any better; it would just crash again.
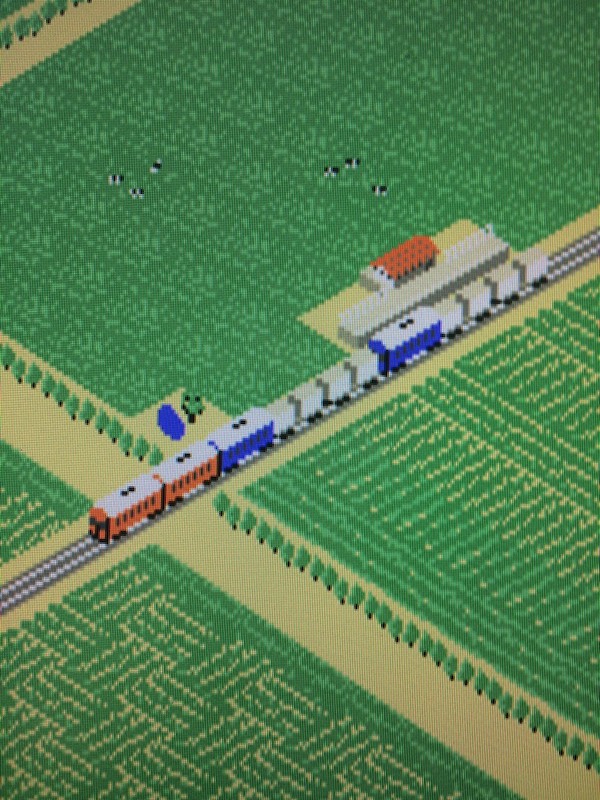
Are those little cows?
I ended up messing with every BIOS option I could think of that was compatibility-related, until finally I hit upon “CPU MODE.” You can toggle it between LOW (8086 emulation?), MEDIUM (slower), and HIGH (full speed). Mine, of course, has always been set to HIGH. Once I set it to LOW and restarted, A-Train III could boot and run! It just ran like molasses. MEDIUM mode was a good compromise.
I’m still not sure why changing the CPU mode affected anything. My best guess is that setting it to a lower speed doesn’t just reduce the clock speed but toggles some compatibility options. I have been poring over Japanese technical documentation ever since to try and figure it out.
So there you have it: if you have an A-Train III install on a Pentium PC98, you should enable the “Medium” CPU mode.
If you’ll excuse me, I have a lot of late notes to write for my little commuters. Apparently, I don’t know how to run a railroad.
The “Good” Atari ST gets all its keys back
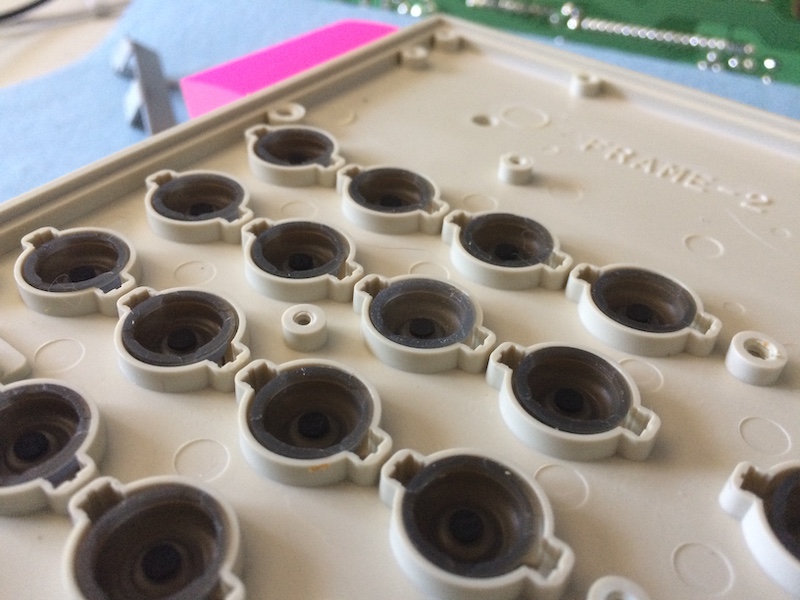
If you recall my entry of just under a month ago, when I reflowed the dangly bits of the mouse hardware on my 1040STF, I either lost or never had one of the little conductive rubber domes that make the keyboard actually work.
Update: I did not in fact lose any of the domes. The return/enter key has space for two domes, but only one is supposed to be populated. Thanks to techfury for doing the same exact thing as me and then figuring it out.
It’s time for another terrible Paintbrush diagram to show you why the domes are necessary. The Atari ST keyboard uses a similar system to the Sega Genesis control pads in order to tell when you, the human, have hit a keyboard key.
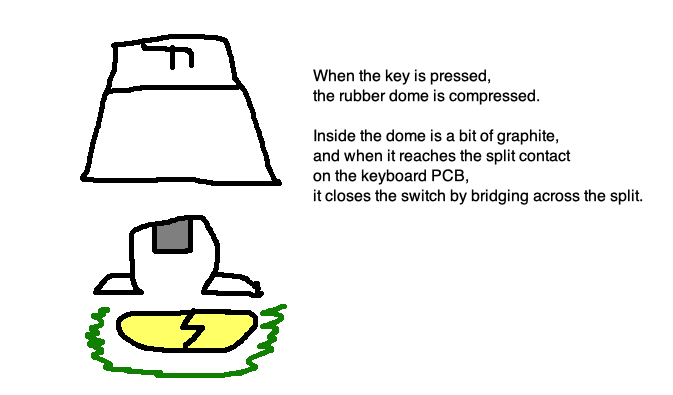
It really is a pretty ingenious system if you want to cut costs, which is why rubber dome and its bastard cousin foam-and-foil are so popular on really budgety computers. They don’t necessarily have to feel awful either (although this one certainly does); on the Atari TT they substituted stiffer, more pleasant conductive rubber domes in the same keyboard design.
Think of them sort of like bumpstops on a car suspension: a lot of the ride quality can be dependent on them. Er, touch quality. You know what I mean.
On eBay UK, I managed to find a seller who was selling 10 of them for a reasonable (by retrocomputing standards) price. Soon a dime bag of domes drove to my doorstep:

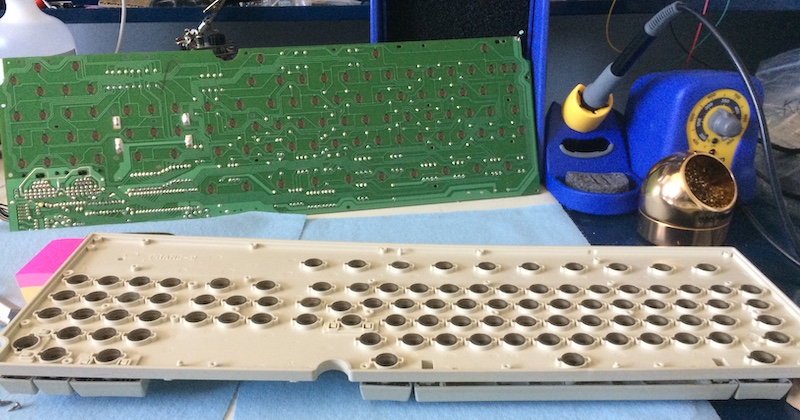
In order to replace the domes, I had to again dismantle the entire keyboard. This is like 20 teeny tiny screws, I swear:
In goes the new dome. It’s a slightly different colour than the old domes, maybe because it came from the UK?
With the keyboard reassembled, every key now works and the machine hopefully doesn’t have to be opened up again for many more years. I expect to work on the “bad” Atari ST soon, as well; its problem with intermittent key input might just be dirty domes!
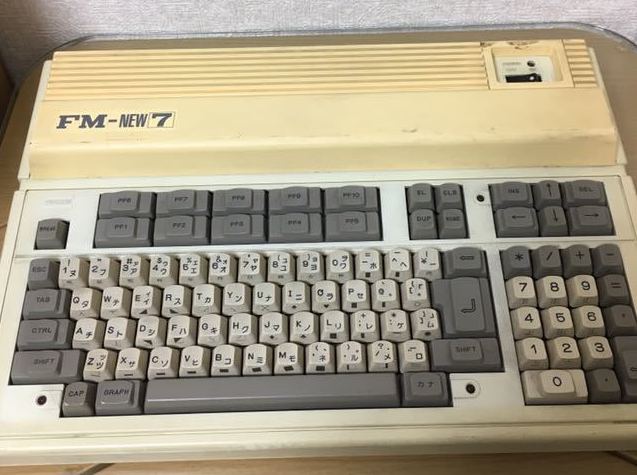
The PC8801mkII digital-RGB video adapter works on a Fujitsu FM-7
The Fujitsu FM-7 is another one of those Japanese computers that is virtually unknown in North America. Bucking the Japanese micro trend of using Z80s for everything, it has twin Motorola 6809s (one handles graphics, the other handles everything else) and a really cool case.
A friend has an FM-7 and from what I could tell, the video pinout is pretty much the same as the PC-8801mkII’s digital-RGB video out. This means it could probably use the video board I made for the PC88, so I sent him one.
When plumbed through an OSSC to get the horizontal sync to play nice with a non-15kHz LCD, it seems to work pretty well. I’m not sure where the ‘jailbars’ are coming from, but it’s probably a similar LCD artifact issue as to my earlier problem.
Now I want an FM-7 of my very own!