The PC-8801MH's gross keyboard gets cleaned
Tags: computer nec pc88 pc8801mh keyboard repair
I finally got a keyboard for my PC-8801MH (I was on the verge of making one myself), and had to settle for a very dirty one as prices are just a hair shy of ridiculous. Even though I was primed by the pictures, I was shocked by just how disgusting the keyboard for the MH was when it arrived.
There was dirt flaking off the keyboard cable whenever I tried to adjust it. The plastics were stained, and everything was generally unpleasant to touch. Cigarette smoke is one thing - I could expect that - but it sure looked like this keyboard spent most of its life in a forest.
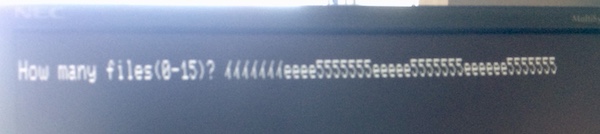
Ignoring the fact that using it is gross, I hate doing surgery on a dirty machine, so cleaning it was a pre-requisite before I could try to figure out what’s wrong with the “E” and “5” keys. Alps switches are particularly sensitive to dirt, which probably means that dirt is the cause of that failure, as well. Cleaning it will help keep the key switches happy for years to come.
I popped the six case screws off the bottom, put them somewhere safe, and then dismantled the plastics. Everything comes apart pretty nicely.

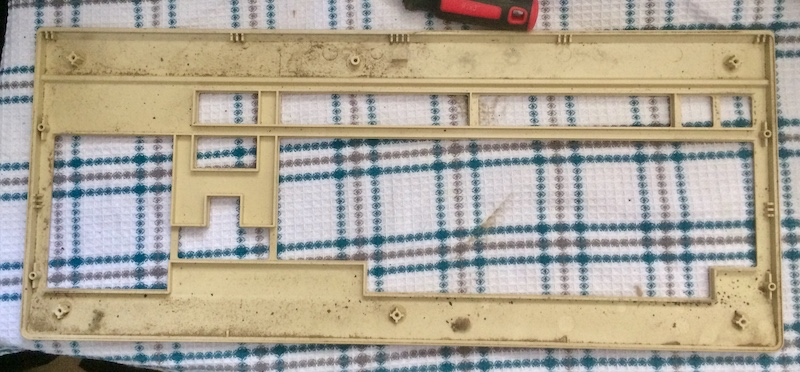
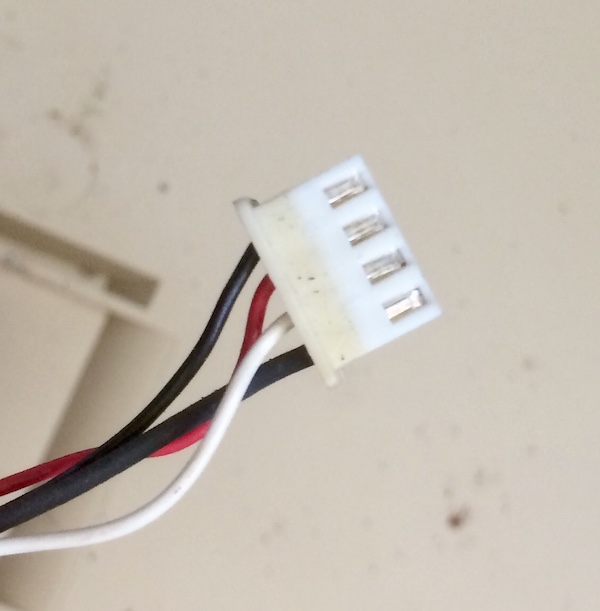
Check out this internal connector on the keyboard. This part of the keyboard should never see the outside world, and yet look at how stained it is.

Most of the loose dirt inside the keyboard looked like this. I just washed it in the kitchen sink with some soap and water, and used a soft plastic dish bristle brush to get into the corners.
After about fifteen minutes of effort, I got the keyboard to at least “liveable” condition. Now for the cable.
For the cable, I eventually hit upon the method of twisting Lysol kitchen disinfecting wipes into a rope, and then ‘flossing’ the coils of the cable. This pulled out a lot of dirt. I did four passes like this - two in each direction - but the cable probably still needs more cleaning. The Lysol wipes came away pitch black.
I left everything to air dry, which gave me a chance to inspect the keyboard PCB and get “5” and “E” working again. The first thing I noticed was the copper braid holding the RF shield on permanently, which is annoying for service since it blocks all of the solder joints of the keyboard switches.
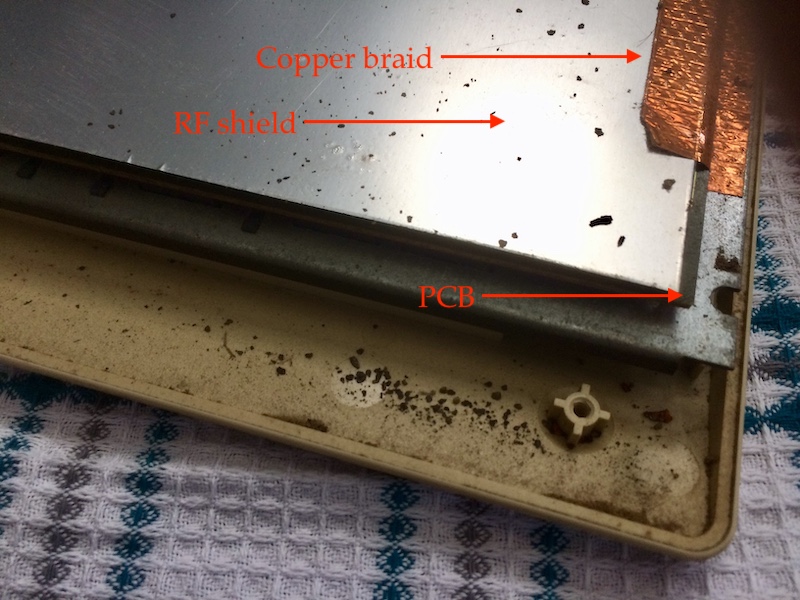
If I want to get in here, I’ll have to either cut the braid and put new braid in (where do you even get that?), or figure out some way to desolder it without hurting the RF shield, which may be impossible. Let’s hope it doesn’t come to that.
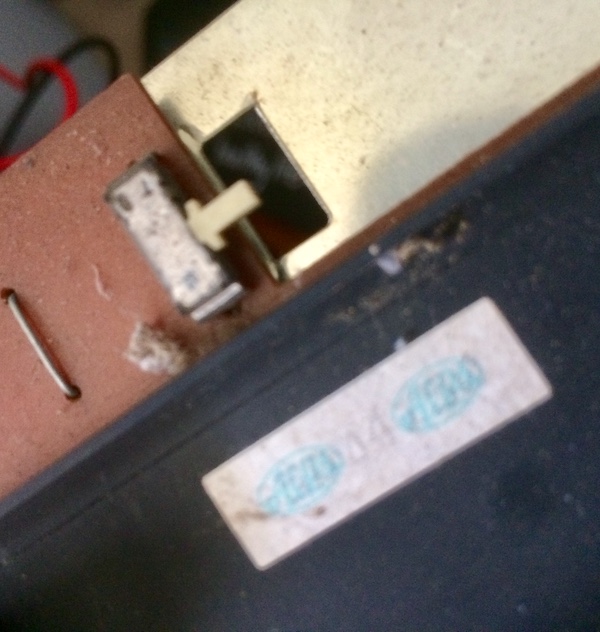
One big mystery is just what this switch inside the keyboard does. The silkscreen just says “SW,” so I wonder what alternate mode this keyboard has in store. Maybe it can also work as a Type-B keyboard? The switch isn’t accessible from the bottom of the case, unlike some IBM keyboards that have AT/XT toggles.
Knowing that the defective “5” and “E” key switches are Alps, I figured I would try cleaning them too. That’d be a lot easier than desoldering the braid and trying to pull this keyboard apart.
Over the Top
One of the redeeming things about Alps key switches is that when they get gummed up and stop working, you can dismantle them for cleaning without having to desolder the whole switch. It’s a little bit fiddly, but once you get the hang of the method you can pop them open with some effort. Just don’t lose the spring!

The actual function of an Alps switch is sort of deceiving. There’s two pieces of metal in there, but only one of them actually does anything - it’s soldered in, and I wasn’t able to remove it for this picture.
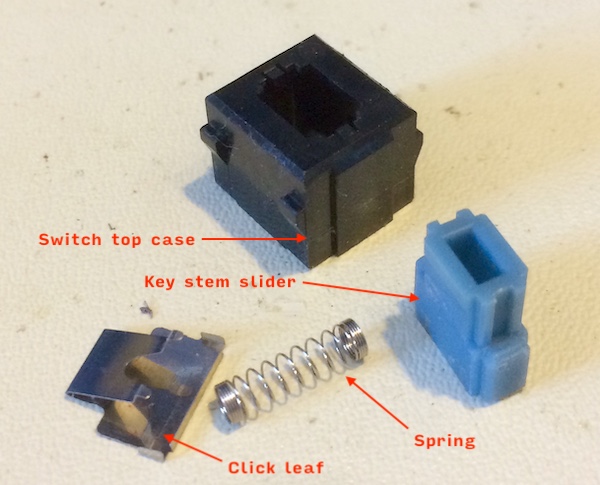
The other piece of metal shown here, the click leaf, is just there to make human beings feel good about pushing keys. And it works. They tune the specific feel by changing the leaf and the spring.
Notice that the spring has a bunch of dead coils - this is a fairly stiff spring, and the dead coils are added so that the spring still has enough length to not bottom out in the mechanism. There’s a little plastic nub to centre it in the housing, but that nub is not deep at all!
The puller I bought was a little too big to fit smoothly inside the key stem (probably due to the tolerances inherent in 3D printing) but it did about 90% of them. It was definitely worth the five bucks, even if I did sometimes have to use a pair of angled tweezers around the side to hurry things along.
When I say “don’t lose the spring,” I mean it. The little spring on the “5” key flew away twice, and I bent the leaf for the same key trying to jam the keyswitch together without making sure everything was perfectly flat.
Once the switch was apart, I cleaned both halves of the switch with isopropyl alcohol and a q-tip. Both of the switches had funky gunk in their wells, probably due to gross hands touching the keys in their distant past, but the actual metal parts seemed fairly clean to me.
I dumped a little bit of PB Blaster dry Teflon lube into each switch as it went back together so it would stay lubricated and hopefully not attract more grit in the future. Don’t do this if you have pet birds; Teflon spray will kill them for the same reason non-stick pans do.
Three tips for this job:
- Install the top half of the switch while holding the keyboard vertically, not when it’s lying on the desk. Don’t fight gravity if you don’t have to. Upside down would be even better, but I felt silly about doing that.
- Get a set of the pointiest tweezers you’ve got.
- Don’t force anything. It takes almost no effort to bend the click leaf.
After some effort, the entire thing works now, although the “5” key action is a little bit less crisp than it once was. I might swap in a click-leaf from the “parts” mkII keyboard eventually. That is, unless I just sell that keyboard in order to capitalize on Alps Madness and retire early from the proceeds.
This means that at long last, the MH is totally usable! I had been feeling especially guilty about using the SR instead. Now I can get my hair blown back by the might of an 8MHz Z80.
Repair Summary
| Fault | Remedy | Caveats |
|---|---|---|
| Keyboard is dirty. | Clean keyboard. | Could not deep-clean due to copper ribbon. |
| Some keys don’t work. | Clean switches. | Bent click leaf for 5 key so it feels funny compared to the other keys. |