A literal Trash-80
Tags: computer tandy trs80 coco pickups repair keyboard
The internet is both really good and really, really bad for my hobby. On the one hand, it lets me buy cheap broken computers and shows me how other people fix them. On the other hand, sometimes people offer me machines and then I take them.
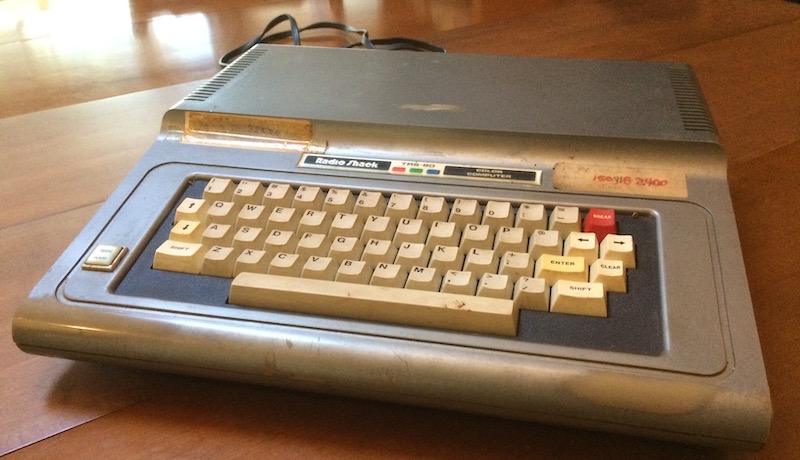
This Tandy TRS-80 Color Computer 1 was posted to Reddit as having been found in a muddy box in a shed. After looking at the gory pictures, I replied and said I’d take it if nobody else did. Well, nobody else did, so soon it was on its way to me through the postal service. I am super grateful to Ed for the offer and the excellent packing!
When it arrived, it became my second 6809-based computer (after the Fujitsu FM-7) and also my second one with 6847-based video (after the PC-6001). A good combo.
The first thing I noticed is that a lot of the paint is missing. This isn’t uncommon for these machines - the oils and friction from your hands on the keyboard wears down the paint and it flakes off. That’s why most computers don’t paint the keyboard, I guess.
If I do end up repainting the case, it might get a coat or two of Effex to add some pop, but I’m not sure how I could preserve the stickers (more on that later).
Speaking of the keyboard, it sure doesn’t look to be the original part (the original machine has PC-6001-style chiclet “island” keys). I don’t know if they swapped this from a later model, or if there was a run of 1s with the better keyboard, but I’m grateful to whoever made this change.
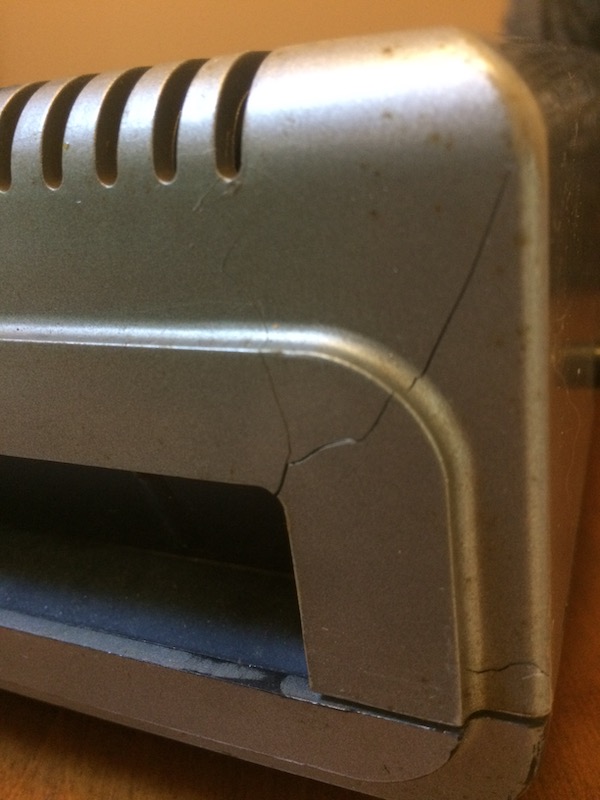
There are some cracks in the plastic, most prominently around the cartridge slot. These are another good reason for a repaint - a little bit of glazing putty, not even Bondo, is probably all this needs.
As this machine had been left outside for some time, protected only by a CoCo3 box, it should be no surprise that it’s dirty. All the keys had a thin layer of grime (the space bar has stuck-on goo that I still haven’t figured out how to get off), and the case needed a few Lysol wipes before I could touch it without some grime sticking to my fingers.
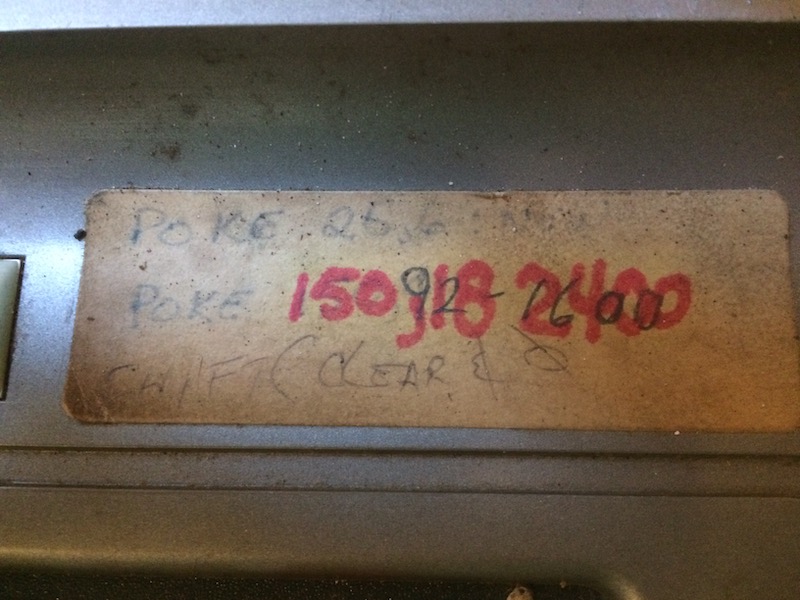
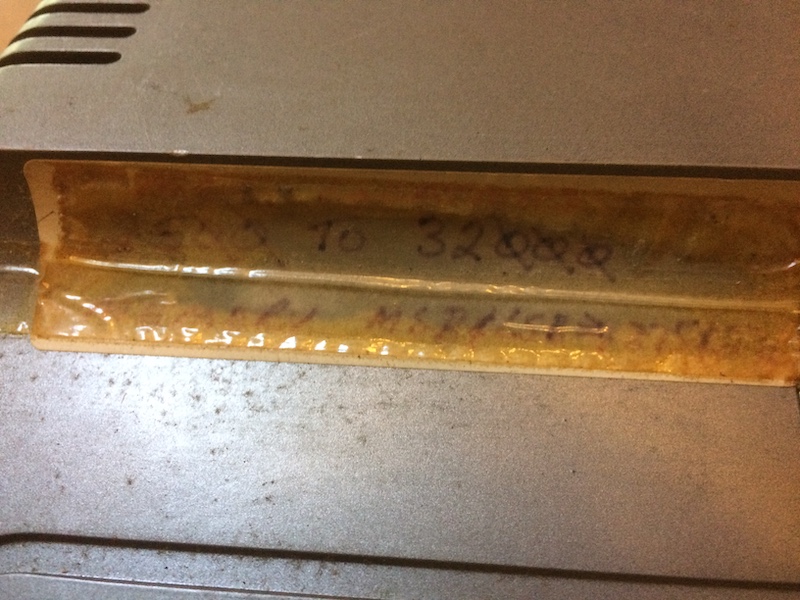
This machine was clearly used to program something in the past, because it had a few stickers on the case to remind the owner of special addresses. These stickers are nearly obliterated from dirt, but I documented them before starting to clean in case it got worse. I’m not sure how I can clean these up to make them more legible, or remove them safely before painting.
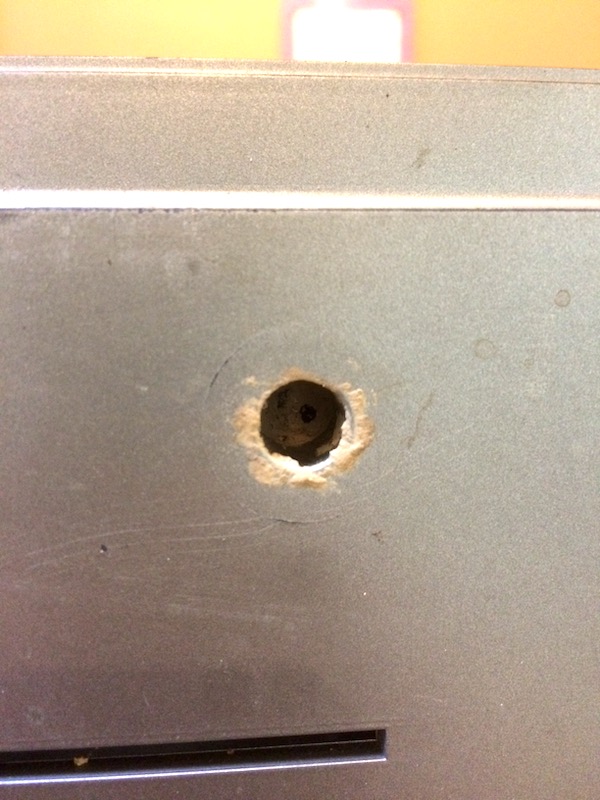
When I turned the machine over, all the screw holes were packed with muddy gunk. It made me think of all those abandoned-car restoration threads I’ve read where Americans have to deal with mud dauber nests. Hopefully that’s not what’s inside this machine; I had enough insect nests with the PC-6001mkII.
Scrub a Dub
I tore this thing apart in my laundry room. Mostly because it had a pretty deep sink, but also because I knew I could scrub the floors clean if I had to.
Since the screw holes were packed, it took me a long time, nearly an hour, to clear all of them with a pair of picks and a small flathead screwdriver. A lot of dirt came out of it, and eventually the rusty Phillips-head screws (2x #6 x 7/8” and 5x #6 x 1-1/4”) did too, with only one broken post.
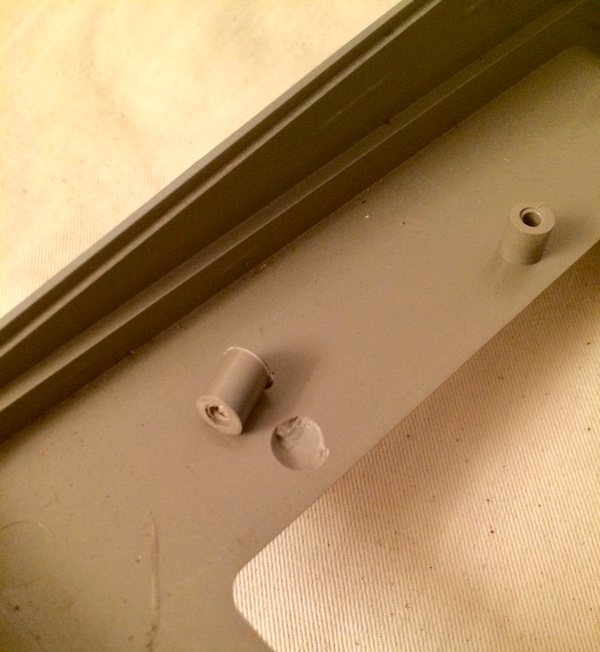
I put a massive amount of super glue on this and I hope it will take the load needed for future generations to enjoy this machine.
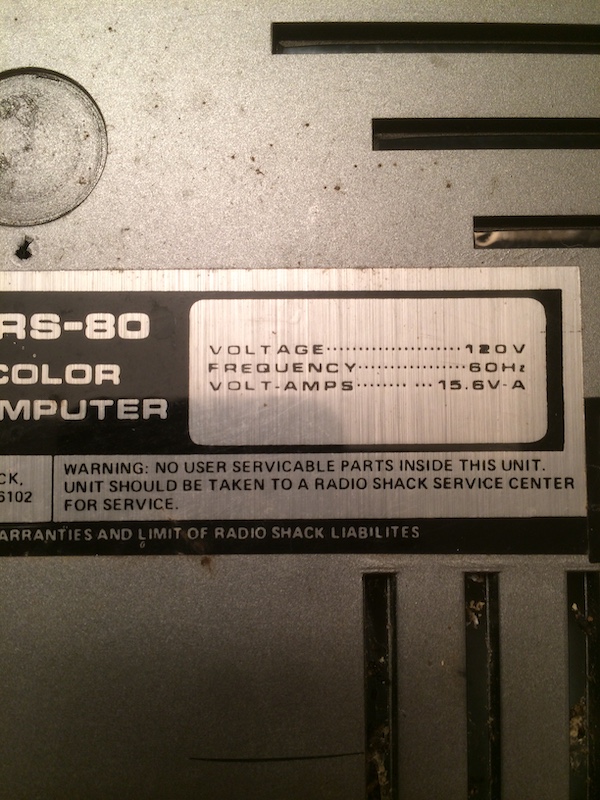
Before opening the computer, it’s worth reading the safety stickers. The donair guy didn’t know anything about this machine either, but again I can’t encourage you enough to try the garlic sauce.
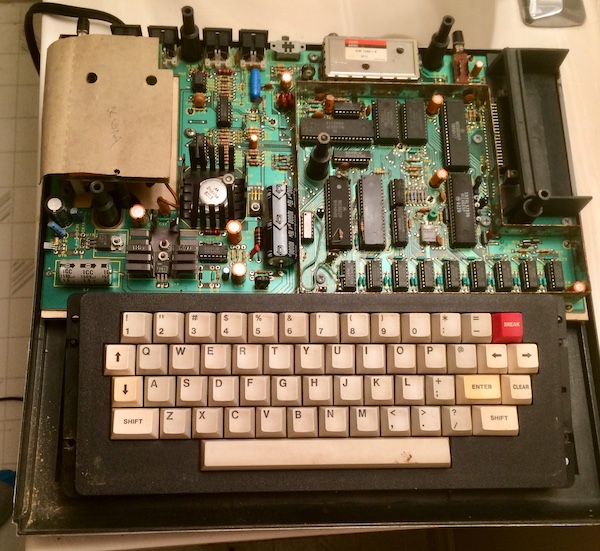
With the top popped off, we can finally see the motherboard. It’s way cleaner inside than I thought it was going to be after the last hour of cleaning dirt and schmoo out of the case. A good design, or just luck?
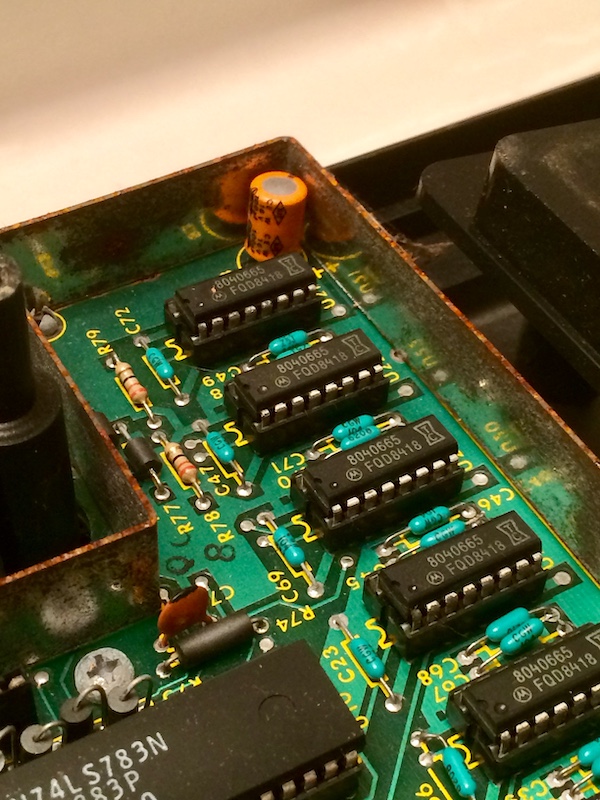
The RF shield looks a little rusty around the motherboard, but none of the chip legs look particularly corroded, a miracle considering the condition this machine was in.
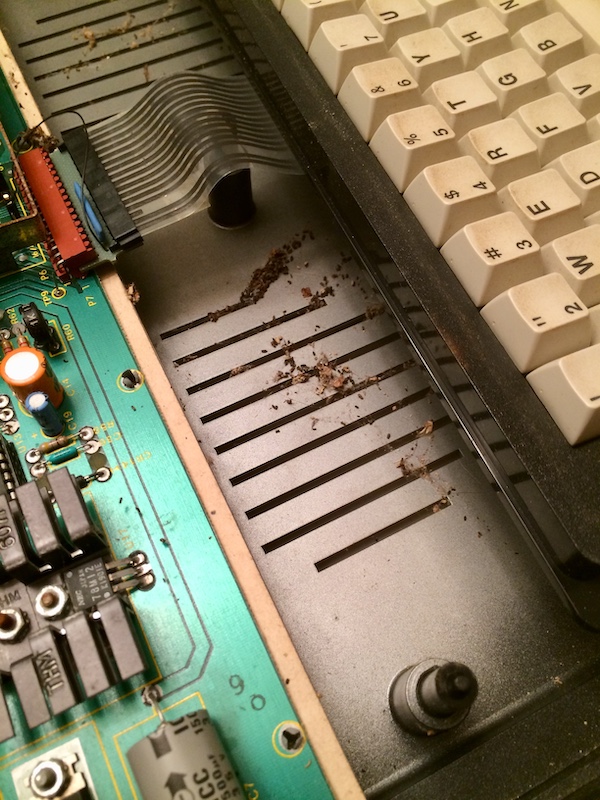
Sliding the keyboard back, we can see a lot of gunk in the bottom of the case. I’m not sure if that lump is some kind of egg sac or what, but it went right down the sink.
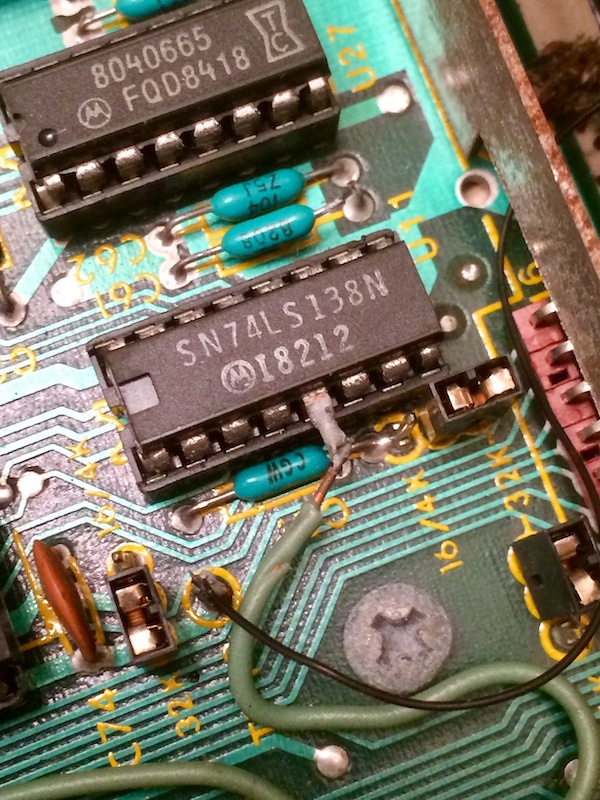
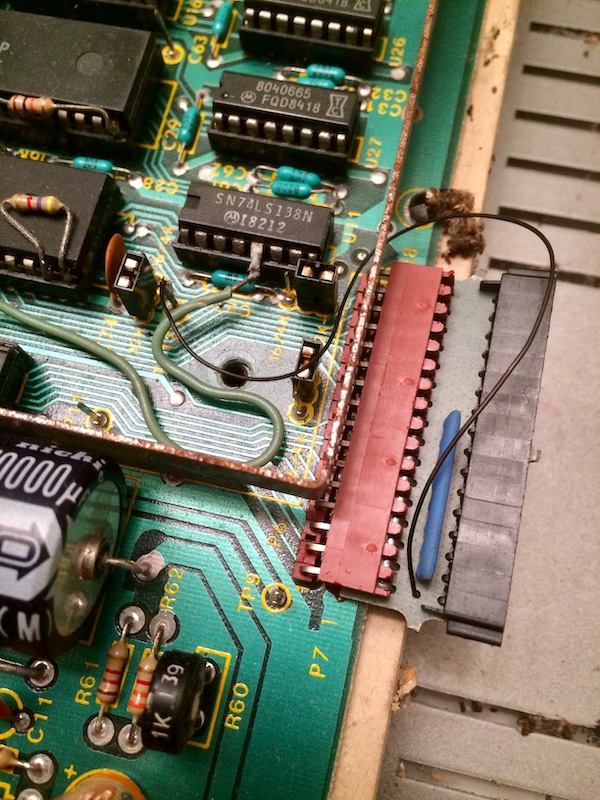
On the motherboard, the keyboard has this weird looking connector. I don’t think the keyboard is necessarily the ‘factory’ one for the CoCo, but all of these bodge wires running to the motherboard look to be original to the machine. Maybe it was a plug-and-play mod.
The 74LS138 here is a de-multiplexer, which is probably used to handle the output from the keyboard PCB’s 16-pin flex ribbon cable. Multiplexing cuts way down on the number of pins you need to read a keyboard matrix. The pin that’s been bodged to is an “input enable,” so perhaps this is some kind of factory repair for a bus contention issue or intermittently working keyboard.
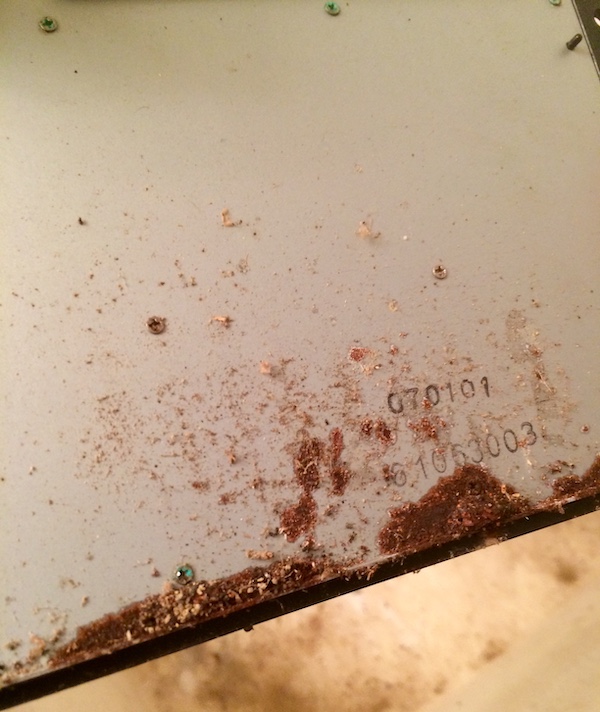
The back of the keyboard had this built-up goo, and once cleaned off, it showed a lot of rust. I’m not sure I’ll bother treating this if the keyboard works, as those little baby screws are almost surely seized.
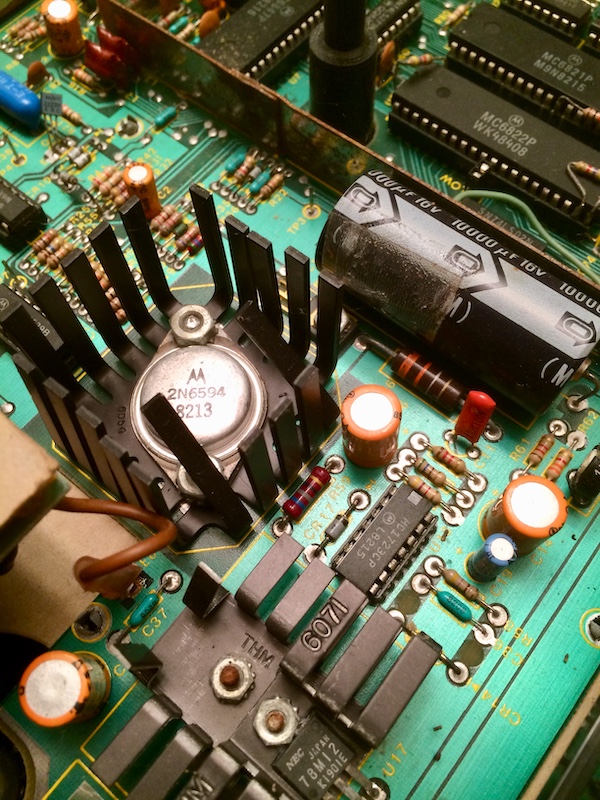
The voltage regulators look OK too, but some of the ground nuts look a little rusty. It’s a little weird how much of the power regulation is done right on the motherboard.
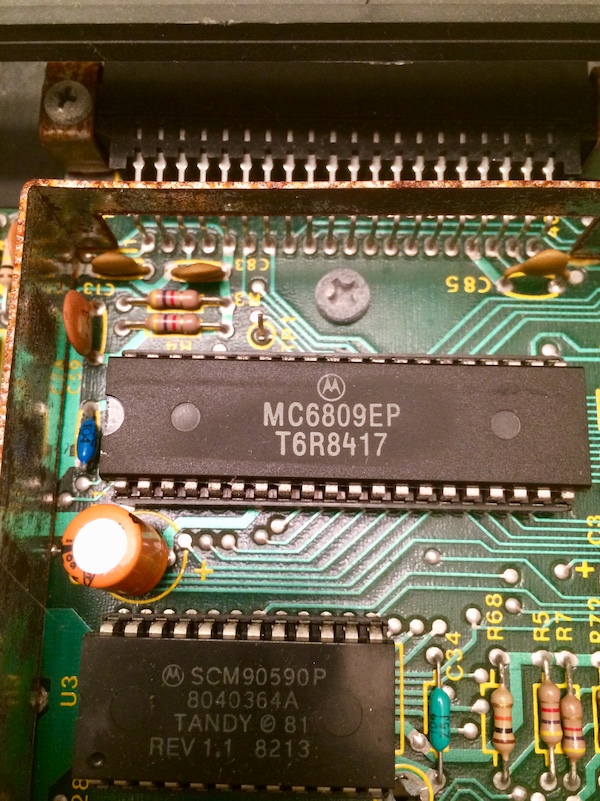
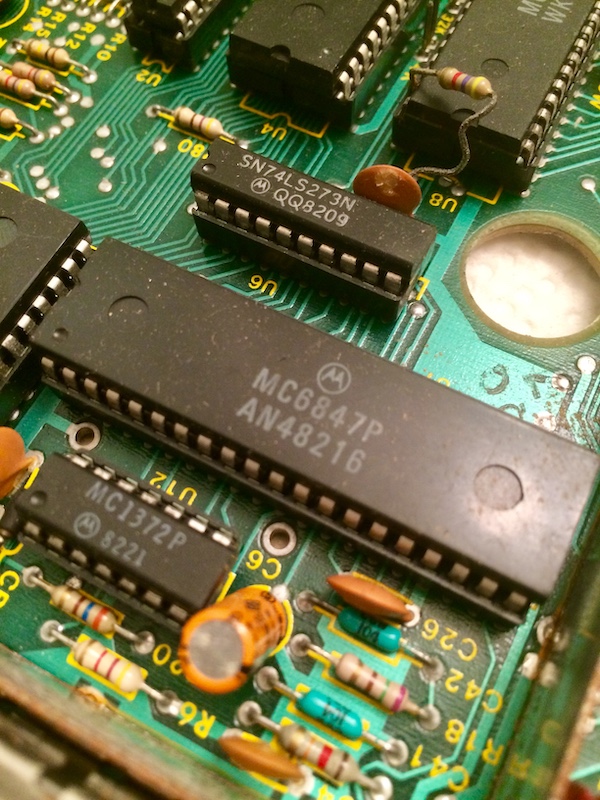
Here are the two big chips we care about, the 6809 CPU and the 6847P video chip. We’ll need their little friend, the MC1372P video mixer, as well. We are going to intercept signals coming off of it for when it comes time to build a composite video modification.
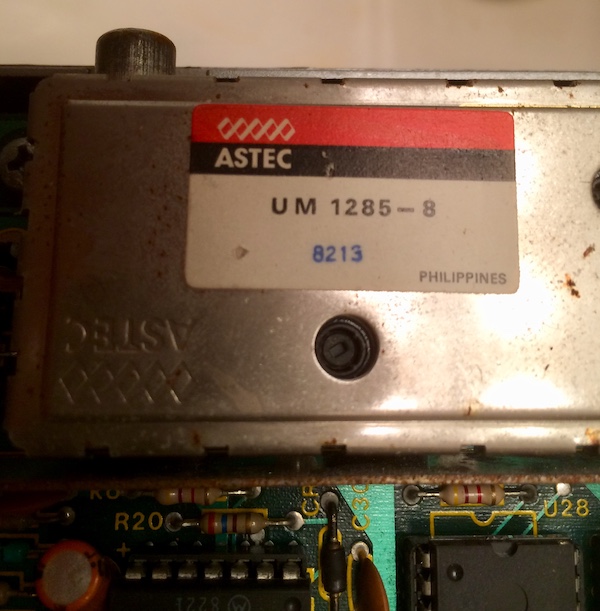
By way of the 1372P, the 6847 feeds into this Astec UM1285-8 RF modulator box. I don’t have any of the parts to make a composite board yet, but it’s definitely on the to-do list.
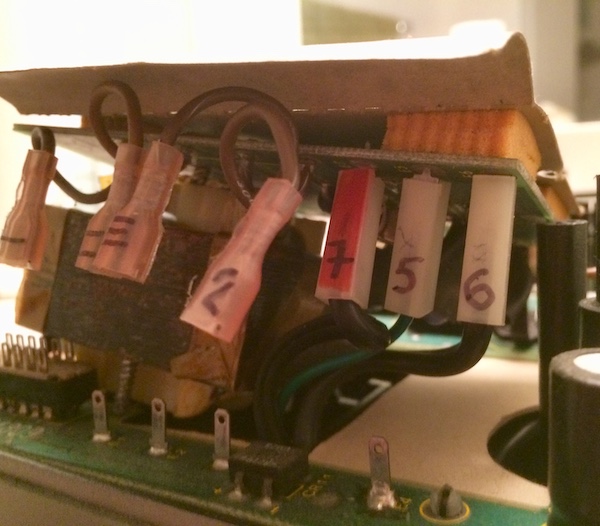
The main power transformer has a Cthulhu of connections onto the motherboard, which are thankfully hard to mix up due to their length, but I marked them anyway. Same goes for the power cord connector, because I don’t think the transformer would appreciate me mixing up hot and neutral.
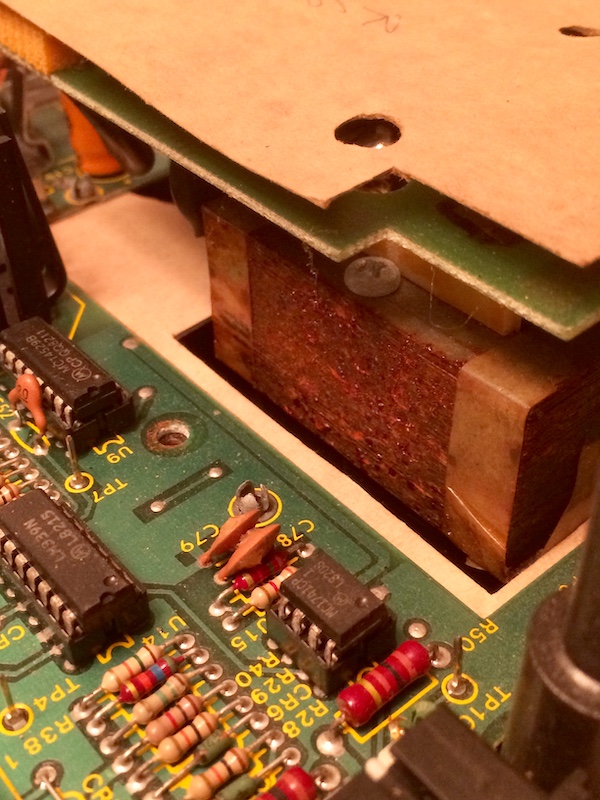
The metal frame of the transformer is rusty on one side, and I’m not sure if this will significantly impact its operation. All the rest of the transformer looks OK.
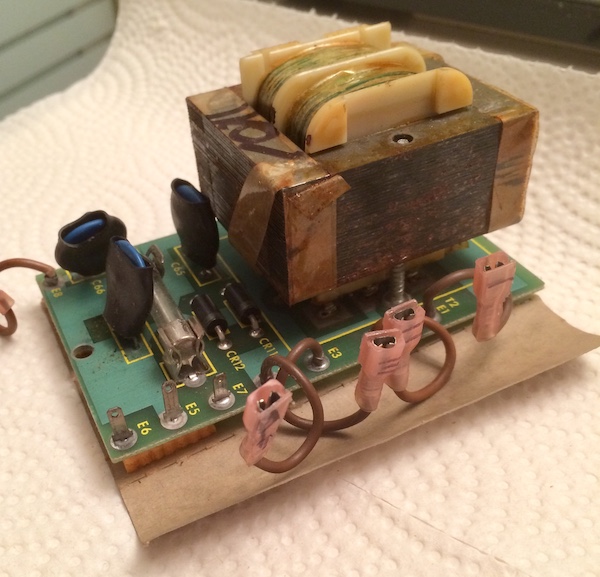
With a little jiggling, the power supply is out, and I can remove the motherboard.
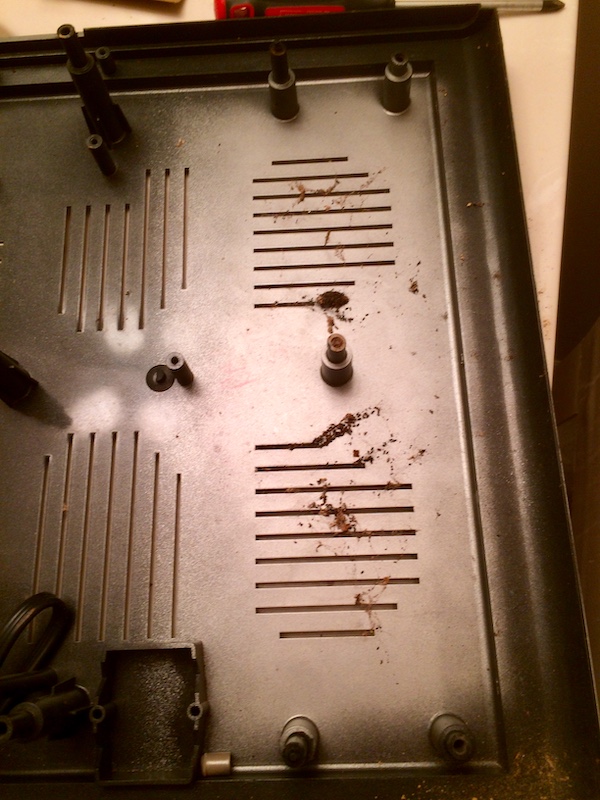
After that, I was finally able to dip the bottom case into the sink and blow out all the dirt in the screw holes and the gunk in the vents.
Contact!
For some reason, all of my RF video connectors have gone missing in one house move or another. With a few (too-expensive) visits to Amazon, I was able to cobble together a connection that should work for anything that speaks analogue cable. Unfortunately, I had no television that still accepted an analogue RF connection:
- The Samsung 910MP has some kind of weird connector that looks like a mini N-type connector, but didn’t fit a full N-type connector. Eventually I figured out this was a “PAL Antenna” or “Belling-Lee” connector, which I’d never heard of but at least Amazon sold. For nine bucks for two.
- The Macintosh TV decided it didn’t want to start, powering the tube and then not bothering to respond to any inputs. Probably the analogue board has gone out, and needs a service too!
- The Sony PVM and the Commodore 1702 aren’t actually televisions.
Even though the (hopefully temporary) apparent death of the Mac TV was a blow, I persisted, and the Samsung ended up being my target of choice. Connected through RF for now, the colours aren’t quite right:
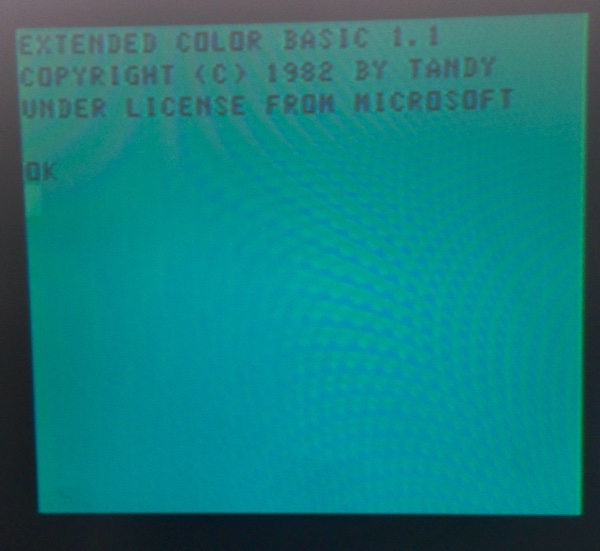
I think this is supposed to be more toxic-waste green like the PC-6001 with the same video chip is, but on this already-questionable Samsung, it is more of a pretty 1970s teal with a fringe of bright green on the right side. I am very glad to see whoever owned this before me splashed out for the Extended Colour BASIC.
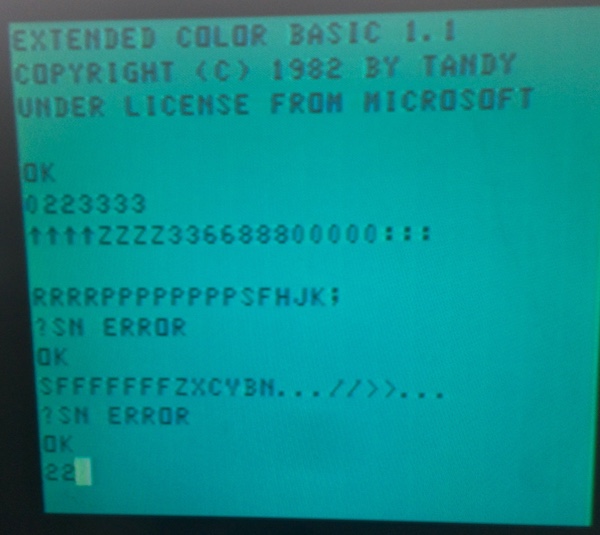
Unfortunately the keyboard seemed unwilling to cooperate with me. There are a lot of ‘dead’ keys:
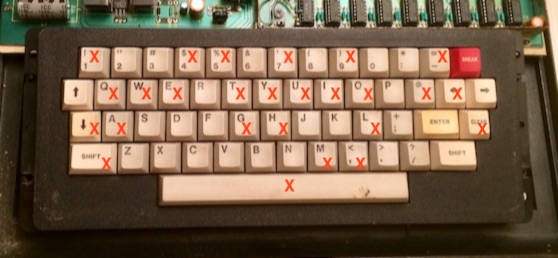
The failures don’t seem to strictly follow any obvious physical pattern (not all in the same column or the same row), which makes me hopeful that it is not an electrical problem so much as it is a gunked up keyboard.
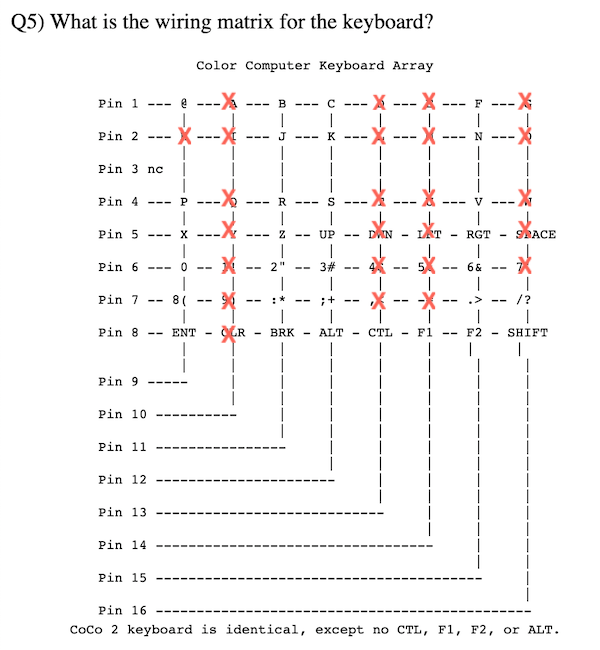
Looking at the wiring diagram for the keyboard matrix makes me a lot less sure. It looks like there are some dirty keys, sure, but it seems to also show that a couple of the columns are questionable at best.
In a lot of cases, the column is only ‘saved’ by a key that I don’t have and therefore can’t test (like ALT, F1, and CTRL,) so it might well be completely wrong and I just don’t know yet.
Considering the condition that the keyboard was stored in, it’s not too surprising that they aren’t working. The down arrow key in particular has a very crunchy feel that is more organic than I would like. Dismantling and cleaning the keyboard is definitely job one. I’m not sure of the construction of this keyboard either - hopefully it’s not a membrane inside!
There are three things now to do on this computer, but I am very glad that it has survived its storage condition:
- Clean the keyboard fully, and then diagnose it electrically;
- Modify with composite output for a wider range of TVs and better image quality;
- Fix the major crack in the case around the cartridge slot and reinforce the back of it so that cartridges and the are safe to insert (it would be really cool to hunt down a Multi-Pak four-cartridge interface).
Don’t be afraid to drag a computer out of storage and bring it back to life!