Mini updates 4 - X68000 battery removal, PC-98 window accelerator, PC-8801MH keyboard arrives
Tags: computer sharp x68000-ace batteries nec pc8801mh pc88 pc9821 pc98 pickups keyboard
I removed the clock battery from my X68000 ACE, sped up my PC-98’s video, and got a keyboard for my PC-8801MH. Come enjoy this bite-sized collection of what’s going on with my machines.
Assaulting the battery of the X68000
In the last update on the X68000 ACE, I found a leaking clock battery. At the time, I was relieved to find that it wasn’t too serious of a leak (at least by X68000 standards), but I knew that I had to get it out immediately before more damage would be done.
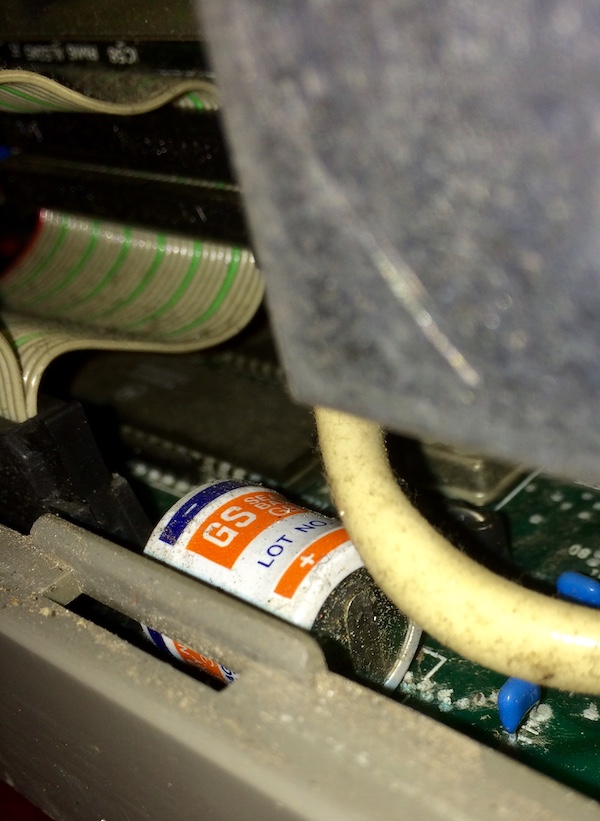
Since the battery is mounted on the lowermost daughterboard - I had erroneously thought it was the actual motherboard before - it has a lot of potential interconnects and peripheral chips to leak into and mess up. One of these interconnects is this really nice-looking ribbon cable, with an expensive “Honda” (not the car brand, it’s another Honda) positive-retention connector. I think this is either the floppy drive cable or the main motherboard cable, but with a connector this expensive and this many pins, it’s important either way.
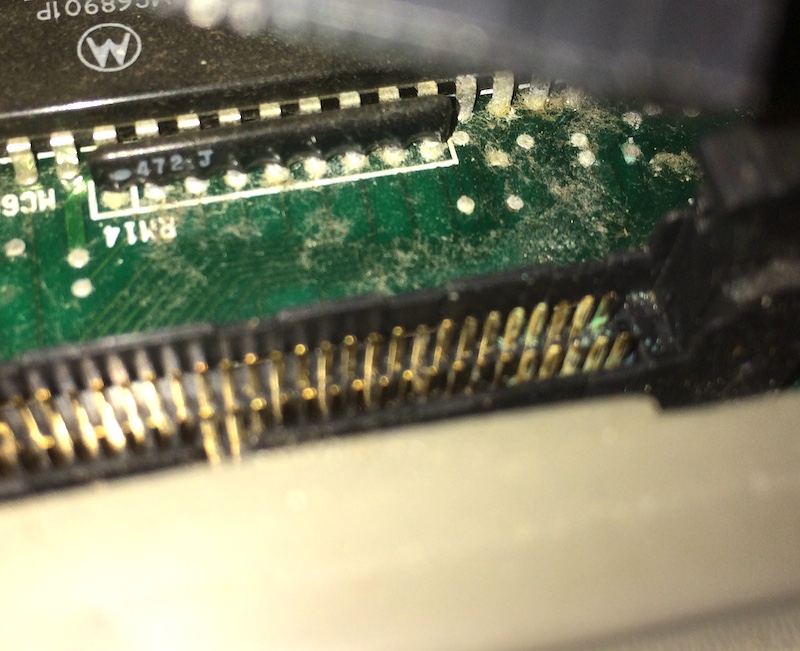
I pulled up the ribbon cable to make clearance for the battery removal, and then spotted some telltale green goo on the gold-plated(!) pin header on the board. This would have to be cleaned too, and hopefully wouldn’t get any worse, as I also saw that there was some electrolytic corrosion that had crept up into the copper pins of the connector itself.
First, I put some vinegar into the socket from my handy deskside eyedropper bottle, let it sit, and then flushed it out with isopropyl alcohol. Once everything was dry, I checked for any corrosion, did a few more cycles of it, and then did a plug-unplug cycle to try and clean the pins on the connector.
Hopefully this took care of the worst of it, although after checking with others who repair X68000s, it looks like this whole board-side pin header will have to get removed in order to really clean the area. The corrosion creeps past the pins onto the underside of the board and wreaks havoc there, including into the soft-power circuitry that already seems to be acting up from the seller’s description. If it’s feasible, I’ll probably also de-crimp and clean this ribbon cable of its corrosion as well. Hopefully I can find a replacement set of connectors, and just redo the entire cable, but Honda doesn’t show up on all the line cards I’ve looked at so far.
Next, I turned my attention to actually getting rid of the battery. I first thought I’d have to completely disassemble the machine to get at it, but after asking around, I found an easier method.
It turned out I could remove the video board and unplug a 2-pin connector, sneak in side cutters on the positive side of the battery, and sever the positive terminal of the battery from the board. Once that was done, I gently twisted the battery around its negative terminal so as not to strain the board’s pads too much, and then I had plenty of access to nip the positive terminal right off. The battery was free, and ready to go into my glass jar of Batteries Who Did Bad Things.
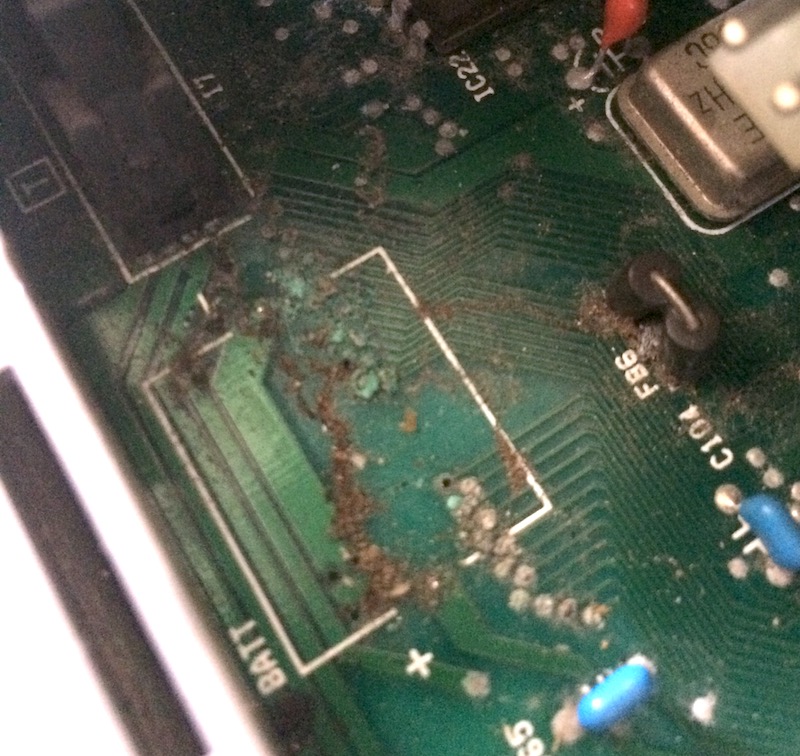
A lot of dirt and electrolytic corrosion was left behind. I flushed the area with vinegar and alcohol as I did with the connector. This isn’t enough to fix things if it crept into the traces, but hopefully it will slow the process of corrosion until I can pull the entire machine apart and fix this the right way.
From what I can understand, that proper repair will have to include soldering in a new battery holder, since the bootstrap SRAM of the X68000 is so important to proper function. That SRAM apparently contains stuff like SCSI drivers, initial bootloaders and other firmware that is necessary for the machine to boot and run properly.
That SRAM also seems to get corrupted often, as evidenced by the fact that Sharp cut a special hole in the RF/heat shield to be able to access its pins for a clip-on programmer to reset errant chips.
All that will be part of a future update, I am sure of it. For now, the X68000’s battery time bomb has been defused.
The PC-98 accelerates Windows beyond 9.81m/s2
A friend who also has an As2 told me that he managed to get the built-in window accelerator for his machine working. I responded with a tilted head and quizzical look, like a Golden Retriever.
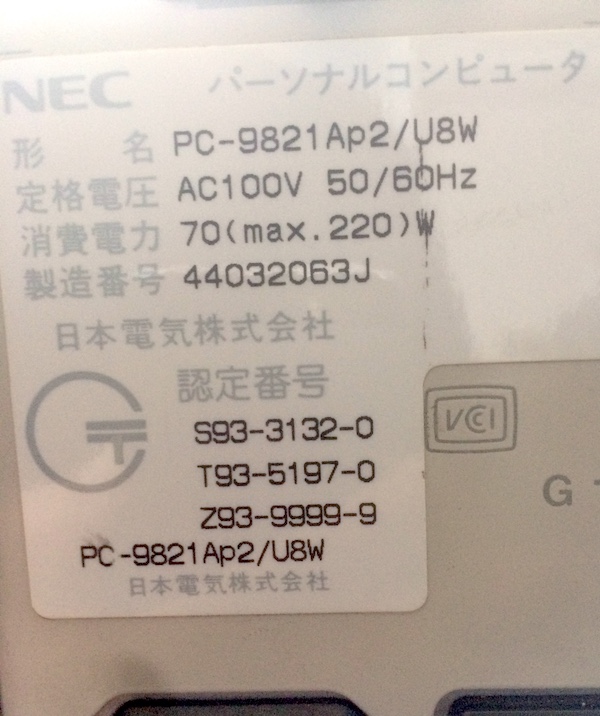
It turns out that some A-mate PC98s shipped with a built-in window accelerator board, including mine!
Apparently that’s what the “W” in “U8W” meant all this time. How cryptic.
Free upgrades are the best upgrades. It’s sort of like finding out your 1988 Toyota Corolla also dispenses hot butter popcorn on demand.
The driver is very hard to get, and needed to be scraped together from multiple install and update disks, so big kudos are in order for techfury. You can download the S3 PC98 window accelerator driver from the Internet Archive on this page.
Wait, not so fast! What is a “window accelerator?”
The PC98’s weird (compared to the IBM PC) video mode doesn’t really lend itself to the way that the GDI library inside Microsoft Windows likes to draw things. As a result, when Windows arrived on the scene in a big way, PC98s did not run nearly as well as their hated arch-rivals, the DOS/V “IBM Compatibles.”
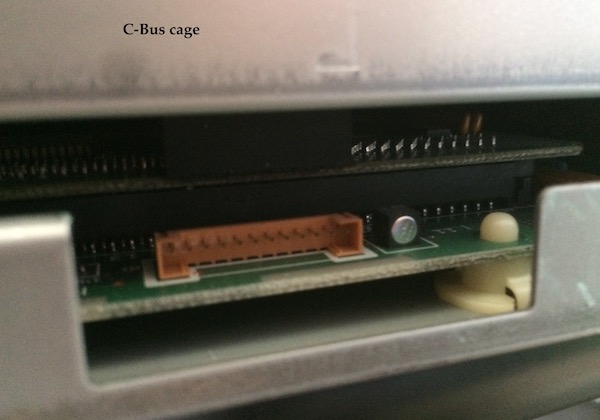
I’m sure they optimized the OS as well as they could have, but at the end of the day, sometimes all you can do is throw hardware at it. And so a lot of vendors came out with “window accelerator” boards, which usually were C-Bus cards that somehow hooked into the existing video subsystem (often using a custom pass-through cable) and… accelerated windows.
This performance problem’s cause boils down to planar vs. chunky modes.
From what I can tell, Windows seems to prefer a linear, “chunky” write (think mode 13h) as opposed to doing video in bitplanes like the Amiga or PC98 do. If you’re pushing a lot of pixels, the extra work to jump around between planes means that often your programs need to be written in a totally different way to draw quickly.
The window accelerator board effectively presents a “linear” memory model to the software, and then does all the planar conversion in hardware, so you don’t have to change your IBM PC Windows program to be fast on the PC98 too, as long as the driver is present to tell Windows what to do.
It’s sort of similar in concept to the Akiko chip in the Amiga CD32.
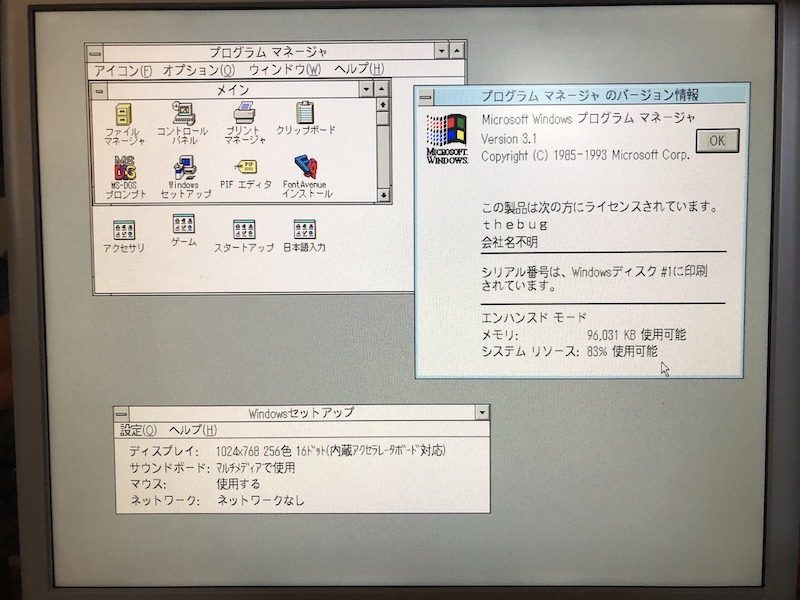
The end result for most people is that you can run Windows 3.1 in 1024x768 resolution with 16-pixel fonts, which is kind of uncomfortable for all of us that grew up running Windows 3.1 in 640x480.
There still seem to be some bugs with these drivers (shift-JIS characters aren’t displaying properly in a DOS-box), but that should get ironed out really soon.
I’m still plodding around in DOS, but when I go to Windows, rest assured that this driver will be installed. After all, it’d be a waste to ignore hardware I didn’t even know I had.
Strong Typing
When I got my PC-8801MH way back in May, I couldn’t really use it because of a lack of keyboard.
At the time, I started a DIY keyboard project (more on that soon), but it got derailed as I had to wait for parts and then let the Tandy 1000SX take over my workbench after it exploded like a week later.
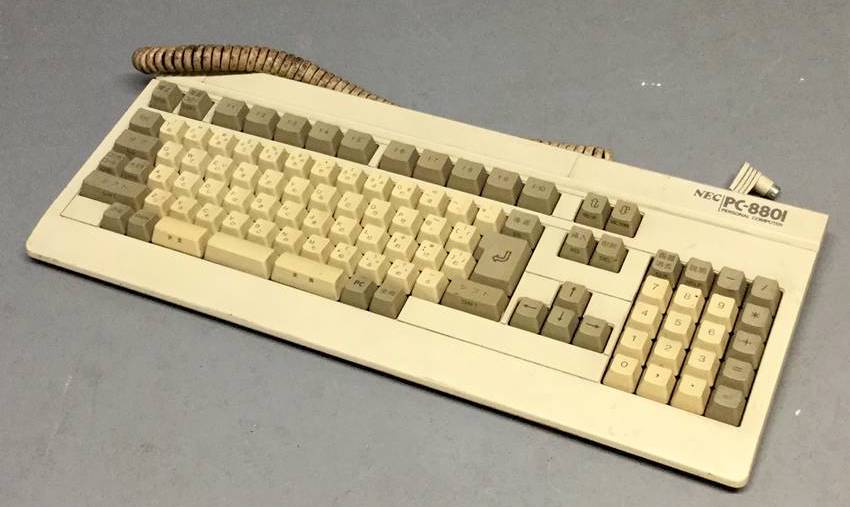
When I bought my 8801MH, I looked around for a Type-A keyboard (since I couldn’t use my 8801mkII keyboard on anything 8MHz or newer), but could not win a bid for one to save my life. Of course, immediately after the MH shipped, this keyboard became available - isn’t that always the way? I won it for ¥7250 - much more than I wanted to pay, but less than my absolute limit.
The first thing I noticed upon taking it out was that the keyboard is really filthy, even worse than the first mkII keyboard. The painters’ tape that was used to hold the cable tight for shipping was flaked with dirt and grime, and I’ll need to scrub the entire cable in order to clean it up.
But! It mostly works. The “5” and “E” keys seem to be particularly unresponsive, even under a great deal of force. As proof, I was able to hold the “PC” key (new in this keyboard) and get into the BIOS configuration screen of the MH:

On the FH/MH, it seems NEC gave up on having a million tiny finger-shredding dipswitches on the front of the machine and implemented this handsome “soft-DIP” system that my monitor hates.
I’m happy to have the 8801MH finally usable, even if it was twice the price of the machine to buy the keyboard. Also, while the keyboard was expensive, where I really wasted money was packing it up. Why? Because why wouldn’t I pack the box with some other stuff?