Not conducting myself appropriately - a CoCo keyboard inspection
Tags: computer tandy trs80 coco keyboard corrosion failure
When I got the CoCo up and running in the previous entry, I noticed that the keyboard wasn’t working particularly well. I found myself with some spare time to dismantle the keyboard, and unfortunately it has not yet been fixed. That doesn’t mean we can’t still learn a thing or two.
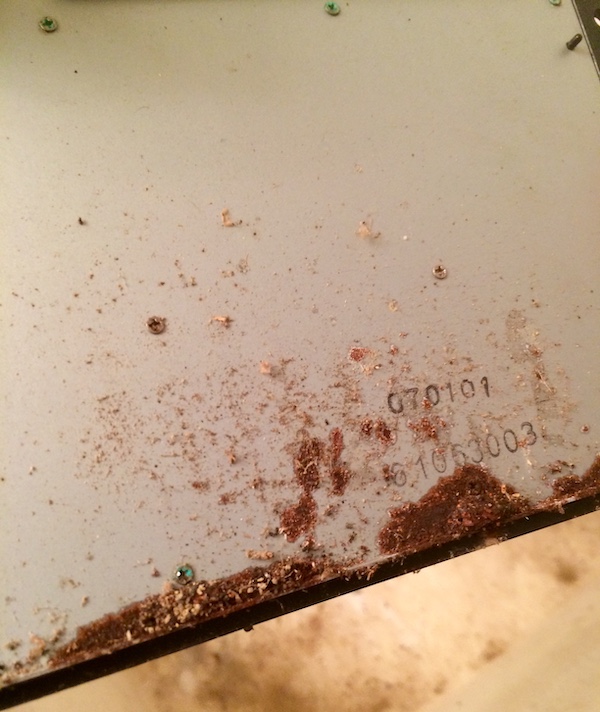
I pulled the machine apart (much easier this time than before) and got the keyboard out. The metal backplate is still very corroded, including two of the screws that we need to get out. They were practically rust-welded in there, which after awhile got me to get out the Neji-saurus screw pliers that everyone who deals with corrosion or screws should probably have in their toolkit. It saved my bacon on this job, although I had to scrape off a lot of the rust to even get enough purchase on the screw head to turn it.
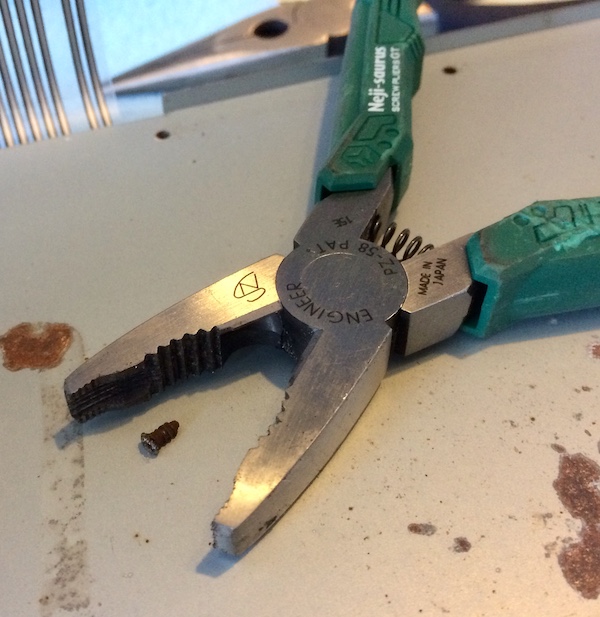
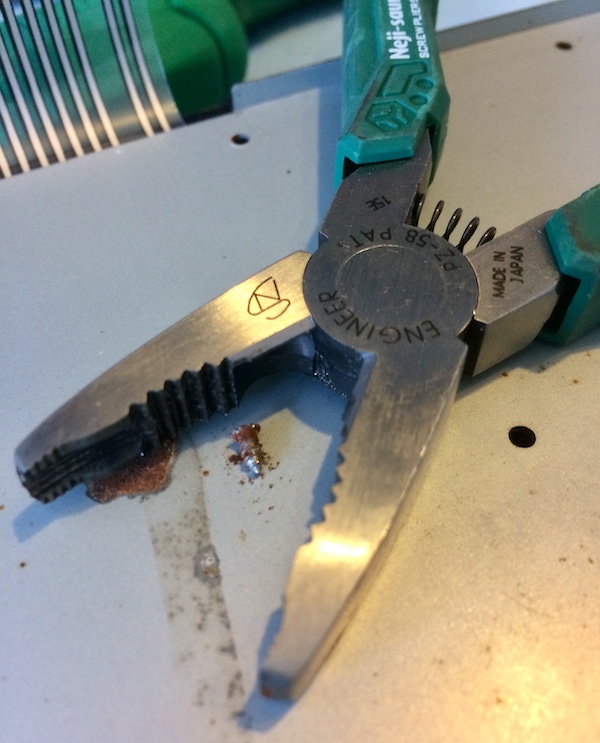
The second screw barely had any thread left. It did not want to come out.
The ribbon contacts look OK - I’ve seen lots of keyboards with a membrane where the connection at the end starts to fray and you have to clip it back. This one is intact, with only a little bit of wear from inserting and removing the ribbon. My problem lies further within the keyboard.
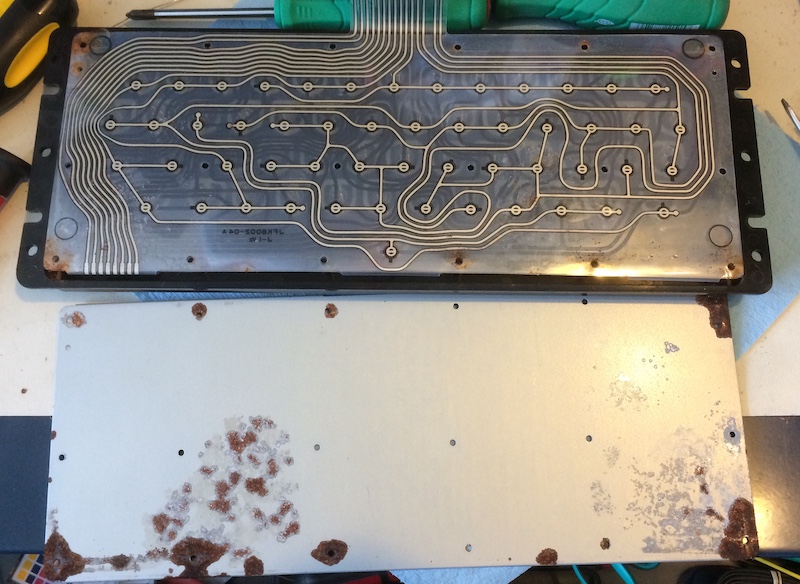
There’s a lot of rot on both sides of the backing plate. The membrane is covered in rust and balloons out instead of being a tightly glued-together envelope. Several traces are damaged.
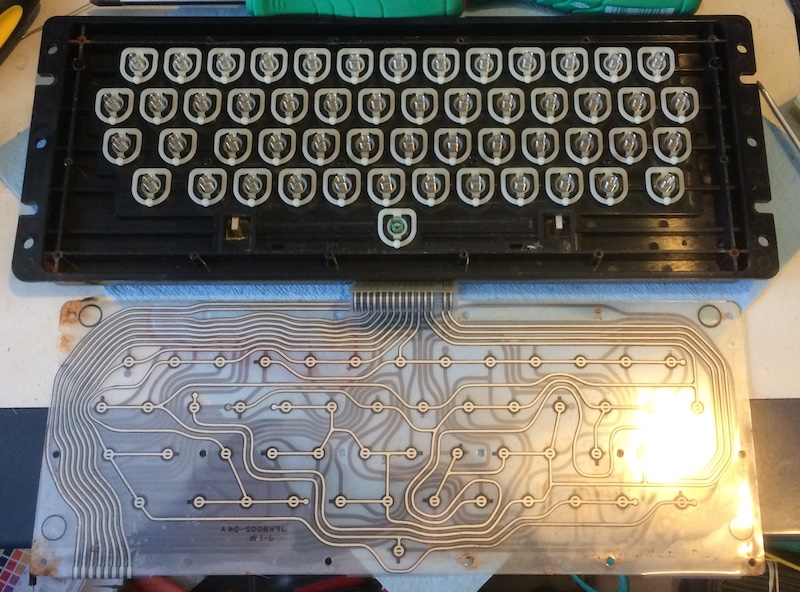
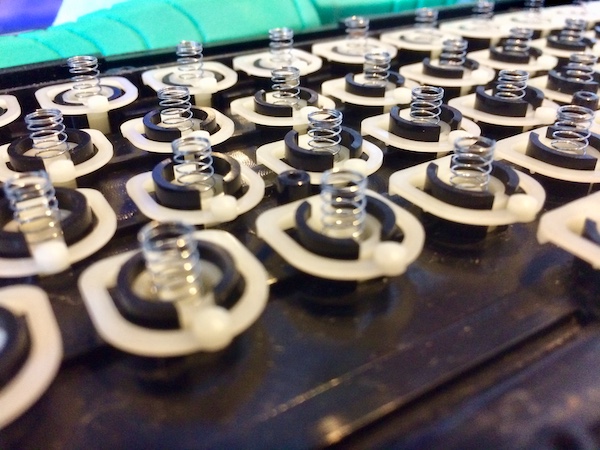
Once the membrane is out, you can see that the keys are actually spring loaded plastic feet that crush the layers of the membrane onto each other. I was hoping that they were conductive feet, so that in the worst case this could be replaced with a PCB containing a surface-mount pad like on the HB-101 keyboard. Maybe I could still do that, if I painted the nubbin with conductive paint or some other hack.
I’ve never quite seen something like this before. Both the plastic casing and the membrane were stamped with a “JFK” makers’ mark. My research came up blank on who this manufacturer was.
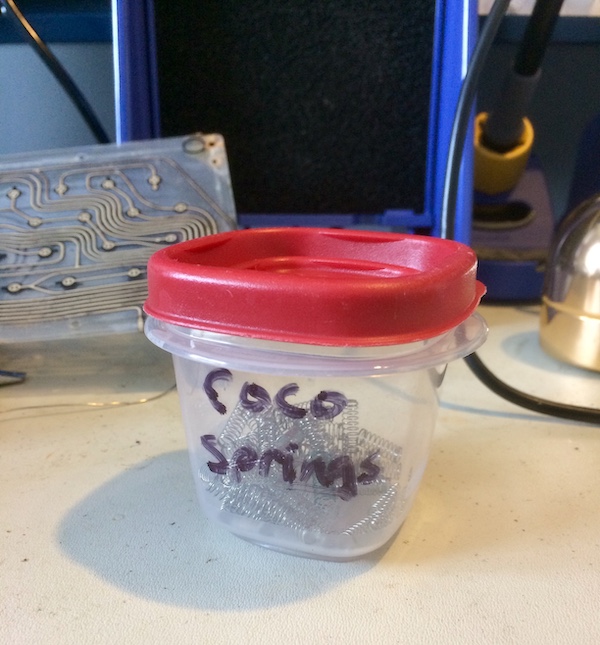
At this point, I knocked the top half with my arm while cleaning it and sent the springs flying around my workshop. A half hour later, I had everything isolated into a little container, so that this wouldn’t happen again:
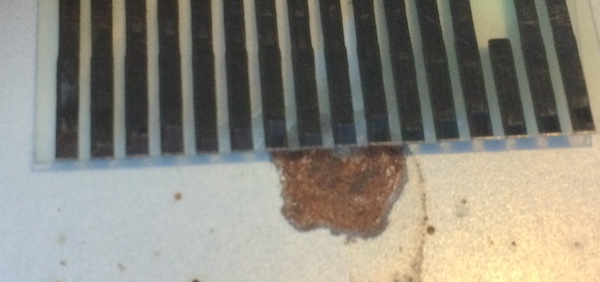
We knew from the previous entry that the columns associated with pins 10, 13, 14 and 16 were either completely non-functional or “mostly” non-functional. I got to tracing them out, and the trace damage confirms my findings.
Pin 16, where the question mark and foreslash key would work, but no others, is particularly dramatic:
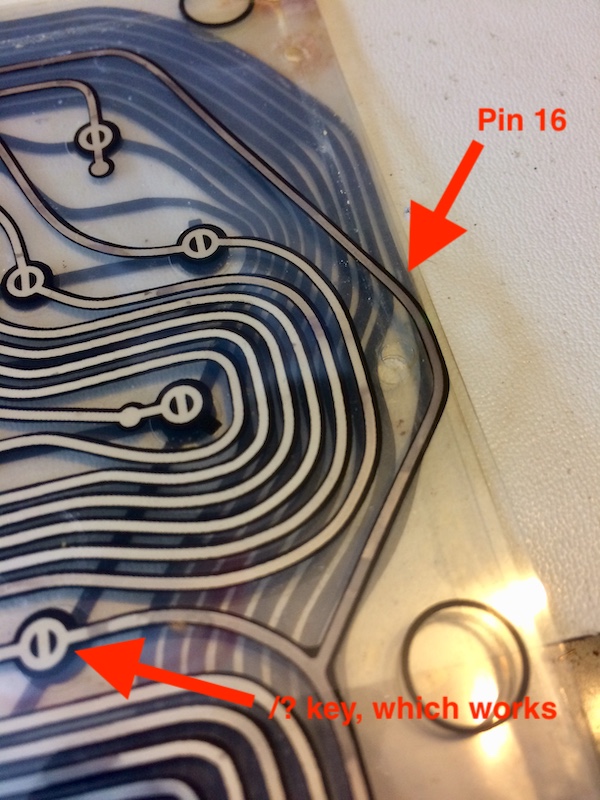
The mylar was still glued together at the top. It appeared that the manufacturer of the keyboard membrane punched this out as one big sheet, then folded it over to provide the two ‘sides’ of the membrane. The glue at the bottom and sides had failed, and the traces were damaged from (most likely) water intrusion.
In order to fix this, I’d have to remove the glue at the top and spread the membrane back out, then use conductive copper tape to patch the traces. I tried a few solutions, but wasn’t able to figure out any way to easily remove the glue without also damaging the mylar. Using a heat gun to soften the glue also didn’t seem safe.
Stumped, I attempted to force the edges back together with strategic applications of kapton tape to the circular fold-alignment marks at each corner.
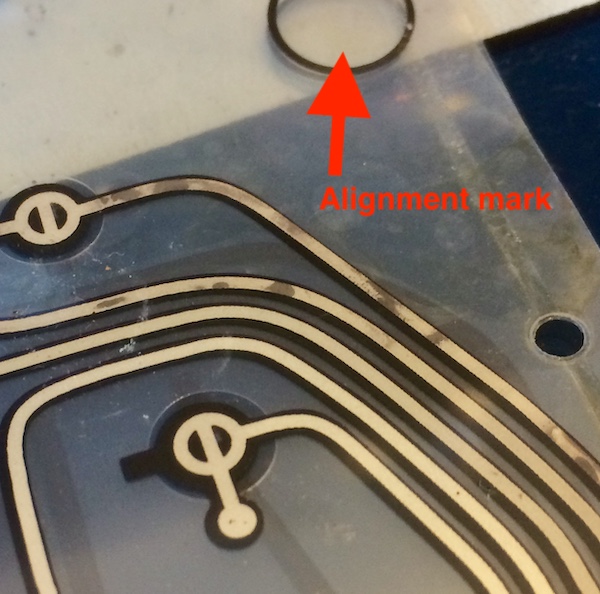
This did not make any real difference, except that the left arrow key now works. We’ve gone from 25 non-working keys to a mere 24. What an improvement!
Option isn’t just a key on a Mac anymore
How am I going to fix this? I have a few options:
- Figure out a way to remove the membrane glue (cut it?) and then use conductive tape to repair it. I’m not sure how long this will last, or even if the adhesive in the tape will melt the mylar, but it is probably the most practical option for repair.
- Replace the keyboard with a parts keyboard from another CoCo.
- Create a whole new membrane. I don’t know how to do this, but I’d like to learn. And while we’re on the subject of mad science…
- Build some kind of insane keyboard PCB that slides in where the membrane used to go, and then modify the key switches to activate it. This is the kind of weird hack stuff that I love; my only concern is that it would probably take a few days of measuring and checking to get everything in perfect alignment. I’d also have to build a new membrane ribbon to go to the motherboard, or remove the original connector and hardwire it. The board itself would probably also have to be pretty thin to fit into the original arrangement without shorting against either the keys or the backplate.
- Replace the keyboard with a brand new keyboard, something like the CocoMech, or a DIY job, which would cost probably a little more than $100 after all the switches and keycaps and plastic. I’m not sure the machine is worth this level of investment as it sits (that money could go towards a PC-6601!), but maybe I’ll win the lottery or get rich over the weekend. I took a bunch of measurements for the backing plate as well as the membrane while the machine was apart, so it’s not unfeasible.