Cleaning the keyboard on the PC-6001
Tags: computer nec pc60 pc6001 keyboard repair
When I first fixed the PC-6001, there were a few sticky keys on the keyboard. “H,” Left Shift, and - most importantly - Return were all bad to a certain extent. I could limp along with Ctrl-M for a little while to replace Return, but it was pretty awkward. How hard can it be to clean the keyboard?
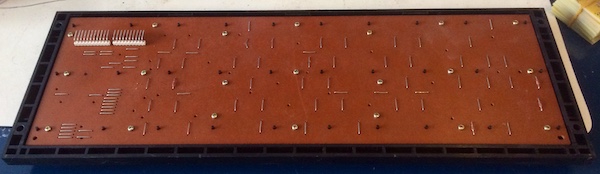
Once you pull the top off the machine, the keyboard can be easily removed and unscrewed. The screws weren’t in very tight at all, which means either someone was in here before me or the Alps assembly process was done by hand.
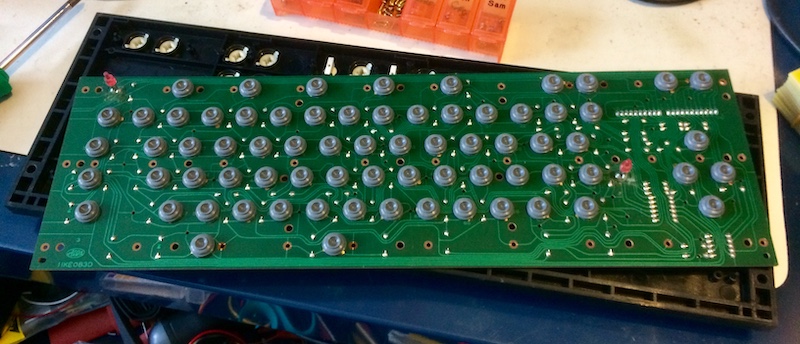
Like a lot of other cheap keyboards, this is a rubber dome (not to be confused with the PC-6001mkII, which seems to have some kind of captive dome switch). I cleaned these all the same way I cleaned the HB-101 MSX keyboard, by scrubbing them on clean sheets of printer paper until there was no more shininess on the conductive pad of the dome. The domes that still didn’t come clean, or started to shed chunks of the conductive layer, were rotated into keys that I wouldn’t use as often, like the kana and graph keys.
There was a lot of leftover flux around the two LEDs (indicating ‘power on’ and ‘kana mode’), so I took the time to clean those up. I don’t know what the chemistry is like after 38 years, but it’s probably not conducive to conductivity and might make more problems later.

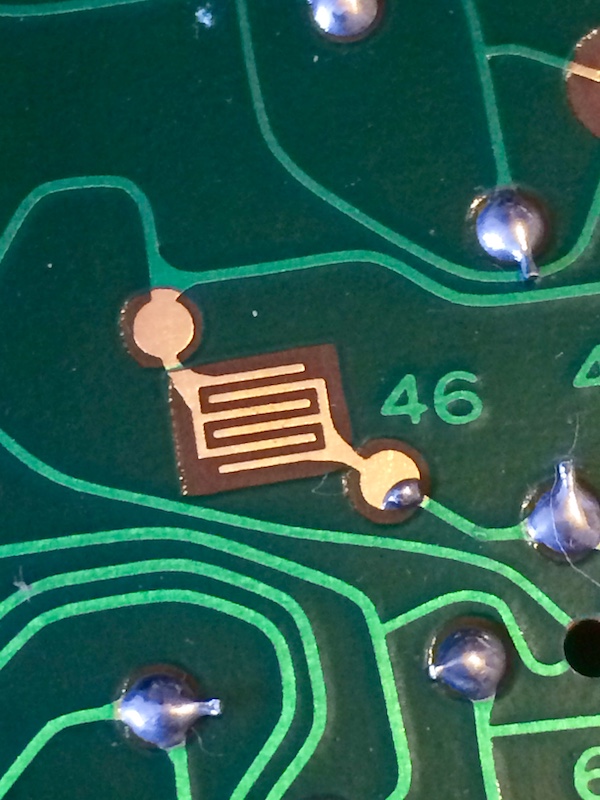
I saw the most wear on the arrow keys, followed by the return key. I also spotted this interesting thing that was either a factory bodge or an errant sling of solder onto the test pad for #46:
Once I cleaned the copper conductive pads, it was on to reassemble the machine. Since we aren’t going deep into the machine, reassembly is very easy.
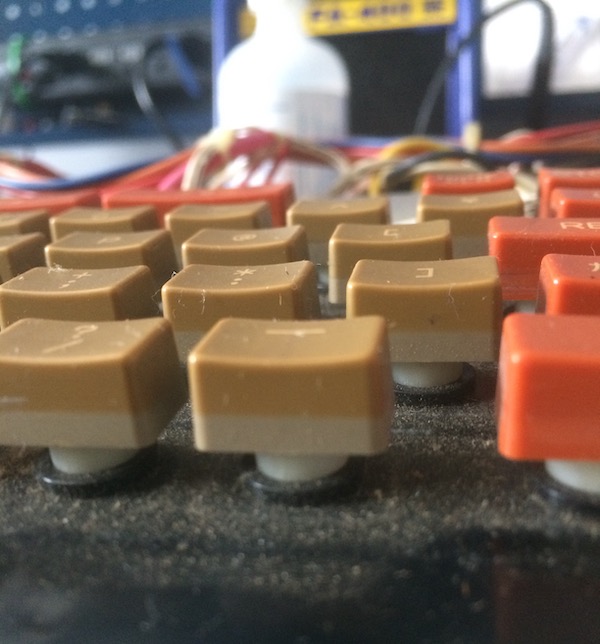
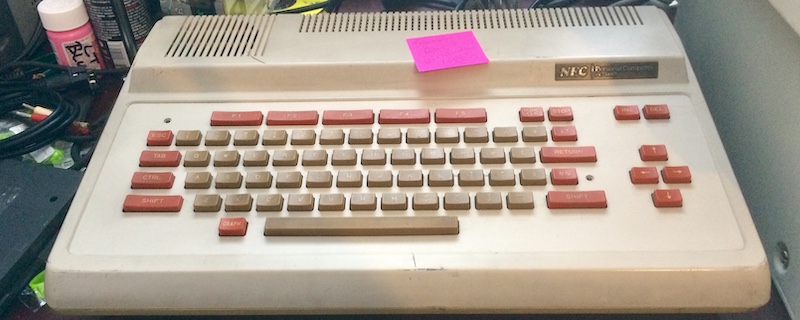
The keys look really sunburned - look at the change in colour as you go below the ‘level’ of the plastic top case. This PC-6001 must have spent a long time getting exposed to UV, wherever it was stored.

The first thing I noticed was that the return key works great now - but only if you hit it on centre. It feels like the stabilizer for that key is still physically binding, but at least the key works every time if you hit it properly. I think a good future maintenance task would be to get in here and re-lube the stabilizers with something like Teflon.
The kana key is a little fishy as well, with either inadequate debounce or a pad I didn’t fully scrub clean.
The composite video output by this PC-6001 looks really bad, even compared to other machines with the 6847 video chip. Just look at all that ringing on the left side, and the weird blotches between letters. The sound is still non-existent, too, which I think might necessitate testing those electrolytic capacitors. If the tantalums got hit hard enough to short out, it stands to reason that maybe their less solid-statey (is that a word?) friends might be hurt too.
Is it OK to love this battered old machine as much as I do? I’m not even sure why.
Repair Summary
| Fault | Remedy | Caveats |
|---|---|---|
| Keyboard response is uneven. | Dismantle and clean keyboard. | Kana key still rubs on case plastic. |