Recapping a Sequel
Tags: computer repair capacitors apple macintosh macintosh-classic-ii
With all this discussion of budget Japanese computers and video game consoles lately, it’s easy to forget that I still like old Macs. This Classic II was picked up years ago, and it’s been on the shelf ever since I got it home and spotted the telltale sign of Simasimac. Now that I actually know how to fix it, let’s try to fix it.
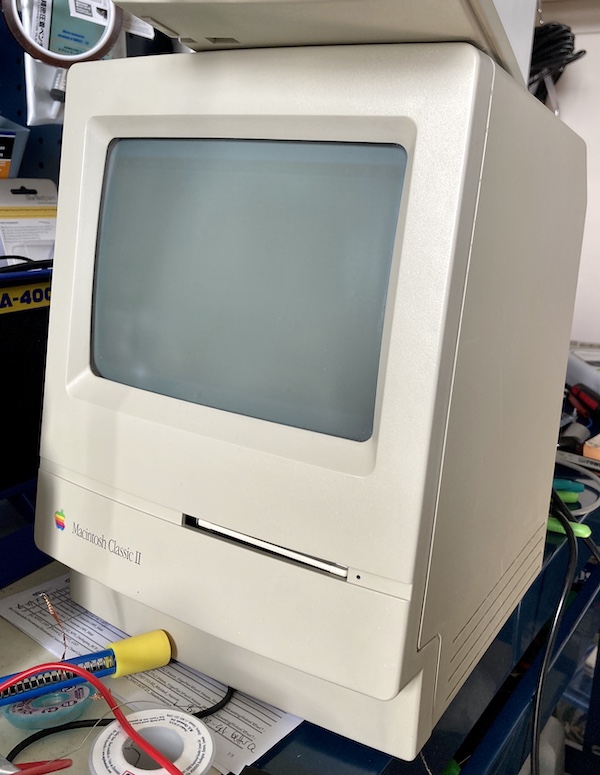
First, a brief note on the specs of the Classic II. It’s a pretty unloved “middle child” performance-wise in the compact Mac world, but it was actually the last B&W compact Mac they ever made, going until ‘93. It sports a Motorola 68030 but its bus design relegates it to be slower than the SE/30 that predated it. I like to think of it as basically a compact LC III.
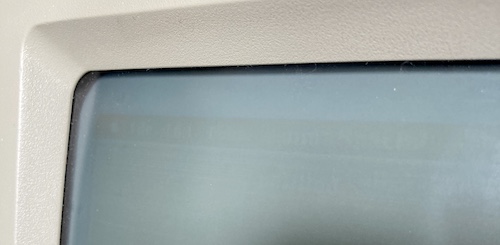
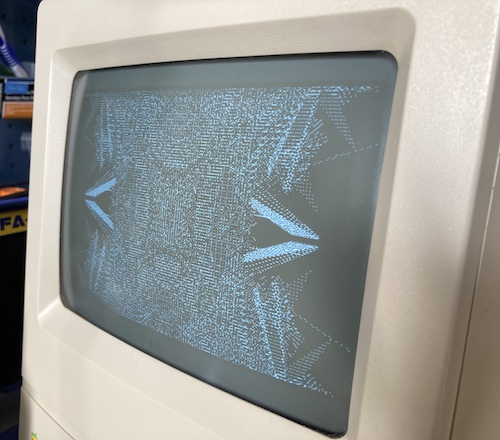
The case is in good shape, but the CRT has some bad screen burn-in. When the computer is off, you can still see the menu bar.
About a year ago, planning to fix the motherboard, I opened this thing up to make sure there was no battery inside it (there wasn’t - the previous owner was also a collector, and he took great care of this machine) and unplug all the cables. That way, when I finally got around to fixing it, all I had to do was knock the back off and pull the motherboard out. I am still really jumpy about discharging CRTs, but I think that experience will come when I get back to trying to resurrect the Magic Smoke SE’s sick power supply.
The Torx screws on the back are not all the same kind. On the top, they’re coarse-thread, but on the bottom (motherboard end) the screws are fine-threaded. Not really a big deal, just seemed odd to me. It’s all coarse-thread on the Macintosh SE.
The motherboard is really tiny. It’s pretty packed in here! I had to do some contortionist antics to work around the various chunks of the board that blocked easy access with my soldering iron. The Bad ADB Mac LC was definitely easier than this, even factoring in that one ugly cap.
The 1µF and 10µF caps were, once again, the biggest offenders for leaking. Luckily, the pads cleaned up fairly well. However, some of the plated vias in the area looked pretty questionable. I knew from experience that these computers are likely to have broken traces from the leakage: the traces are really thin. There’s a lot of gunk left behind under the caps that needed a firm cleaning-out; I can see why people shove these in the dishwasher.
After the first few 10µF caps, I had to adjust my technique and involve a lot more cleaning and a lot more liquid flux. I was having a lot of problems with solder globbing up, fouling, and using too much on a pad. Compared to the LC, this recap job was significantly more difficult.
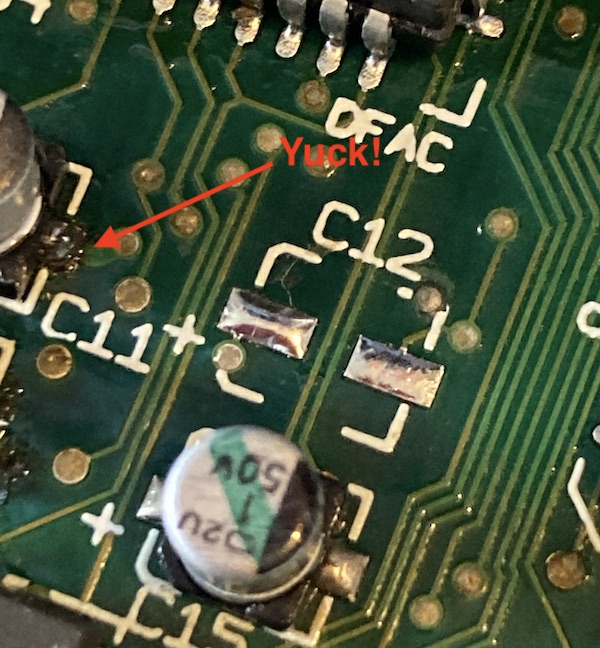
You can see on the negative pad of C11 how much excess solder I was using, and how big of a black mess the joint became as it sucked in some of the gunk from the motherboard as the solder set. I took it slower and made sure to clean everything thoroughly until the swabs came back clean before slamming in a new cap.
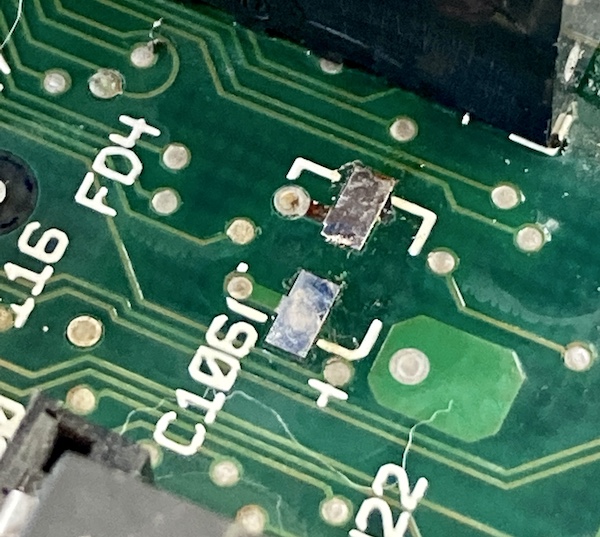
On C106, the solder mask had been damaged around the negative trace. I buzzed this out, and it was continuous, but it didn’t look great. I’m not sure how this exposed trace could be conclusively fixed, other than applying new UV-cured solder mask - which I don’t have on hand.
This pad also took a lot of work to scrub clean. When I’d add solder and wick it away, I ended up with little flecks of dull solder left stuck to the pad. This could be where the joint problems came from on the previous caps - leftover gunk seeping out and grabbing hold of some solder.
I had to touch up a bunch of pins on ICs around the area of leaky caps. The process of doing so wasn’t difficult, but scraping the corrosion off the legs gently with an x-acto knife so solder would stick to the legs again is a bit of a nerve-wracking experience.
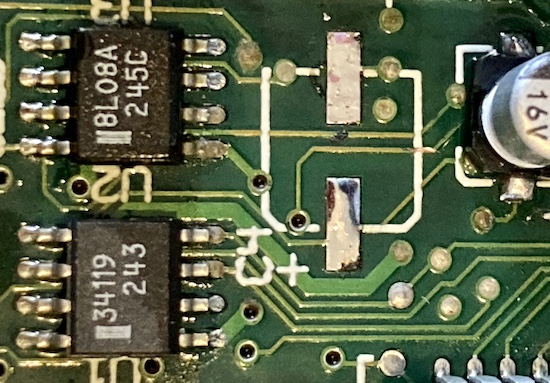
For instance, the 47µF cap at C4 had a lot of grossness underneath it, including what looked like a partially damaged trace. It also managed to corrode some of the legs of U2 and U1 next to it. It took me longer to clean these chips up than to replace the caps. Unfortunately, the Quick 861DW rework station/heat gun I had ordered to desolder chips like this safely was lost somewhere in the pandemic shipping nightmare, so I did what I could with my regular old hand iron, a scraping knife, and flux. I buzzed out some of the traces using the Bomarc Mac schematics to make sure that they were still connected afterward.
Clean Getaway
I knew from others’ experience that the Classic II board needs to be scrubbed clean for it to work after capacitors had leaked. I’ve also been using lots of flux, and that stuff should be cleaned off if at all possible as well.
Lots of people seem to love sticking the motherboard in the dishwasher. Unfortunately, we have really hard water in my province, which I feared might leave conductive deposits behind. I’ll test this theory out in a future entry with something less valuable.
Instead of the dishwasher, I propped the board up into a plastic container and then hosed it down with spray isopropyl alcohol. Gravity did the rest of the work, and I was soon rewarded with a disgusting urine-coloured puddle in the bottom of the container. I did this a few more times, rotating the board 180° between each application, until the liquid coming off the board was clear.
Testing
After leaving the board to dry for a day (read: I had to do some actual work), I put it into the Classic II, plugged in the wires, and let her rip. There was no startup bong, but it went to a nice grey screen… and then a Happy Mac!

Everything seems to work. ADB, floppy drives, SCSI, the screen. Even the original 80MB hard drive spun up and reported for action immediately. Why not sound? I plugged in an external set of speakers, and the Mac’s audio was crystal clear through those. I’ve never heard a sweeter Wild Eep.
My best guess, without re-opening the machine, is that I’ve still got a bad trace somewhere. I checked quickly over the schematics and pictures to see if maybe I had just forgotten to plug in the speaker, but it doesn’t look like I will be that lucky. The audio subsystem was one of the parts of the board I definitely didn’t bother to buzz out in my haste. Over the course of testing the machine over the next few days, I’ve also noticed a faint coil whine on cold starts that might be something in the analogue board starting to get old. I did a check for leakage on the analogue board before putting it back together, but visible leakage only tells you that a cap is totally ruined, not when it’s starting to lose capacitance or gain resistance as it dries out.
Oh well. We have a working computer! What does this thing have on it?
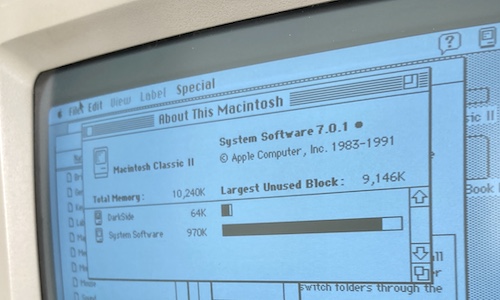
10MB of RAM, nice.
The previous owner installed the DarkSide screensaver, presumably because he saw that there was screen burn-in. Taking care of problems: if only he was the previous owner of every machine in my collection. Not all of the screensavers bundled with DarkSide work on this machine; a good portion of them just display a black or white screen. I’m guessing they must want a colour Mac. It’s weird that there are no YouTube videos of DarkSide operating on a 68k Mac! I’ll have to figure out a capture rig.
I’m glad I could revive this Mac, although there is still more to do. Even this pretty pedestrian recap job taught me a lot about how to properly clean and prep the pads on a motherboard. Armed with this knowledge, I know I can do a better job on every machine I repair in the future.
Repair Summary
| Fault | Remedy | Caveats |
|---|---|---|
| Simasimac, no boot. | Shotgun replace motherboard caps. | Did not fix internal speaker. |
| CRT burned in. | Did not fix. | I can live with it. |