Reviving a Game Gear
Tags: console sega game-gear capacitors repair
With the recent success of the PC-9801NS/T capacitor replacement, I had chip-electrolytic capacitors on the brain. And like I said in this article, the easiest place to find more of those leaky little rectangles in my house was in the Game Gear I hadn’t bothered to repair for years.
I found this machine from the same junk bin that, years later, I would find the Gemini. It was sold as non-working, and I don’t think I paid much more than ten bucks for it. Very few of these machines are still working now, from the leaky capacitors and also the general mistreatment that happens from being a finicky portable console entering its third decade of life. When I took the machine home after buying it, I had opened it, confirmed that the caps leaked, and then put it on a pile of broken machines next to my window… where, unfortunately, it would sit for awhile.
When I got back to it, it had been sitting in that window for so long that the sticky note I had left on the console had faded in the sun. I quickly took it apart, disconnected all the internal cables (everything wiggles out except for the speaker, which is a really annoying one: remove the sound board so you can get clearance and push upwards from the bottom of the plug) and then once again left the machine for a bit while I ordered new caps.

My main motherboard is a “single ASIC” 837-9024 VA1. According to Console5’s excellent wiki, the caps I need to replace are the following:
Mainboard 837-9024:
C1	33uF	6.3V
C4	10uF	16V (or 6v)
C11	10uF	16V (or 6v)
C14	10uF	16V (or 6v)
C42	10uF	16V (or 6v)
C43	22uF	6.3V
C45	4.7uF	35V
C47	68uF	6.3V
C49	100uF	4V
C54	0.47uF	50V
C55	0.47uF	50V
C68	100uF	6.3V

Power board 837-9025:
C5	22uF	35v
C11	100uF	25v
C13	820uF	6.3v

Sound board 837-8562:
C1	100uF	6.3V
C2	100uF	6.3V
C3	100uF	6.3V
C5	47uF	4V
C7	47uF	4V
I had most of these caps on hand, but not all. The Game Gear seems to use every fitment of capacitor known to man at the time:
- The sound board uses surface-mount SMD “can caps” like the Macs;
- The motherboard uses “chip electrolytic” SMD caps like the 9801NS/T;
- The power board uses good ol’ fashioned through-hole caps.
Packaging is everything with this machine, so I’m sure the engineers had a tough time trying to make everything fit and wouldn’t let something like ease-of-repair get in the way. It could be a lot worse: I could be fixing smartphones.
Before I started, I wanted to check if I could possibly replace some of the chip electrolytics with surface-mount ceramics. The ceramics are a lot easier to solder, I don’t have to worry about them potentially bridging their legs together, and also they’ll last basically forever.
I replaced a handful of PC-9801NS/T caps with ceramic equivalents, but not all. The reason why is that ceramic caps quickly lose their effective capacitance as they get close to their rated voltage. Since I’m not launching a Space Shuttle, I eyeball this kind of thing by “doubling the voltage” of the original part.
Some caps (i.e. 22µF/16V) simply can’t be effectively replaced by a 1206-sized ceramic. But something like a 10µF/6V electrolytic? You can safely replace that with a 10µF/50V ceramic, and a 1206 is just the right size:
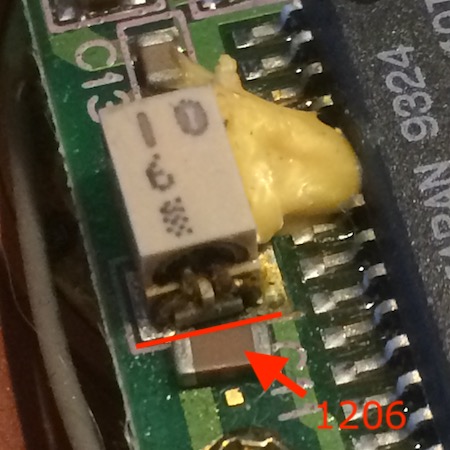
Of course, it’s really difficult to get the rest of those caps in ceramic. Even if you could buy a 100µF cap rated for over 12V in 1206, it would probably be insanely expensive. Basically only the 10µFs on the mainboard ended up becoming ceramics.
I bought a 1206 tantalum to replace the 33µF cap on the mainboard (C1) but it turned out to be just a smidge too short to bridge the pads. I bought regular electrolytic through-hole caps on the same order to hedge my bets, and grow the parts hoard of course.
Popping a Cap
Before removing them, I took a look over the board. The caps didn’t look particularly bad from above - no real obvious leak or doming like I’ve recently seen in other machines. But we’ve also found out recently that a cap that “looks good” can also be hiding horrible corrosive leakage underneath.
Mother Earth, Mother Board
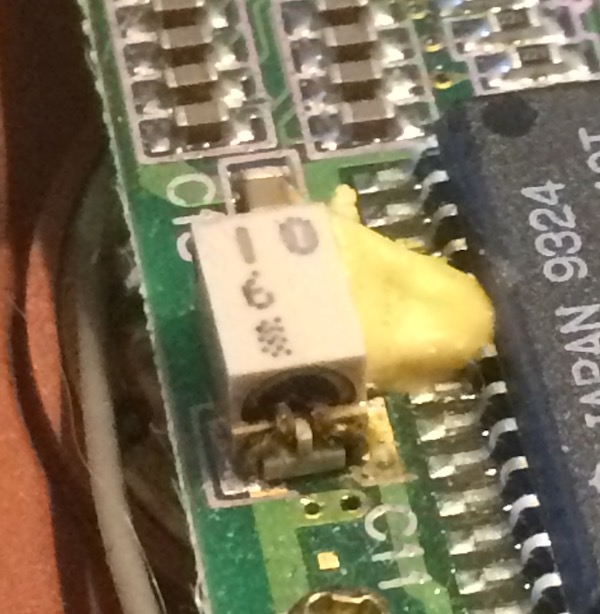
The motherboard is basically clean, although it is weird that Sega chose to put this damping silastic goo only on 2 out of 4 of the 10µF capacitors - just the ones near a surface-mount IC. It was annoying to remove this goo in order to get at the caps. I tried cutting it and then found that the best solution was to just grab it and pull with the tip of a pair of pliers, and it came off like dried taffy. Pretty gross.
Before I started pulling caps, the C11 cap seemed to be the only one that looked particularly bad. And considering its location on the board, maybe it just got wet at some point and rusted. Still, we’ve come this far… all these teeth caps have gotta come out.
However, once I started removing the caps, it seemed like almost all of them had leaked in one way or another. These pads aren’t the worst I’ve ever dealt with, but they definitely weren’t easy either - thankfully, most cleaned up quickly. As with the 9801NS/T, I grabbed the cap body with pliers and then gently rocked back and forth until the adhesive loosened, and then snipped off the legs and desoldered each one individually. Although the board isn’t labelled, it’s easy to remember the negative terminal, since it’s always on the “left.”
Tons of goo came out of, in particular, the 100µF cap between the transformer and the connector that goes to the power board. I’m willing to bet that goo dripping into the blue “9-pin” connector (or stray solder from the very close pad) is a big cause of why Game Gear recaps don’t succeed. This is not really well packaged at all. I cleaned up the area as well as I could, making a note that I should look there first in the case of a failure during test.
The Power To Crush The Other Kids (Again)
The power board was a really easy job - just three through-hole caps. I did order the wrong 22µF caps (a voltage way too low for the old caps’ rated 35V) so I ended up doing an emergency order chock full of high-zoot 22µF caps. Now I’m stocked for life.
Once I got everything assembled, I plugged the board into one of the MK-2103 Genesis II adapters I had lying around (as per the direction on the back of the Game Gear) and probed the lines. While it’s not really great for a switching power supply to be run unloaded like this, I was too lazy to break out the load testers that I’ve used many times before. This might have been a mistake, as you’ll see shortly.
I went off the pinout diagram from this blog entry when I was testing with my meter. I ended up with the following findings:
| Pin | Name | Voltage quoted by blog | Observed voltage |
|---|---|---|---|
| 1 | +5V | 5V | 4.94-4.95V |
| 2 | +5V | 5V | 4.94-4.95V |
| 3 | GND | GND | – |
| 4 | GND | GND | – |
| 5 | GND | GND | – |
| 6 | VREF | 1.28V | 1.28V |
| 7 | VBAT | 9V | 12.4V |
| 8 | NC | N/C | – |
| 9 | +34V | 34V | 33.9V |
So all the voltages are there. What’s up with the “9V” line, though? According to the blog post, that’s what’s coming out of my Genesis II wall-wart, which is putatively 10V:
The 9V output is the source voltage passed through.
It wasn’t particularly unusual to see a 10V unregulated supply reporting as high as 12.4V unloaded, but it did give me a little bit of concern. The Sega service manual calls this pin out as VBAT, and based on the name, I’m guessing it’s some kind of battery-voltage signal that gets fed to the 315-5536 main ASIC.
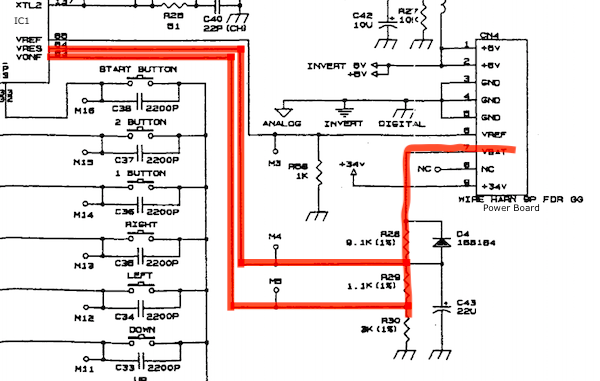
Of course, the service manual doesn’t say what VRES and VONF are supposed to be for. I was still pretty nervous about connecting this without knowing more about the expected load.
In the meantime, I moved on to the sound board.
Sounds Right (wait, wrong machine)
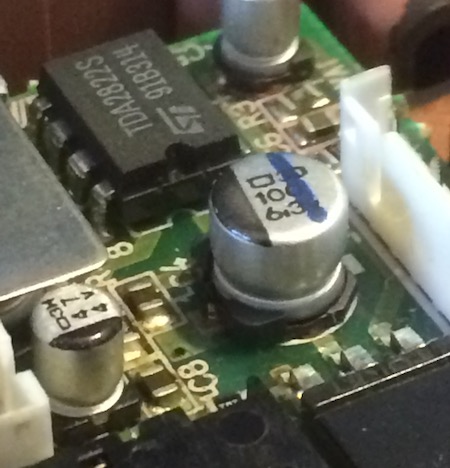
Surface-mount can caps are all over the sound board, just like we saw on the Bad ADB Mac LC. They were removed the same way, and rewarded for their decades-long service with a trip to the jar of bad caps.
Everything is super packed in here, so you have to be careful and plan ahead about where the soldering iron is going to go. You don’t want to accidentally burn a neighbouring component because your wrist got tired.
I ran into a couple problems here. The first is that the caps are glued down, so the plastic bases don’t really want to come off the board. And when you do cut them off the board, there’s a bit of ‘build’ left behind from the plastic that’s still glued to the PCB. This means that the new caps will ride just a hair taller, which brings the top of the cans into contact with the metal RF shield. I don’t think this is a huge problem, but it didn’t feel right. This was mitigated by wrapping the RF shield in Kapton tape where it was likely to contact.
The other problem is that despite having two 47µF, 4V caps on the board, one of the footprints is too small to easily accept the 47µF, 6.3V cap that I was using. I ended up using a very small through-hole cap and kind of dead-bugging it to the C7 position. It’s very tight in here, so it’s easy to melt the plastic on the connectors. I singed the big connector’s plastic during a moment of clumsiness, but I got away with it.
Put it together
I put the machine together. I immediately noticed that it was a little harder to get the two halves of the shell back together, so I had to take it partially apart and push some wiring harnesses around with my finger to make it come together smoothly. You definitely don’t want to force it and end up crushing one of the newly installed caps, pushing them out of alignment so their legs short, or putting a screw through the wiring harnesses. This was kind of nerve-wracking, and it only got worse when I realized the power board’s AA spring had pushed out a little bit and needed to be tapped back in to clear the battery door. Everything did tuck together in the end, and I was able to smoothly screw down all the corners of the machine.
Now it was time for the acid test: a test.
Reasoning that the “that seems high” problem on VBAT would be mitigated by running it on 9V of batteries, I decided to test the Game Gear off of AA batteries. We’ll revisit my MK-2103 in a future episode and see if perhaps it is getting out of spec and needs service.
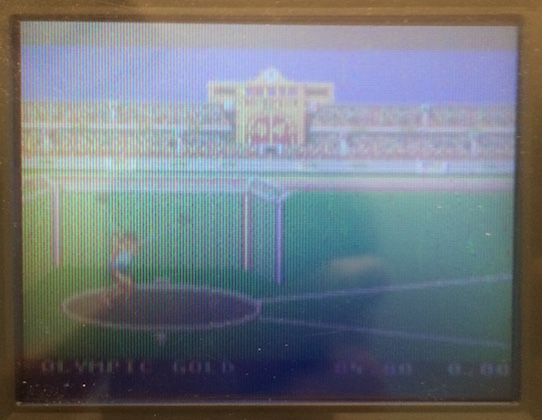
I grabbed a test cartridge I wouldn’t miss (Olympic Gold: ‘92 Barcelona). All of my Game Gear “collection” (12 games) came from an extremely nice Greek game store on eBay which was blowing their inventory out many years ago during that country’s depression. It was such a deal, in fact, that I bought it without even ever having owned a Game Gear!
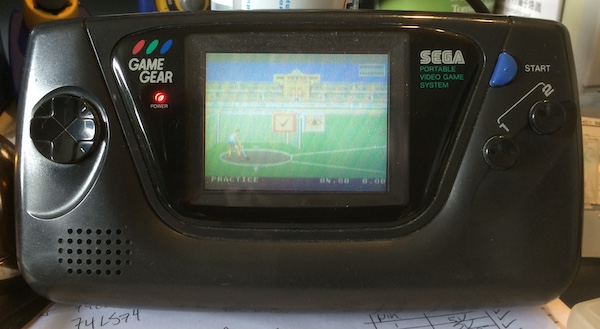
I held my breath and flipped the switch on. Before I could exhale, the words “Produced By Or Under License From Sega Enterprises Ltd.” appeared in infuriatingly tiny print, and switched to the Barcelona ‘92 logo with a little bit of music.
After a few miserable attempts at mastering the shot-put during training, I switched games. Even with the extra year of training time, I am not going to make it to the “2020” Olympics. All the buttons and dials worked and the audio was confidently loud - which is great.
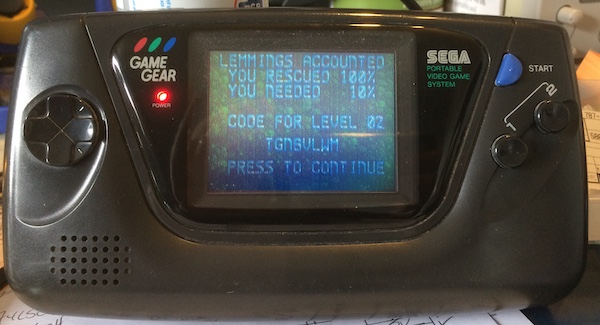
Lemmings is more my speed, although the interface (“change tools by moving to the bottom of the screen, no speed-up mode”) makes this kind of a bad port.
There is a little bit of funky analogue-domain stuff going on with the screen that I would like to look into, but honestly I do remember that being the case when they were new in the early 90s as well. We just didn’t care, because you could play Sonic 2 in the car.
Soak Test
Now, the internet is full of stories of people who have recapped their Game Gears and had them fail a few days later. There’s not a lot of analysis of these “re-failed” machines, but the most popular guesses I’ve seen are:
- Something was shorted together;
- Some other component was marginal and failed now that it is being used again after sitting for several decades;
- Some component got squished during reassembly and failed;
- Your soldering job undid itself;
- These things just happen some times, you know?
In order to make sure I wasn’t one of those poor victims, I decided to play the Game Gear a bunch over the following week. Here’s the entire Grecian collection, representing my turn into part-time video-game reviewing from computer repairing:
| Game | What did I think? |
|---|---|
| Olympic Gold | Pretty low-effort, good music |
| Lemmings | Interface stinks, still fun |
| Bare Knuckle | Don’t drop the lead pipe! A little easy, Yuzo’s tracks are surprisingly close to the Genesis original except for Level 1 |
| Lion King | You can tell why Sega chose to use this as a pack-in promotion. Big sprites, ok music, the pause screen says “Paws.” Still too hard, I have traumatic memories from the Genesis version that my therapist hasn’t electroshocked out yet |
| Sonic 2 | Why would you make a mine cart level your first level? Big sprites, great controls, but you can’t see what you are running into, even more so than on a regular Sonic game. |
| Sega Game Pack 4-in-1 | Feels bootleggy but isn’t; the included version of Columns (Flash Columns) expects you to match four?! The soccer game contains only penalty kicks, the tennis game has Sonic as the judge, and the Outrun clone isn’t too bad except the music is awful. Can’t stop playing the very low-rent Columns variant though. |
| Super Kick-Off | Weird; the players don’t dribble automatically. Is this what this series has always been like? Runs smooth, though, and tons of options. |
| Batman Returns | You get to shoot a boomerang at a clown, or use your car to kill a juggler. Top marks. |
| NBA Jam T.E. | Harder than I remember. Hard to punch the other team. No announcer (obviously.) |
I had to clean a lot of the carts very thoroughly to get them to even run. I’m guessing the cartridge slot itself is pretty dirty, even after I blew it out with canned air.
I finally have a working Game Gear. Now I can try out the whole library!
Repair Summary
| Fault | Remedy | Caveats |
|---|---|---|
| Does not power on. | Shotgun replace logic board, audio board, power board caps. |