Columns Me Maybe
Tags: arcade sega sega-columns pickups repair
I love Columns. I love its creepy music, I love its chunky gameplay, and I love the way that it invariably hands me my own ass within a few minutes of playing. I also love using it to test suspicious Genesis consoles. Is it possible that one could acquire the power of Columns in a more inconvenient format?
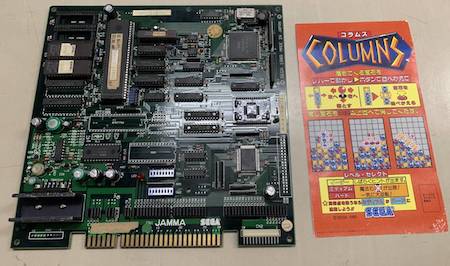
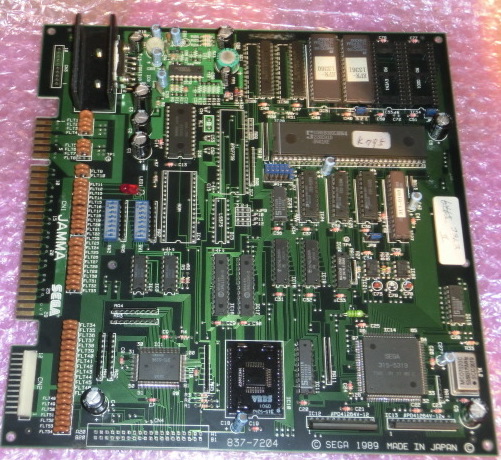
Luckily for me, Columns was also released on Sega’s System C (née System 14.) And I managed to hunt down a nice board on Yahoo! Auctions Japan, which was advertised and shown as working.
How hard could it be to get a known-working board to work, you ask. You’re new around here, aren’t you?
Unboxing
A little bit of a mystery presented itself as soon as I took the board out of the box. This precarious bodge wire was pulling a pin to ground. It seemed to have also been partially melted by a soldering iron accident, and the ground-side bodge was in fact shorting to the adjacent pin, which thankfully was also ground.
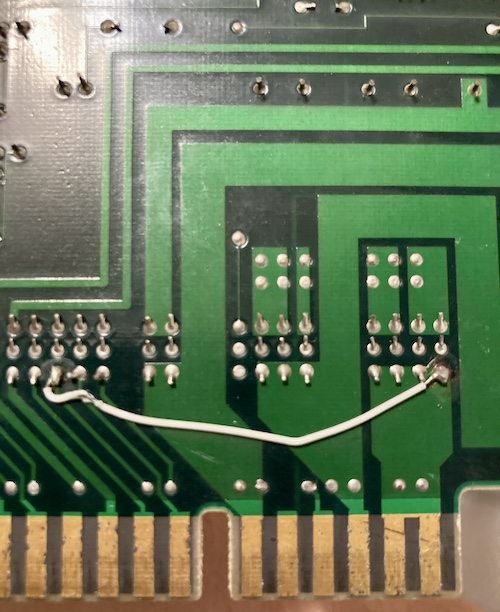
After looking it up in a JAMMA pinout and flipping the board over, the via in question appeared to be going to the “lock out coil #1” edge connector pin on the topside of the board. I wonder what kind of cab this used to be installed in? Either way, this pin is unused on my supergun and appeared to be depopulated on my cabinet. I desoldered the bodge, added to my collection of various lengths of wire, and cleaned up the joints as best I could.
Repair

There was also a 470µF/16V capacitor (C5) which had had both of its legs pulled out, probably in shipping. I had a pile of Panasonic audio-quality caps on hand, which mostly fit the footprint. Additionally, there was a rusted ceramic axial cap (C43, probably 0.0022µF in keeping with other Sega boards) in the area, as well as some rust damage on the nearby 53.693MHz oscillator can at XL2 and on a nearby µPD41264V-12 video buffer hybrid (also used on the Sega Genesis, apparently.) Something leaked, possibly the electrolyte as the cap bled out. We’ve seen how much damage a scorned through-hole electrolytic can do to a board before.
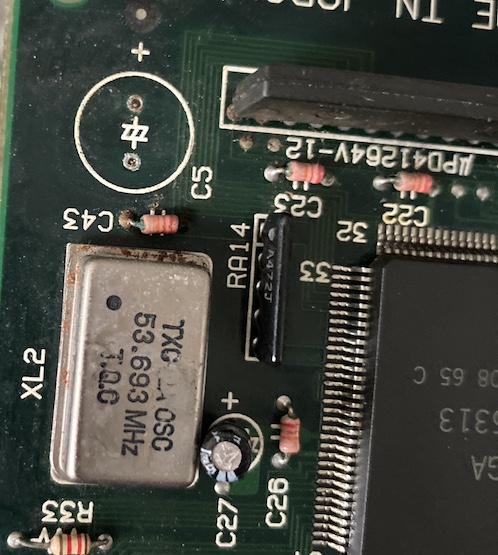
I’m pretty sure this is a bypass cap, so it probably doesn’t even need to be there for the system to function. Better to take care of it than not, though. I cleaned up the area with alcohol and a firm scrub.
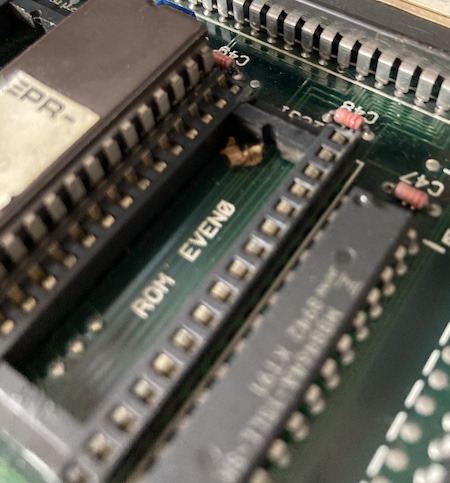
I think when the cap blew apart, the fragments must have slid around the board as well when it was in shipping. I found this piece of suspicious electrolytic-capacitor-like paper under the “even” ROM when I removed it for cleaning.
There were also some exposed traces which had already been tinned by an operator. Maybe they were damaged when the board was removed from a machine. I slapped a blob of solder mask over top of them after verifying continuity.
Test Fire One
As regular readers will know, I have a 1-slot Neo-Geo cabinet of unknown provenance. The body looks like a “Dynamo” HS-5 cab of North American infamy, but the harness has been hacked up – sometimes by me – and it’s generally a little weird every time I work on it.
The current occupant of the cabinet was (and is) a Neo-Geo 1-slot board, which is putatively JAMMA. Could I get away with unplugging the harness from the Neo-Geo and plugging it into the Columns? I tried just that, and ended up getting a blank raster with a periodic white flash, almost like the system watchdog was resetting itself over and over.
Of course, this was the very first time I’d ever swapped a board, so I forgot the golden rule of JAMMA: check your supply voltage before you plug it in. My multimeter reported the supply was set to a scorching 5.66V.

After a thorough inspection of the board, I turned the +5V regulation setting down on the power supply (to about 5.10V) and then tried again. It fired right up.
Although the Columns manual says it will hit the safety limit at 5.8V or above, it’s possible that whatever it’s using for voltage sensing errs on the safe side. Either way, running a putative 5V system at nearly 6V does not strike me as extremely bright.
The Neo-Geo was running at that sky-high voltage, so I was wondering if it really needed to run that hot as well, or if it was some kind of “operator insight” into trying to make the crashy, corroded multicart that came with the cabinet slightly less crashy. If nothing else, the board’s ICs would probably be a lot happier with much less heat in them. I swapped the JAMMA connector back to the Neo-Geo, and – surprise – it started right up and ran fine at the lower voltage. I don’t like to think about how long this poor SNK board was running at this level of spice.
Sound Off
I would have liked to play my new Columns at this point, but there were two problems standing in my way. First, the board was not actually fixed to anything inside the cabinet, and I was holding it by one end with my fingertips while trying not to touch it to anything metal.
Second, the audio wasn’t working, and at least half the fun of Columns is the haunting music. It would clip or make awful static noises as the attract-mode demo proceeded, with a very loud amplifier hum the rest of the time.
The Neo-Geo board had an extremely obvious volume control pot right on the board, so I assumed that whoever built this cabinet in the first place didn’t feel the need to add an external one. At least, I was pretty sure there wasn’t an external one, after sticking my head in the cabinet and worming my body around into various uncomfortable positions in order to trace the speaker wire back to its mounting.
As a result, I suspected the Columns board was running at maximum volume directly into the speaker. My theory was that its internal amplifier was overwhelming the speaker, preventing it from making that pleasing FM-synthesis aroma. This seemed feasible, and looking in the manual for the game confirmed my suspicion, listing a section about how to configure a remote volume control.
However, I didn’t feel right about this. After hunting down and buying an expensive rheostat, cutting up some scrap metal to make a bracket, and wiring a partial jump harness, something about this whole project was still bugging me.
When I searched for advice on adding a volume control to an arcade cabinet, a lot of the “seasoned” folks all were saying that they’d never seen a JAMMA board without a volume control and therefore it was a pointless endeavour to add one.
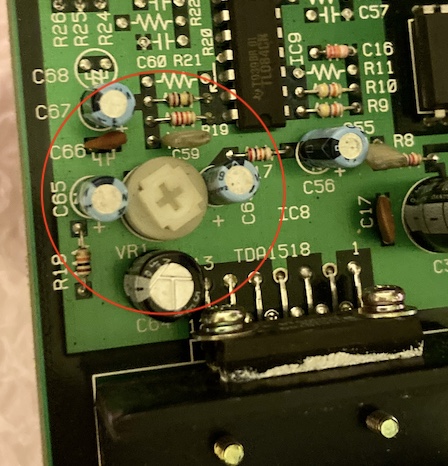
Indeed there was a trim pot on the Columns board, labeled “VR1,” that I noticed when I was first looking over the board. I had assumed it was for fine control of 5V regulation, and I was therefore afraid to touch it. But that made no sense, especially because I already knew that the power supply provides the +5V regulation, and also because VR1 sits right next to a massive TDA1518 amplifier. Hmm.
What if those forum denizens were right? The manual did say remote volume control, which on a second reading implied to me that it was an optional feature meant for the operator’s convenience…
I did a quick web search for “sega arcade pcb vr1,” and it turns out that System-16 boards like Altered Beast use a trim pot called VR1 to control their pre-amp volume level. Would it work for me?
I marked the pot’s position with a marker so that I could go back to the original setting if I needed to. I didn’t need to – it was turned fully clockwise, also known as “eleven.” After rolling it back to about halfway, I started the game up, and the opening strains of Clotho banged out of the speakers.
It turns out that the forum experts were right after all, and my unused hack-job of a remote volume control went back in the parts box.
Call in the Mounties
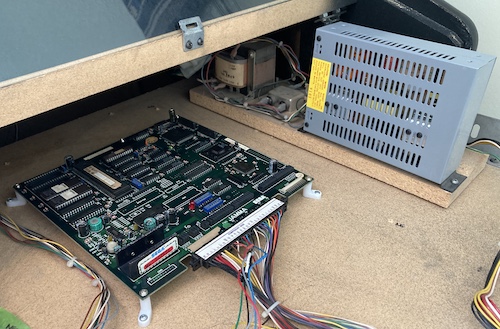
Now, I just had to figure out a way to mount the PCB in the cabinet, so I could close up the control panel and actually play my new game.
To do this, I pulled the tray out a little more, and unscrewed the Neo-Geo board from the wood. This was surprisingly difficult, as all the Robertson (Canada!) screws had been inserted at a ridiculous angle, and I had to remove the joystick panel entirely from the board holder so that I could reach them all without straining.
After cleaning the tray and putting the Neo-Geo board safely away, I put the Columns board on L-shaped plastic PCB risers (eBay special) and screwed those risers down onto the tray. It sounds simple to say, but it involved a little bit of manipulation and a couple drilled pilot holes to make sure I wasn’t going to twist and crack the board or the wood.
As I was reinstalling the board, I noticed that some electrical tape had fallen off a thin black wire on the JAMMA harness where it led into the back of the cabinet. Under the electrical tape was a broken stranded wire, twisted together. Not even soldered. To be fair, it was a very good twist – better than I can do – but come on, people.
I soldered up that connection, slipped some heat-shrink over it, and shrunk it with a heat gun. I don’t think the connection was bad before, as everything worked, but this certainly didn’t meet with my standards.
After a little oopsie where I dropped the entire board holder out of the front of the cabinet, scratching the paint on the front of the wood, I managed (with some help) to wrestle the thing back inside the machine, bolt the panel back on, and do everything up.
Yup – still works. But it took me almost an hour to swap this board.
Enjoyment
I decided at this point that, rather than picking up the hobby of woodworking, I’d play a few rounds of Columns first. That is, in theory, why I bought this board.
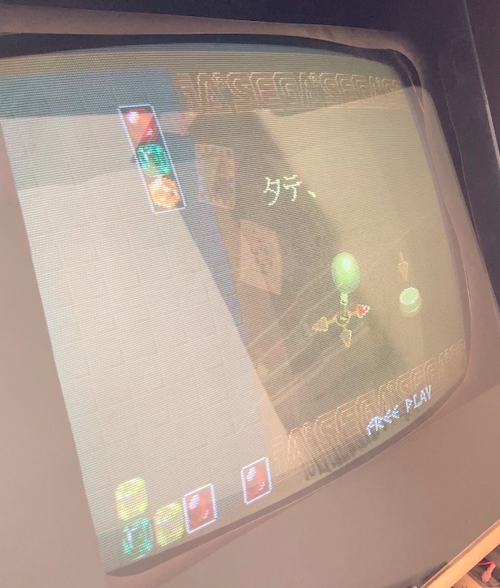
The game is largely similar to the Genesis version, although I found it hard to get used to the different controls and standing so close to the screen. I was pleased to find out that the supercapacitor on the board still holds a charge for days on end of non-power: my high score list is safe!
You know, Columns is great, but how come they never made a Columns II?
Oh.
Repair Summary
| Fault | Remedy | Caveats |
|---|---|---|
| Capacitor C5 pulled out of board. | Replace with new capacitor of similar value. | |
| Game won’t start. | Turn the +5V rail on the power supply down. | |
| Game has flashing white and black watchdog. | Clean the JAMMA edge connector on both sides, not just the parts side. | |
| Sound clips and doesn’t work. | Turn the volume control at VR1 down. | |
| Black wire in cabinet harness is twisted together, not soldered | Solder and heat shrink wire. |