Breaking out of the Snail Maze
Tags: console master-system sega homemade-software homemade-hardware
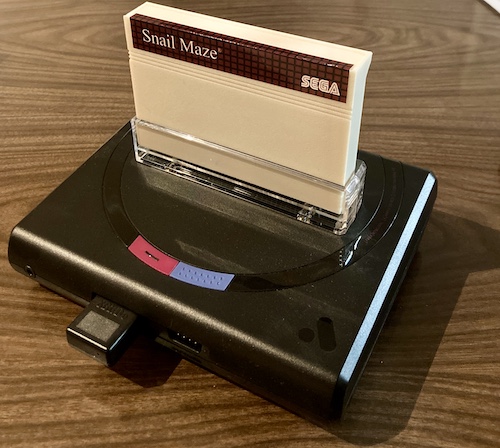
Snail Maze. Either you know what it is, or your video game system didn’t come with a free video game hidden deep within its logic board. Or you bought a later Sega Master System, which didn’t have it. But what if we could bring Snail Maze to those later Master Systems? What if, indeed?
Background
Snail Maze is the unofficial name for a secret game that was contained inside the early US-market Sega Master Systems.
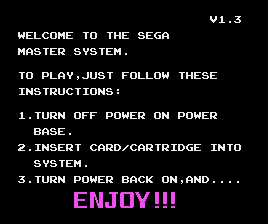
When you powered the Master System on without a game inserted, you’d get a message telling you to turn the system off, put a cartridge inside, and try again.
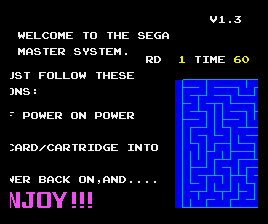
However, on these early models, you didn’t have to do what it said. If you held down buttons 1 and 2, and then pressed Up on the controller, the forbidding screen would slide away and reveal a secret game.
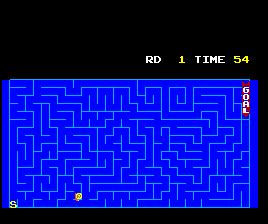
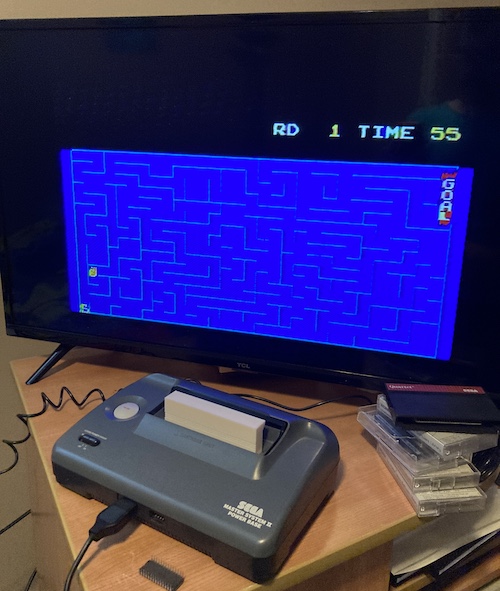
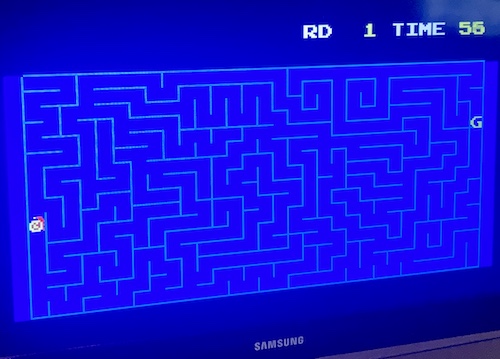
It’s not much of a game, but it’s still a game. Your goal is simply to reach the end of the maze (“GOAL”) before the timer runs out. The game consists of twelve mazes of increasing difficulty and shorter timers.
Reportedly, the method to access the secret game was released officially by Sega USA marketing, in order to provide an extra “hidden goodie” for early adopters of the Master System.
In the 8-Bit Service Games Discord, I was asked by proprietor Braillynn why Snail Maze wasn’t available on flash cartridges, and decided to go about breaking the game out of its BIOS prison. Along the way, I went a little crazy and decided to try running it on a few Master System-alikes that didn’t get the game originally.
How It Works
“BIOS” is a bit of a misnomer for the Master System. Unlike the ColecoVision, which puts handy functions in the BIOS that games can call, the Master System’s “BIOS” is pretty much just a bootstrapper. This is because the Master System is based on the Mark III, which doesn’t have a ROM of any kind. Any Master System games that called Master System-exclusive BIOS routines would obviously be incompatible with the Mark III.
A better term would probably be “IPL,” or Initial Program Loader, a more common acronym in Japanese computers. Indeed, Sega’s own terminology for this mechanism on this and later systems is “IPL1,” but the SMS community has decided on “BIOS,” so we’ll keep using that term throughout the rest of this article.
The Master System’s responsibilities on startup are as follows:
- Set a bunch of variables, initialize peripherals;
- Display a splash screen logo;
- On US models, do a checksum and region check (more on this in a bit;)
- Boot whatever game is inserted, whether it is on a ROM cartridge or My Cards.
- If a game isn’t inserted, depending on boot ROM revision, display an error message or load a built-in game from the ROM.
It’s this last step where Snail Maze steps in.
The Plan
To pull Snail Maze out of the BIOS, I’d first need to find a copy of the v1.3 BIOS. Although none of my own Master Systems had it, that’s floating around out there.
In order to test the “conversion,” I decided to use MAME as my emulator. MAME offers a couple different permutations (“clones” in MAME-ese) of the SMS hardware. sms1 uses the original v1.3 BIOS, and sms2 is an identical machine, except that it uses a BIOS featuring Alex Kidd as a built-in game.
To make sure that I was doing it right, I decided to target the sms2 machine, which made for another BIOS that I had to track down and get.
FYI, the v1.3 “Snail Maze” BIOS has a cool intro animation and a SE-GA chorus on startup, which automatically makes it way better than the later BIOSes, even if you ignore the cool hidden game.
This should be simple, right? Just burn the v1.3 BIOS onto a ROM and then load it like a cartridge. No problem at all…
Getting Approval
Part of what makes the the US-market Sega Master System different from the Japanese one is that it has a BIOS check to make sure that the game cartridge inserted into it is legitimate. Specifically, it looks for a TMR SEGA header in ASCII. It also checks the region of the game, and does a checksum of the ROM contents.
I’m not sure why they did this, because:
- Any pirates would have just pirated the Japanese Mark III games which were not protected, and sold them in Japan;
- The cartridge pinout is totally different between the US and Japanese models of the Master System, so grey-market imports wouldn’t physically work anyway regardless of region-locking;
- Most SMS games have relatively complex page-switching logic integrated into the mask ROMs that hold the game, and would be at least as hard as a Nintendo CIC to copy;
- A lot of the Japanese Master System games ended up with the header placed in them anyway, because the developers were building both the US and Japanese versions from a single code-base, so pirating those games would have worked on the US models too.
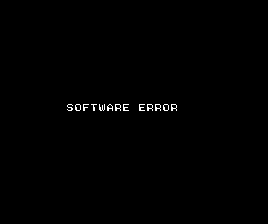
This whole process does have some benefit, in that the checksumming will detect a poorly-inserted cartridge, or corrupt ROM, rusty edge connector fingers, or some other shenanigans at play. In those cases, you’ll see this “Software Error” screen, which I encountered a lot while trying to figure out where my checksum generation was wonky:
Luckily, the SMSPower documentation on BIOS checksums on export models is very exhaustive, including a snippet of the Z80 code that calculates it, so I was able to figure out 99% of this header on my first pass.
To inject the header into the ROM, I kludged together a Python script, which I called SMS Header Injector. It makes a new copy of the original ROM, with a plausible header for an 8kB ROM. Sega was nice enough to leave the portion where the header should go, starting at $1ff0 2, completely blank:

In order to double-check my hand-calculated checksum, I used a GitHub C “Master System Checksum Checker” program. Using this, I found out that I was off by one on each byte of the 16-bit checksum (probably by not simulating Z80 carry properly,) and so I just hacked it to make it work.
After writing the header with the freshly bodged checksum into the empty space in the BIOS ROM file, I ended up with this:

Boot and Reboot
I launched MAME with the modified BIOS ROM attached as a cartridge, using the -cart command line option.
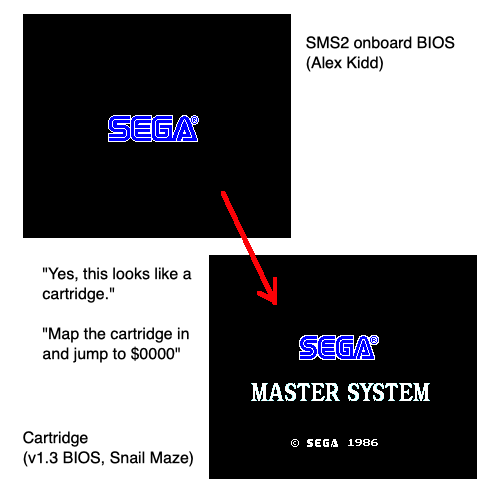
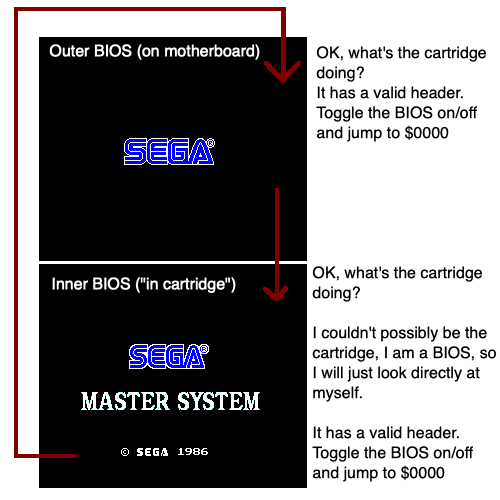
Now that a valid header and checksum have been provided, the outer SMS2 BIOS will see the inner SMS1 BIOS as a cartridge, and try to run it. This here is the startup logo and animation from the v1.3 Snail Maze BIOS:
Now the first SMS BIOS (the one inside the SMS) is loading the second SMS BIOS (the one inside the cartridge) and then running the logo startup sequence.
At this point, it seems to crash and restart from the outer SMS2 BIOS. That’s unexpected.
After a few minutes of poking at it, I had a theory. Because the second BIOS has a valid header on it, it is looking at itself, finding that it is itself also a valid game cartridge, and then trying to launch into it. This creates an infinite loop of BIOSes calling BIOSes, thinking they are cartridges. All of this starts at about $c700 , which contains all the code that checks the header.
Even though I threw some time at it, I wasn’t able to figure out exactly why it “breaks out” to the outer BIOS when it does this, instead of just constantly trying to run the inner BIOS as a cartridge. My best guess is that maybe the system is simply toggling (instead of checking and setting) the latch that pages the onboard BIOS ROM in and out of the memory map, but that doesn’t make a lot of sense, as the SMSPower pages about the paging schemes say that you can’t inspect the latch, only write to it…
In either event, to solve this problem, I then spent about an hour in the MAME debugger trying to figure out where the v1.3 BIOS would jump into the actual game of Snail Maze. Then, I complained about my ordeal to blog superfriend Nicole, who immediately told me there was a commented full disassembly of the v1.3 SMS BIOS out there. So I read it.
This commented disassembly revealed that Snail Maze starts at $0b90 . Rather than try to figure out how and where the SMS BIOS makes a final decision, I wrote another script, called Snail Game Patcher, to patch out the CALL $c700 instruction which enters the header-checking code, turning it into a JMP $0b90 instruction, which is – luckily – the same length.
So now, the order of operations will look something like this:
- The SMS2 BIOS sees that the SMS 1.3 BIOS is a valid cartridge, and launches it;
- As soon as we get into the 1.3 BIOS, it jumps immediately to $0b90 ;
- That’s where Snail Maze lives, so the game starts.
Once that three-byte patch was done, I recomputed the header checksum so that the “outer” BIOS wouldn’t be mad at my new hacked-up inner BIOS, and loaded a new version of the modified ROM in MAME.
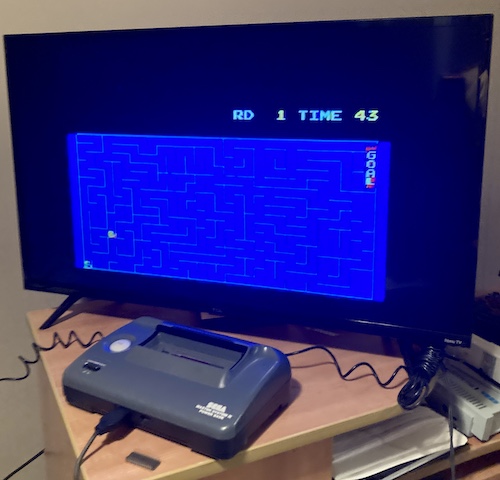
Snail A-maze-ing
Sure enough, after the SEEEE-GAAAAA…
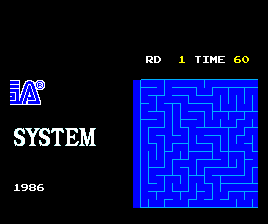
It’s Snail Maze! I’ll miss the shibboleth of doing the special key combination to unlock the game, but I think this is more in keeping with a “cartridge” game, anyway.
It works in MAME. But will it work on an actual system and actual cartridge?
Get a System
I’ve talked about my SMS1 before on this blog, and it’s been rock solid ever since, so there hasn’t been much to say about it. It’s got Hang-On and Safari Hunt preloaded, so it would be a good candidate for this test3.
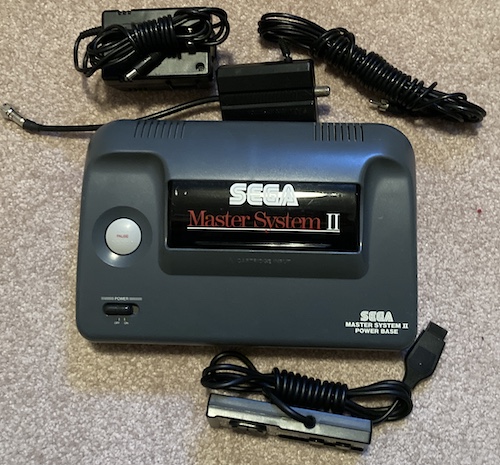
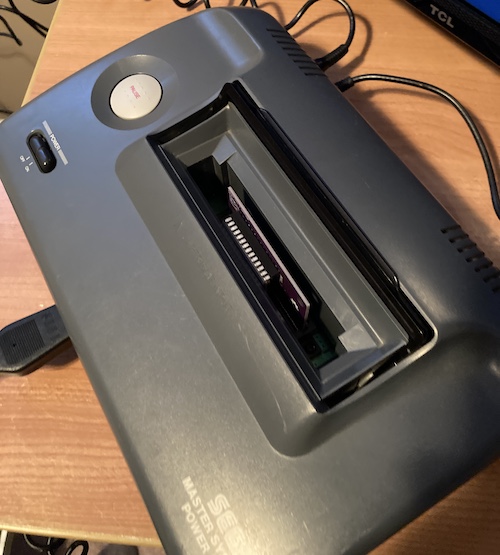
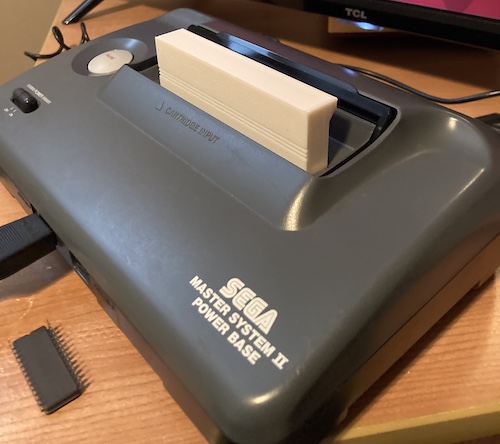
However, I also own a Sega Master System 2. I bought it a couple years ago from my favourite pawn shop, and it came shrink-wrapped, complete with the system, AC adapter, controller, and RF unit. That last one is important since the SMS2 only has an RF output.
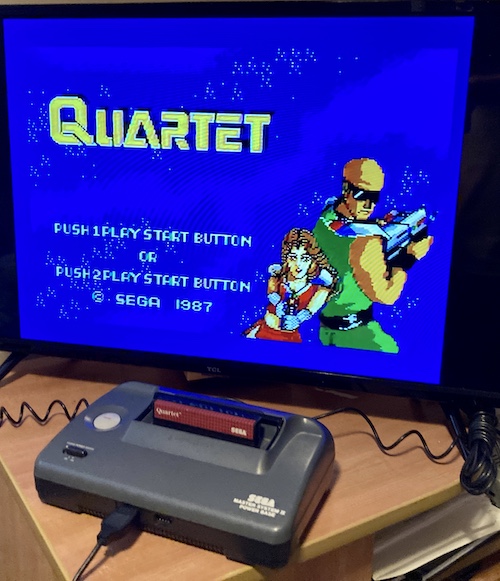
As expected, the SMS2 has a built-in Alex Kidd, meaning the BIOS is likely identical to the one that I’d been testing with in MAME, making it the ideal test system for this silly project. I stuck in a Quartet cartridge to make sure the slot worked properly, and it did.
I decided that now would be a good time, after having carried this system between multiple homes and in and out of storage, to finally break the seal and put it back to work.
Overall, this machine is in great condition. The controller is crisp, and the video and sound output is solid even over RF. My only complaint is that the rolling cartridge door is a little stiff to open, which seems to be a common problem with these. Maybe a little silicone oil will get things moving again, but for now, we got a cartridge to build.
Make a Cartridge
I was a little surprised that I wasn’t immediately able to easily find a gerber file for an SMS cartridge4. Interest in the platform is still pretty rabid, to the extent that someone made a whole reproduction SMS2 motherboard.
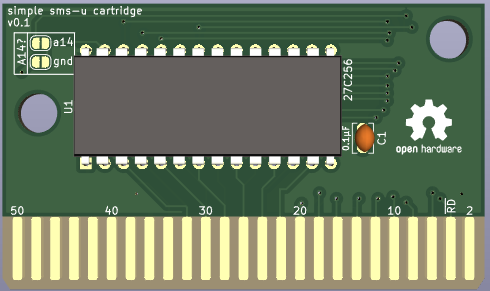
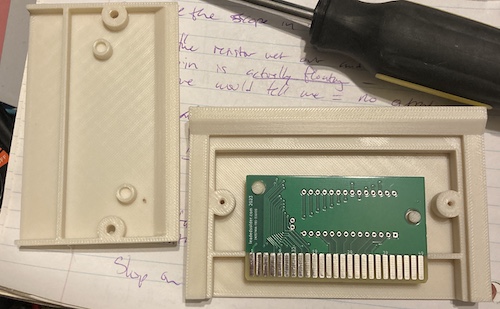
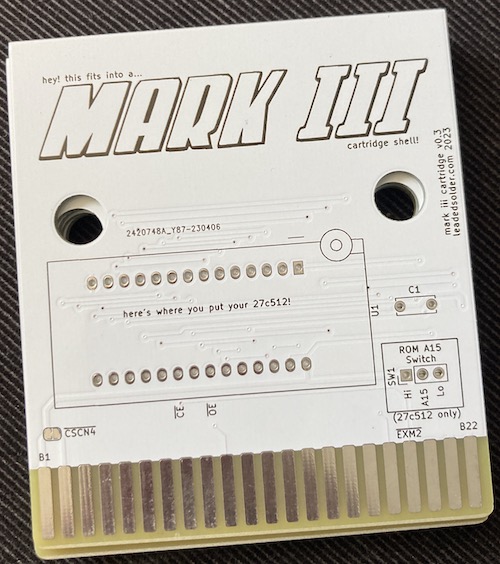
It doesn’t take much prodding to make me gin up a PCB, though, so I opened up my made-in-Japan Choplifter and measured the board. Then I threw a couple hours of my life into KiCad, and came up with this:
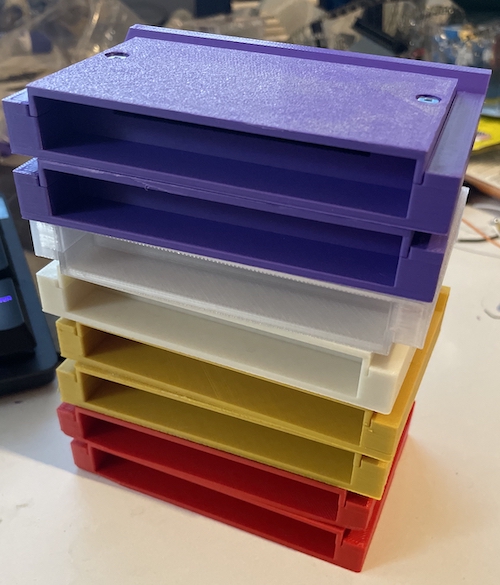
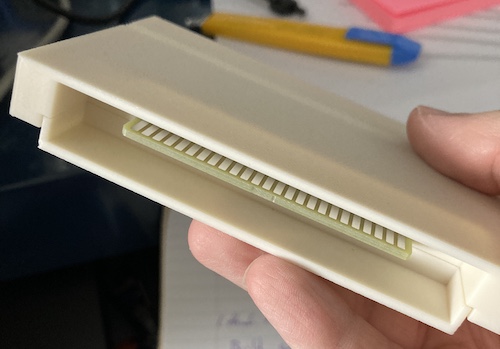
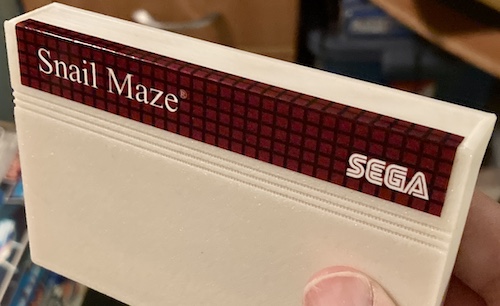
I also found a super-cool 3D-printed cartridge shell. Blog superfriend keegs modified this shell to add some snazzy racing lines and other greebles to the shell, and printed off a bunch of them.
Unfortunately, I screwed up on the first version of this PCB, and it wouldn’t fit into either the 3D-printed or original cases. It was 0.8mm too narrow, although every other dimension seemed to work out.

This is the point where I realized that I had been measuring the width of the board using the wrong part of the cheapo caliper – the difference in width between the tips of the jaws and the shank of the jaws is about 0.8mm, and I just got lazy with measuring the original board in a hurry using the shank as a vise to hold it still. I wonder how many other things I’ve screwed up doing this? I definitely should have printed the prototype board out and test-fit it, like I keep telling everyone to do.
Still, the teeth lined up, so let’s give it an electrical test while we wait for a better-fitting version 2 PCB to arrive.
Running the Cartridge
…it didn’t work. The system would freeze up at the Sega logo rather than transfer control to the game. It also wouldn’t load a 27c256 EPROM I made of TransBot.
After a bit of puzzled head-scratching, I did some more searching. There, I found the aforementioned 32K SMS PCB by Agent24, and kicked myself for not having seen it earlier. I had wired on the cartridge bus to on the ROM, thinking that it was as good as any.
On a real SMS PCB, the ROM’s is wired to what SMSPower calls , which is an active-low signal that gets lit up when the system is trying to access $0000 to $7fff . Hey, that’s the address where we live! Given this difference, I assumed that jumping on the pin meant that the ROM was responding to something it wasn’t supposed to respond to, and potentially clogging up the SMS BIOS’s attempt to do page switching.

I cut the trace to , and then hastily bodge-wired the pin to the pin, which is – tellingly – immediately next to the one for . Seems like Sega was trying to tell me something.
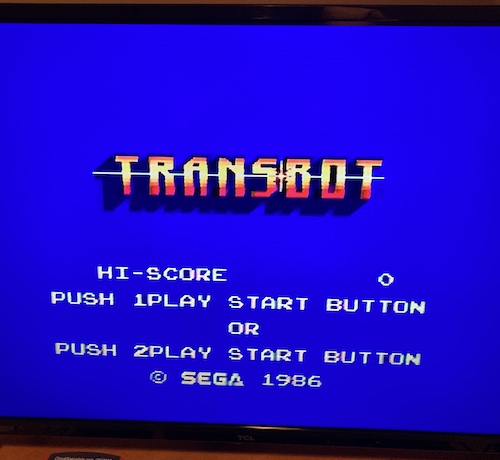
Now, TransBot worked!
…but Snail Maze paused for a second and then blew right into Alex Kidd.
I thought about what else was different. TransBot, being a 32kB game, is on a 27C256 EPROM. Snail Maze is on a 27C64, because it’s 8kB, and also I’m cheap, didn’t want to erase any more 256s, and had a bunch of 64s lying around. I did know that the 27C64 pinout was a little different, but surely it wouldn’t matter? I should have looked into this a little further at this point, because it burned me later on.
Because I was grumpy and wanted results now, I ignored my instincts. I went and erased and burned a 27C256… and that’s when I realized that I had burned the wrong ROM file to the chip. Before, I had burned the patched one, but not the one with the re-calculated checksum and header injected. Both files were generated by my hazy swarm of patches and sat in the same directory, but I picked the wrong one5. I wrote the correct one onto a 27c256 (quadrupled, of course) and shoved it into the cart.
It worked! I can’t imagine this is the only SMS2 to ever have played Snail Maze, but it might be the only one that hasn’t had a BIOS swap to do it.
Shelling Out
After I finished (or so I thought) bodging the PCBs, a PCB with a correct fitment for the shells arrived. Of course, because I jumped the gun on ordering it, I still had to do the bodge for , but this is a small price to pay when it fits this well:
This PCB was too small to bevel, so… I didn’t. I will do it by hand for the “final” revision so that consoles don’t have their little cartridge-slot feelers bent out of shape.
It fit great into the Master System 2, as well:
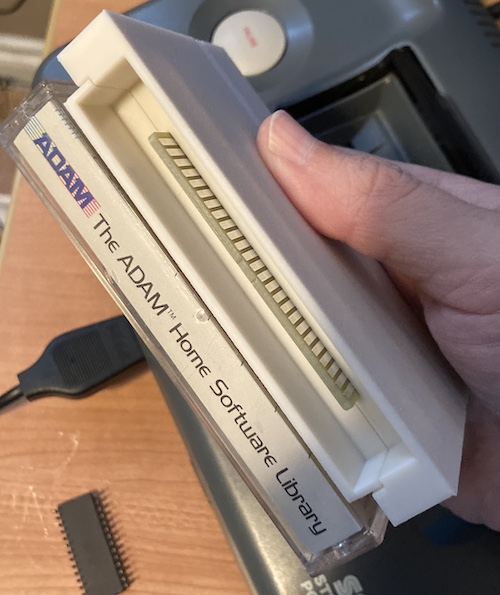
As an aside, this is the point where I realized that the SMS-U cartridge shell is exactly the same size as a cassette tape case:
Would my freshly-made cartridge work?
No – the very first run revealed a “Software Error.” Undaunted, I took it back to the workbench to figure out what went wrong. It was something that had scratched at the back of my mind all this time – I was now using an 8kB 27c64, because I had a lot of them left over, rather than the 32kB 27c256 that I had tested Snail Maze with on the previous cartridge.
Although most of the pins are the same between the 27c64 and the 27c256, not all of them are.
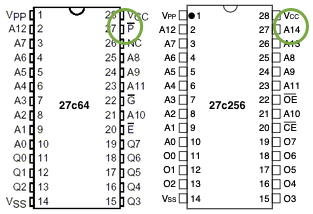
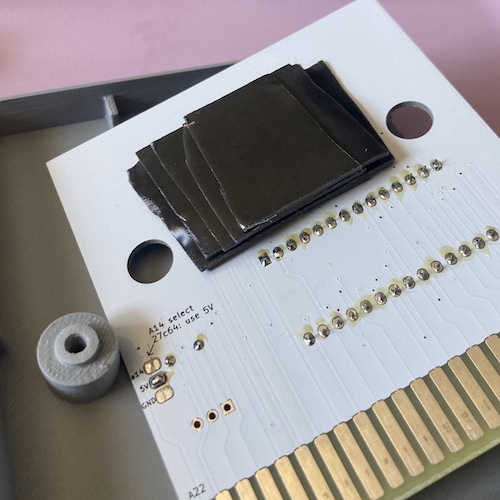
That’s right. The 27c64 has an active-low “program” pin on pin 27, . On a larger 27c256, which the cartridge PCB was designed to accommodate, this pin is instead A14.
With the PCB as it was, this pin was tied to the A14 address line coming off the CPU. My theory was simple. A14, being an address pin, is sometimes low. And when that pin was low, the 27c64 wouldn’t respond to read requests properly, because it thought it was being programmed. Thus, the cartridge seems to puke garbage while its checksum is being read, resulting in a “software error.”
I cut the trace between A14 and pin 27, and then bodged it to the adjacent +5V pin using a short length of Kynar wire. Let’s try again…
Woohoo! Snail Maze on an unmodified SMS2, with all-new parts, in a new cartridge shell! This project can’t really get much better… or can it?
I guess it can!
Mark III Experiments
For the last stanza of this ridiculous quest, we must turn now to the tiny island nation of Japan. Once bursting with Segas, in recent years, domestic Master System populations have been decimated by foreign bargain hunters, e-waste recyclers, and the universe’s general slide towards entropy. For just a couple dollars for a PCB, you can help bring Snail Maze back to its country of origin.
In Japan, Snail Maze also wouldn’t have received a Mark III cartridge, most likely because it is too simple to justify a full release. However, it seems like the game is in Sega’s recent Yakuza-alike, Lost Judgment, integrated into the Master System that your protagonist can play in his office. That information conflicted with my belief that the game would not have existed in the BIOSes of any of the Japanese MK-2000 systems.
To try and figure out if the game was hidden in the Japanese Master System (the Mark III has no onboard BIOS ROM – as we’ve seen from tearing the Sega machine apart previously – and therefore could not contain Snail Maze,) I asked blog friend Tianfeng if he would bring out his SMS-J collection – two units – and test both of them. Unfortunately, both of them were the same version (2.1, Space Harrier background) and that version did not contain Snail Maze. This is hardly a conclusive test, however, so perhaps there really is an SMS-J out there with Snail Maze built in. Please write in if you know otherwise!
At least I can confidently say that we’re bringing the game to two Japanese Master Systems!
Casing The Joint
Of course, doing a PCB is not enough. We’d need a cartridge case, and to get the measurements for that case, I broke out my Mark III copy of Phantasy Star.
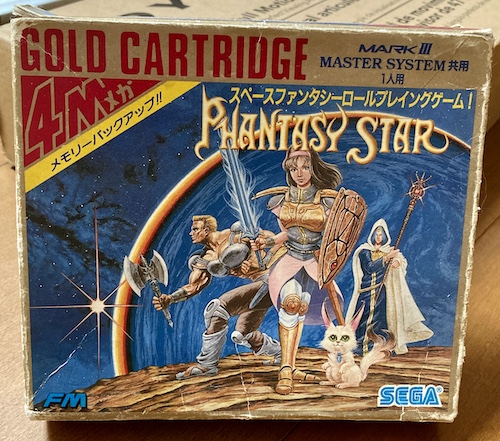
Sega R&D genius Hideaki Sato has previously told Famitsu that he regrets the “tombstone” appearance of the SG-1000/Mark III cartridges. Not only do they not fit in with the style of the system, but they are surprisingly large even if multiple ROMs are on the board. I’ve always wondered why the US Master System got such tiny cartridges by comparison, and maybe this comparison will lend some insight…
The SG-1000/SC-3000/Mark III cartridge shell is, shall we say, heavily inspired by the ColecoVision. There’s no way Sega didn’t have one of these on hand to crib from when they were designing the SG/SC.
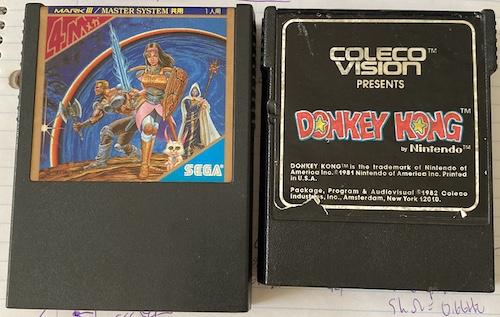
Maybe, just maybe, Sato-san’s dislike of the cartridge design originates in a feeling of guilt?
Even around back, the “Sega Made In Japan” copies from the “Coleco Made In USA” patterning. The strange tabs on the back of the Coleco cartridge are intended to hold controller overlays, I only found out recently. As far as I know, there is no such overlay system for the Mark III, whose cartridges are much wider than the controller anyway.
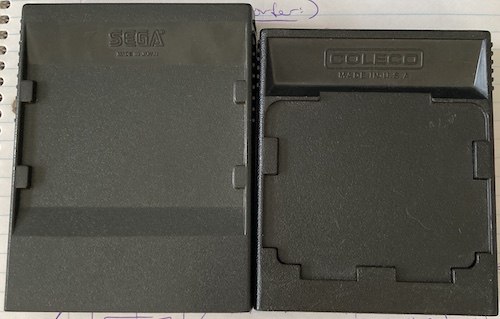
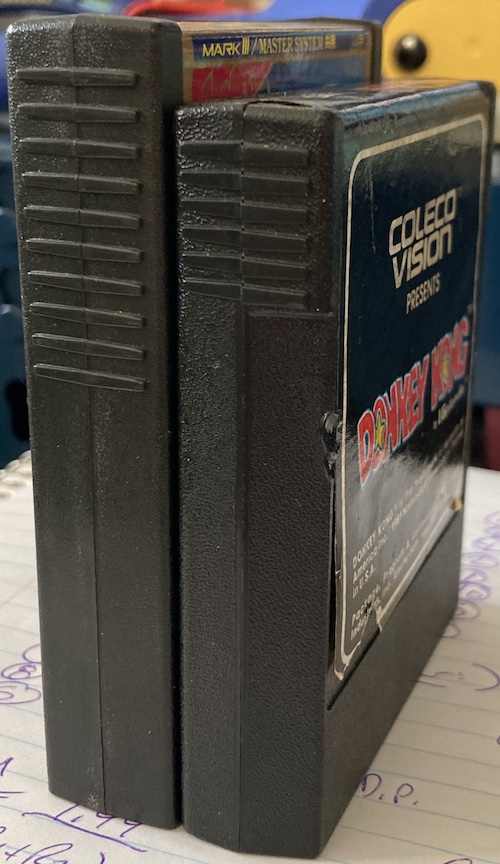
In fact, the only real differences between the ColecoVision cartridge shell and the Sega one is that Sega added more grabby “greebles” on the side (10 to Coleco’s mere 6,) and made the cartridge slightly taller. The Coleco version also has a jazzy front bevel leading into the label which was probably seen as “too 70s” for Sega’s more refined sensibilities.
Mark III PCB, Mark II
The first PCB didn’t quite line up with the holes as measured on a real shell (quelle surprise,) but the second version fixed it all up. For some reason, I couldn’t bring myself to test my PCB this time without having the appropriate shell around it.

With a 27C64 UV EPROM that I found in my basement (don’t ask,) I finished assembling a revised board. Now, we were ready to get some Mark III Snail Maze action going.
Or at least we would be, after I tore my entire house apart looking for the Genesis 1 AV cable. A hasty order from the jungle site finally provided the cable, at which point I realized my original Genesis 1 AV cable was sitting behind the TV… still plugged in.
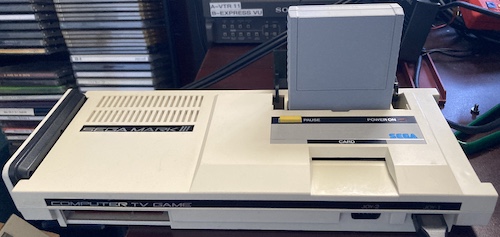
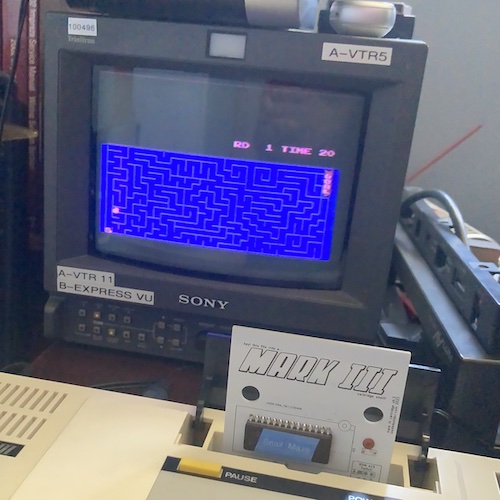
Regardless, I was at long last ready to test the Mark III Snail Maze.
It didn’t boot! The Mark III achieved sync and seemed to run, but the game didn’t start.
However, the action of inserting it didn’t feel right to me. I went back and removed the PCB from the case and tried it in the Mark III, and Snail Maze booted right up.
Great! We know the cartridge PCB works, and the software does too, so what’s the problem?
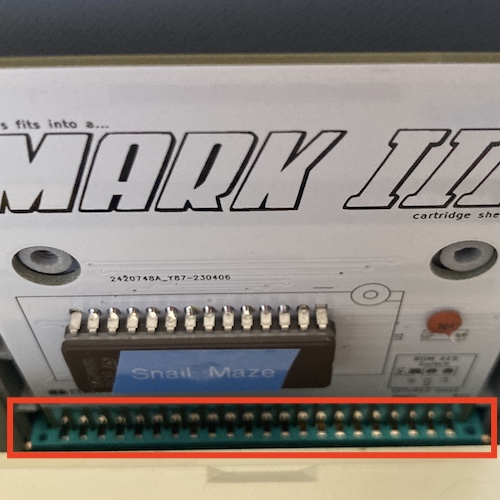
The Mark III has a very shallow cartridge slot, surrounded on all sides with thick plastic. It seemed like the problem was that the PCB when mounted into the case was too wiggly, and the PCB was too far forward in the case compared to a real cartridge. Combined, it meant that the PCB wouldn’t completely seat in the cartridge slot, even when it felt like the cartridge shell had “bottomed out.”
To confirm this, I stuck a bunch of two-sided tape on the back of the PCB, and then tried to mount it with the front case missing, at which point it became obvious that the shell wouldn’t go down enough to let the PCB fully seat in the (admittedly-aftermarket) cartridge slot:
We made a new version of the cart shell, pulling the PCB “back” in the case by 1.6mm, and that fixed the depth issue. There was still a lack of contact when the assembled shell was inserted. This was because the holes in the PCB were too big, and as the cartridge shell went into the Mark III, the edge connector pushed the PCB up and out of contact. A quick tack with some hot glue held the PCB in place long enough for a test fire.
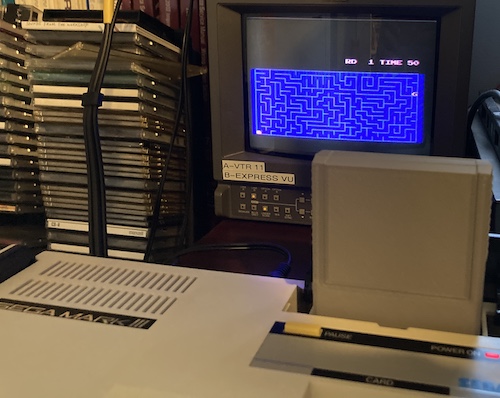
Yes! Snail Maze on a Mark III, with an intact cartridge shell. Japan has truly received a gift today.
Some Other Junk I Had Lying Around
My Analogue Mega SG came with a Master System adapter. It would be hypocritical of them not to support a homemade cartridge, right?
Sure enough, this provided Snail Maze… in HD. Snails so sharp you can cut your eyes on them.
As you would expect, the Power Base Converter did the same thing for a regular ole Model 1 Genesis, too.
Unfortunately, I don’t have the Mark III version of the Power Base Converter (the “Mega Adapter,”) so that section of the compatibility list will have to remain untested for now. Feel free to send me one, or better yet: build your own cartridge!
Happy Snail Trails
Thank you to everyone who encouraged, or at least didn’t call the police on, this very silly project. Thank you especially to keegs for making and printing a bajillion versions of each cartridge shell.
Was Snail Maze actually worth all of this effort? Absolutely not. Did I learn something? Yes! That made it all worthwhile in my book.
Here are all the downloads for the Snail Maze-related items developed during this post!
There’s still more places where we can take the Snail Maze party.
I want to try and figure out how to make an IPS patch (perhaps there’s a tool that can do it from a binary diff?) so that I can upload the fix to somewhere that focuses on patched retro games, such as RomHacking.net.
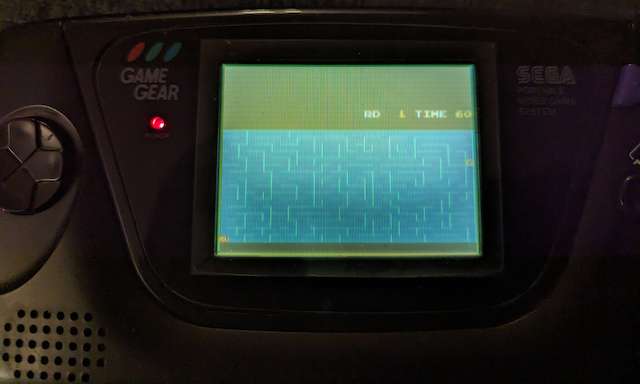
Maybe it will work on Game Gear? Only one way to find out…
Update: It does work. Thanks to skonkfactory on Mark Fixes Stuff’s Discord for trying it on a real Game Gear, using a flash cart.
-
The earliest use of the term “IPL” that I’ve found in Sega documentation is from the boot rom for the 1984 SF-7000 disk drive unit for the SC-3000, which actually is a BIOS, to boot. ↩
-
The SMS BIOS actually checks multiple locations for this header, but $1ff0 is the only one that is present in an 8k ROM. ↩
-
It turns out that if you hold UP + Button 1 + Button 2 during startup on this SMS, it also starts Snail Maze. Three built in games, right under my nose. What a luxury! ↩
-
While I was trying to debug the OE/CE issue (more on that in a bit,) I ended up finding this 32K cart project by Agent24. I don’t know why it didn’t come up in my searches earlier, because I would have just used it and saved myself some bodging and a couple re-spins. Google is not as good as it used to be, yeah, that’s it. ↩
-
The file names are
patched.smsandheader.sms. Since it had been a few days since I wrote the code, I chosepatched.smsinitially, which was the wrong thing to do. There’s no header on that one at all, becauseheader.smswould be the patched (i.e. hacked) version with a proper checksum slapped on. To the SMS BIOS, the header area of this ROM would have been a block of $ff garbage, and it decided that there was in fact no cartridge inserted, and jumped into Alex Kidd. ↩