Mark III To The Future
Tags: console sega mark-iii master-system corrosion repair
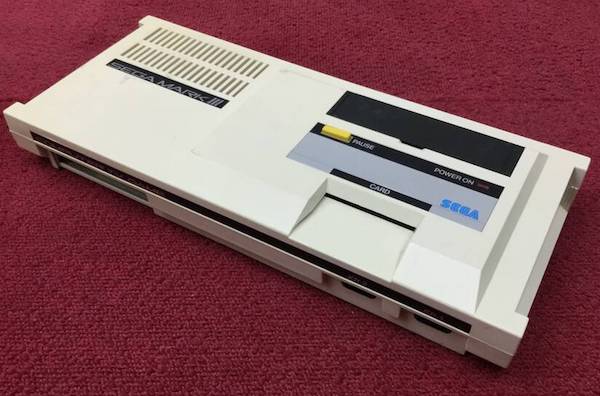
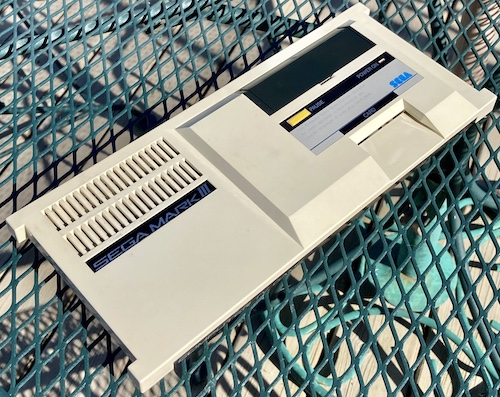
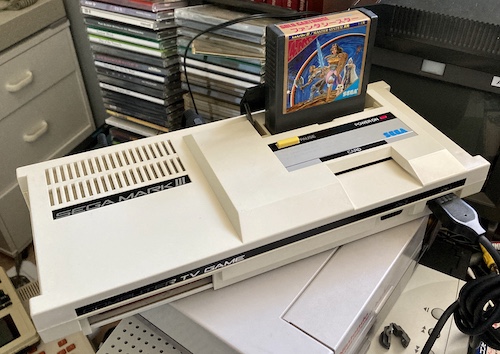
On my latest jaunt to the wild world of Japanese auctions, I found this Sega Mark III that nobody else seemed to love as I got it for only ¥1100. Once it arrived at my home, I realized why. A Sega that can’t play games is too sad for words, so let’s get the thing up and running again.
In case you’re unfamiliar, the Mark III is effectively the same console as a US Sega Master System. It’s the successor to the SG-1000 II (hence the III.) Japan got both the Mark III and the Master System, with little difference between them. The Master System has FM sound, basically.
So why did I get a Mark III when I already have a perfectly good Master System? Good question… my only excuse is that the cartridge slot pinouts are different, I already had some Japanese Mark III games in my collection that have yet to be played, and I wanted to be able to play my SG-1000 games on something other than my long-suffering SC-3000.
In the original auction, there’s a lot of parts missing from this humble Mark III:
- No power supply;
- No AV cables;
- No controllers (and those can get pricey);
- No little port door for the expansion slot.
The latter didn’t matter so much to me as I fantasize about building a homebrew FM expansion such as the brilliant SMSFM, and the others are just the same as the parts I collected for my Master System a few years ago. It would also be cool to pick up an SK-1100 keyboard for the SG-1000, which I think would enable me to run SC-3000 BASIC on this thing.
I really like the quirky 80s-Japanese-ness of this label on the top of the case:
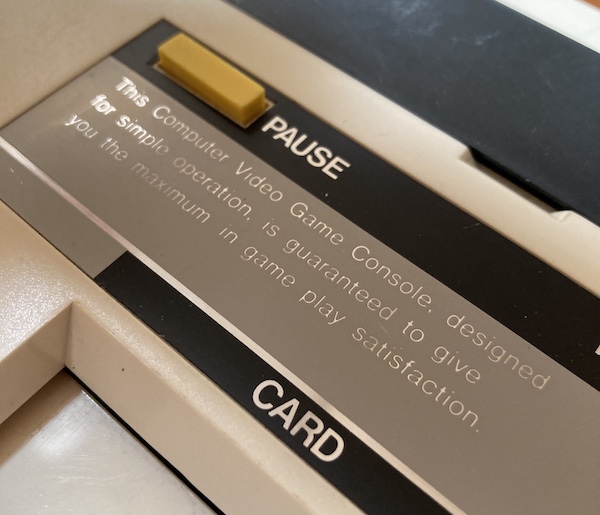
It’s guaranteed!
Looking At It Even Medium-Hard
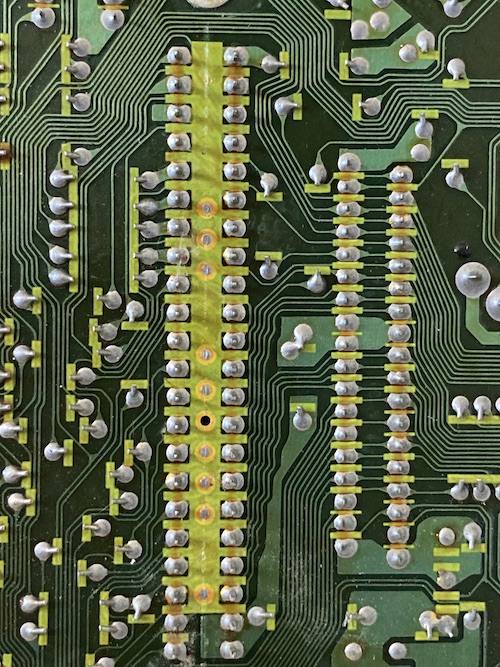
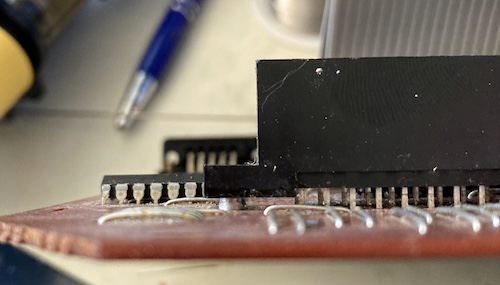
The initial inspection wasn’t positive. While the case plastics are in mint condition, they’re really filthy, and the cartridge slot has some green corrosion that tells me it may be beyond saving:
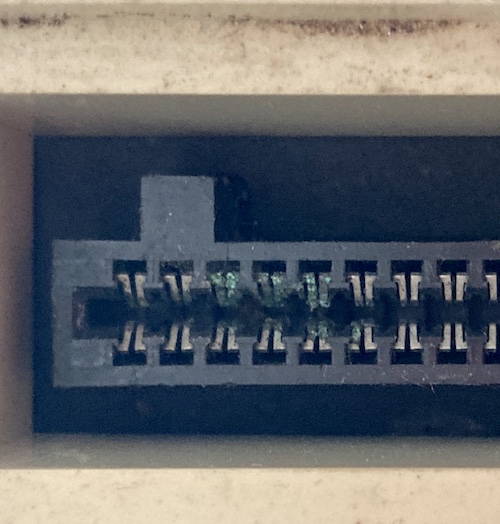
I think these are the address pins A2…A4 and the I/O and memory read-write pins, based on the SMSPower pinouts page. Definitely necessary to play a videogame, I’d say.
The power switch was also loose and ‘floppy.’ It would stay on one side, but it didn’t have any springiness to conclusively lock into either position when toggled. More of a fader than a switch, which is really dangerous when you’re dealing with a power switch. Probably the internal leaf springs have gotten worn out over the years and needed a little re-tensioning to provide the same crisp action as my SC-3000 has. You hear that, SC-3000? That’s what happens when a machine is actually used!
Taking apart the console, I noticed the screws were still tight and the plastic clips holding the case halves together had plenty of flexibility left. It’s challenging to get the motherboard out, because you have to unscrew the card slot from the top of the case, but you don’t have quite enough room to fit a regular screwdriver in. I ended up using a stubby one. I guess Sega didn’t want to spend a buck on the connector here so that the ribbon cables could come off the motherboard.
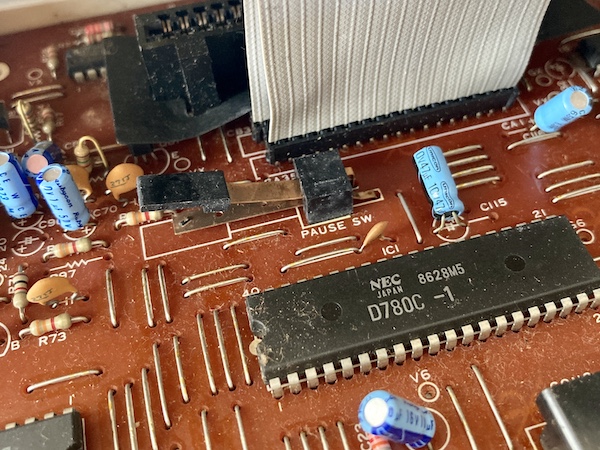
Check out this weird little leaf switch that the “pause” button on the top of the machine pushes onto. The tactile response on this thing actually isn’t bad, but primarily I enjoy the ridiculousness.
There wasn’t immediately anything obviously broken about the power switch, but I don’t have a good one for comparison. It’s possible these spring leafs have lost their tension and need to be re-arched.
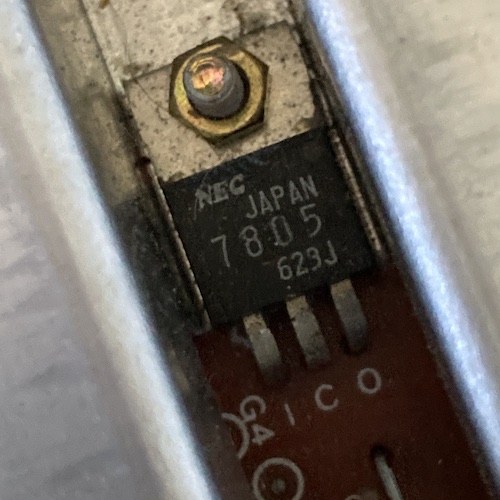
Uh-oh. An NEC 7805 5-volt voltage regulator. Our friends at the Electric Company might be good at a lot of things, but these little voltage regulators were a low point of their careers. I think I will pre-emptively replace this with a modern solid-state switching replacement, both because I’m a little afraid of these and because I want an excuse to try these regulators out.
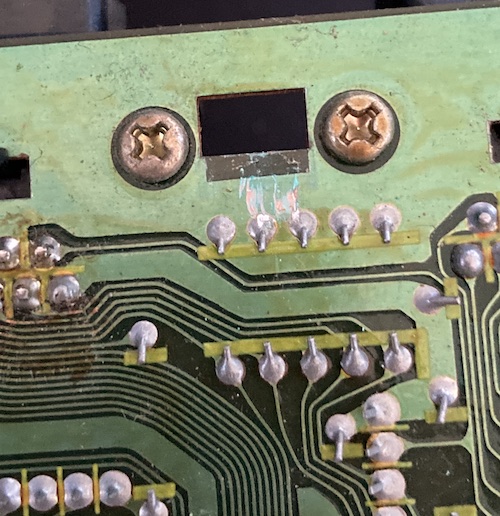
In order to remove the motherboard, you have to pry back some little plastic hooks to pop it free from the case. I swear I didn’t do this damage. Someone else has been in here, probably to reflow the controller port nearby, judging from all the leftover flux. Lucky for me, it’s all on the ground plane anyway so these capacitor pins aren’t bridged to somewhere they shouldn’t go by the failure of the solder mask.
Deep Scrub
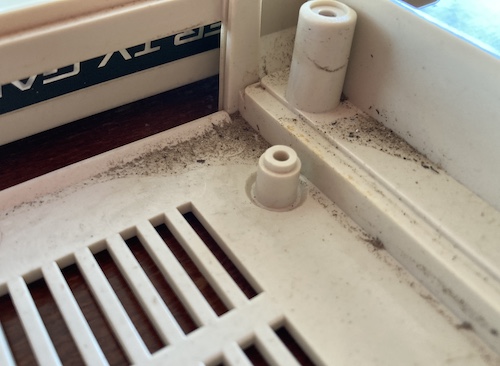
The case and motherboard are both filthy, and perhaps spent some time in a shed or otherwise exposed to the elements. There’s even a bit of rust, which tells me that some water probably got in here, too. Thankfully, all the solder joints and traces look okay, but it’s going to take some elbow grease to return this Mark III to stardom.
I used a bit of Windex to break the hold of the dirt and I was surprised how well it worked. The grit just flowed right out of the case, and then got a dose of kitchen-sink water to finish the job. All of the corners of the case trapped a lot of dirt. Surprisingly, the ‘cooling’ vents weren’t so bad.
There’s a couple scrapes and dark marks on the top of the case that I wasn’t able to shift, which is disappointing, but the whole thing looks much better. I finished the case cleaning off by drying it for an hour on my porch in the sun (July heat!) and then sprayed it with some 303 Aerospace Protectant to make the black cartridge-cover plastic shiny again and protect the stickers from fading.
Cart slot replacement
I knew from reading Raphaël Assénat’s brilliant Mark III/SMS-J cartridge adapter page that the Mark III cartridge slot was a 0.125”/3.18mm 44-pin slot. For his adapter, he used an EDAC edge connector.
The EDAC 346-044-520-202 part was still in stock at DigiKey, so I took a chance to look at the datasheet to see how close it is and then calipered the original slot. It would be really nice for the screws to line up, not just for the rigidity (and longevity) of the slot but so that I don’t have any leftover grumbly doubts about my fix.
| Measurement of the slot | My measurement | Datasheet measurement |
|---|---|---|
| Edge to edge (“A”) | ~90mm | 90.42mm |
| Screw hole to screw hole (“B”) | ~82.5mm | 83.69mm |
| Central cart-slot region (“C”) | ~77mm | 77mm |
So I was pretty close on every dimension except that of the screw hole. I’m still not very good with a caliper and sometimes take cockeyed measurements, so I was willing to accept that 0.5mm on each side was a possible error. It should still align alright. I ordered the part. It’s nice to have a part that’s still in active production available instead of having to cut up, say, a Power Base Converter.
At $6.65 a shot, it wasn’t particularly cheap, but I ordered two anyway because it would be cool to one day make an SC-3000 clone so I can have a working keyboard. It’s nice that it comes in such a cool teal colour, too, which I’m sure is some kind of industrial colour coding I don’t yet understand.
When it arrived, I held the new slot up to the old slot and every dimension was bang on. This is almost certainly an exact replacement, and I need to take a class on how to use a caliper sometime.
All the pins of the cartridge slot connector desoldered easily and cleanly with some fresh solder added beforehand, but with an extreme stench of ozone-y flux that I’ve never encountered before. It was like trying to desolder a used ashtray, which honestly might be not too far off the mark.
I ran into a bit of trouble getting the slot out once it was desoldered: there are some aluminum rivets that come up through the underside that are press fit into the holes in the cartridge slot plastic. It must be how they align the screw holes at the factory. I had to use a flathead screwdriver and some precision prying to get them to come free of the plastic - it’s a really good thing that the board is single sided.
I couldn’t get the old rivets to cleanly go into the new connector. Since they’re very soft aluminum - and old aluminum at that - they just kept distorting. I don’t think they are too necessary.

The old slot is a little taller than the new slot, but I don’t think that will matter too much as cartridges are not captured by the top case plastic at all. It’s just a straight hole to the motherboard that’s covered up by some black foam rubber in the original slot.
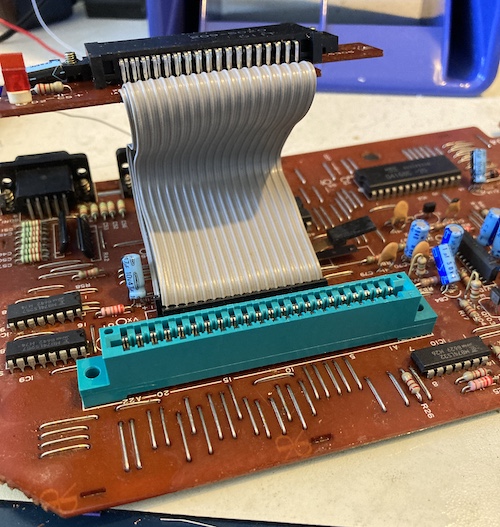
The new slot dropped right in and soldered down quite nicely, and with some thorough cleaning in between, it didn’t even stink.
I Have The Power
Although I haven’t actually tested the NEC 7805 5-volt voltage regulator, I know that on other Mark IIIs and Master Systems, they have a tendency to either die (best case scenario) or drift up to the input voltage (worst case scenario.) I’m hoping the latter case hasn’t already happened. It looks like someone has touched up the joints on it…
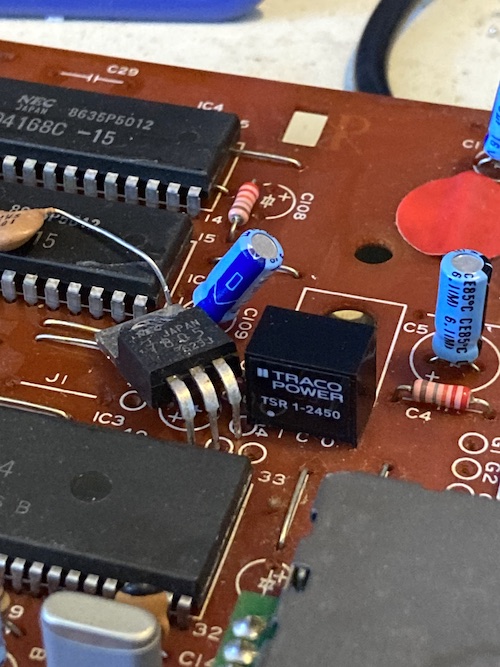
I decided to replace the old-school NEC 7805 with a Traco TSR 1-2450 solid-state switch-mode regulator. The new one is much more efficient (at 78% efficient, it produces so little heat that it’s cool to the touch when running), has very little ripple, and will tolerate a much lower-voltage input power supply, which could further reduce the heat. The downsides of the switch-mode regulator as I understand them is that it can introduce noise into the power rails, it costs a bit more money, and that some kinds of 80s chip will act up as a result of not being hooked up to an old-school regulator. However, lots of other Mark IIIs have had this part replaced, so I felt okay going ahead with it.
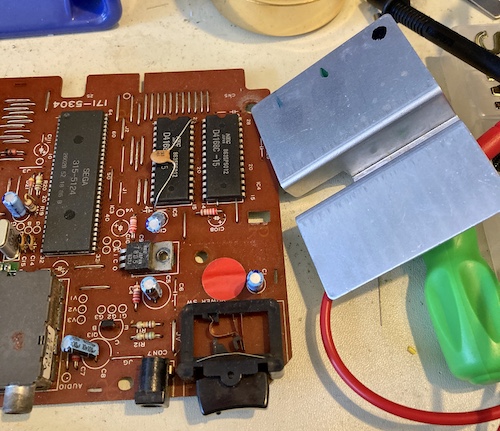
It’s amazing that Sega used this much heatsink for just a single 5V regulator. The VDP and RAM nearby isn’t cooled by it.
Unfortunately, the old heatsink is too narrow to fit the new switch-mode regulator. That’s okay, as I don’t think I need this much aluminum to cool down this much more efficient regulator, and Traco themselves even say no heat sink is necessary. There’s not even a way to attach a heat sink if I wanted one - the entire casing of the 1-2450 is plastic.
Intermezzo: A Test Fire
I couldn’t resist seeing if the Mark III worked, so I hooked it up and used my power bar to switch it on and off. Without a game in, it just shows a black screen with the usual uninitialized-SN76489 hum, but it does get sync!
I put in my SG-1000 copy of Flicky and fired it up. A great result, although there was some gross horizontal smearing on the video, and the audio was somewhat quiet, both of which could be attributed to my long-suffering PVM. A US Master System controller plugged into Joy 1 (the port on the right) worked great as well.
After about 15 minutes of letting it run the Flicky demo loop, the Traco regulator is still room-temperature to the touch. What a neat part; I’m glad I spent the extra bucks for it.
It works! Let’s finish the job.
Switchin’ Out
The power switch seems to be a frequent failure point on these Mark IIIs. It’s a complicated arrangement of copper leafs that are bent into contact with some plastic grabbers, and the plastic grabbers either break or the leafs lose tension.

I have the latter problem, and the switch is always closed as a result. While this means that the Mark III will work when plugged in - a better outcome than not working - I would also like to be able to change cartridges without having to unplug the thing from the wall every time. That can’t be good for it.
Compare my broken switch to this working one from blog friend Esteban Villalobos’s Mark III:
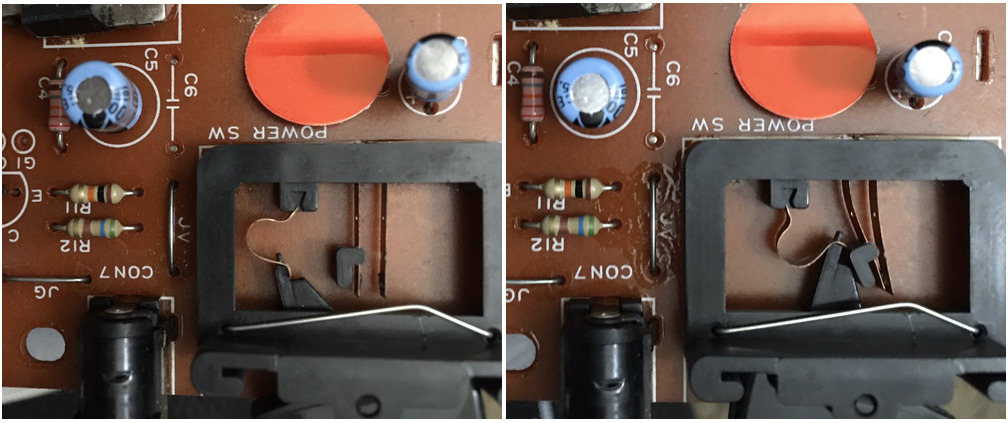
You can see that a couple bits of plastic have broken, releasing the ‘back’ spring so it is no longer tensioned. New plastic parts could probably be 3D-printed, but I think it’s probably best to replace the switch entirely.
I found out from this YouTube video by Global Garage that the Arcolectric C1300ALAAA SPST rocker switch fits in the case openings and looks pretty close to the original. It’s also super beefy. If Arcolectric sounds familiar to you, they’re the same vendor that made the power switch for the Bad ADB Mac LC’s power supply!
Desoldering the old switch was easy, but one of the pads tore at the front when I was removing it. I got a little impatient and didn’t heat the pin fully before pulling it. Luckily, it doesn’t provide any actual function, and I was able to wire the switch to the two pins in the back that are actually switched on.
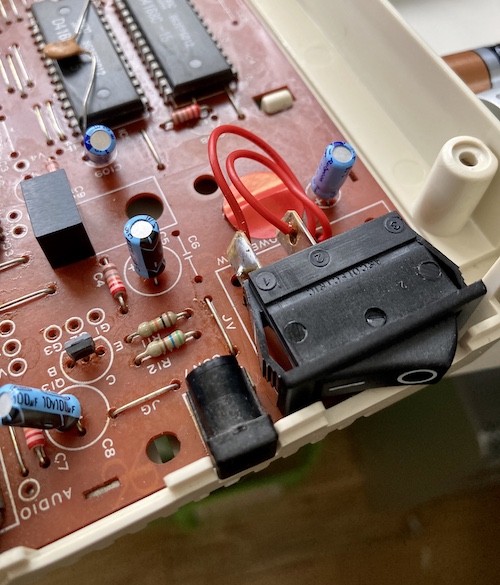
I held the switch in place with two-sided “Gorilla” brand tape just to test out, but the tape was strong enough that I decided to just leave it for now.
When closed, the top case interfered with the switch so that the action was poor and it couldn’t be easily toggled. I filed back the top of the plastic and tried to match the original curve, but it doesn’t look nearly as good as it once did.
I washed off all the plastic shavings, scrubbed out some of the black marks on the top case with a magic eraser, and then re-coated it with 303 and a session in the sun to dry.
Now the switch has great action, and the console is ready to go back together.
Enjoyment
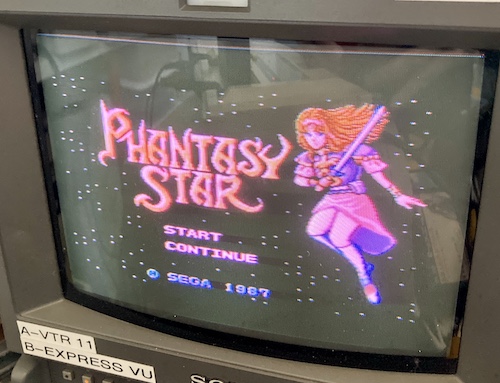
I don’t even remember when I bought this copy of Mark III/SMS Phantasy Star from Japan. It might have been over a decade ago, when eBay was the promised land of random garbage washing up on our shores.
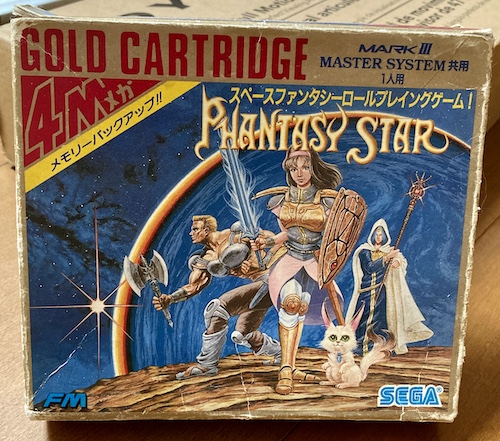
The box was never in great condition, but even so I’ve kept this game with me for awhile without ever being able to play it.
Today I got to play it! Now if only I had an FM module for the full effect…
I’m amazed the battery is still good and it could load a saved game. The one-off PCB made for just this game was evidently very well designed.
Whoever played this before me only has 16hp and is still in the starting town! Was this dog-eared Phantasy Star only played in Japan for like an hour?
Conclusion
I found out that the Mark III was an interesting combination of SG-1000-era gimmicky jank and SMS-era polish. It was a real labour of love to put this machine back together and give it some fresh new parts. One day I’d like to get a matching set of SJ-152 controllers, but for now it’s a nice feeling to have brought it back and be able to play a bunch of games.
Repair Summary
| Fault | Remedy | Caveats |
|---|---|---|
| Corroded cartridge slot | Replace cartridge slot | New part is slightly shorter, no longer riveted to board. |
| Bad power switch (always on) | Replace power switch | Had to carve case to fit new switch. |
| Suspect voltage regulator (not tested) | Pre-emptively replace voltage regulator | Potential waste of money |
| Dirty. | Cleaned. |