More Japanese exchange students arrived
Tags: computer console sharp x68000 x68000-ace nintendo famicom keyboard sega sc3000 nec pc88 pc8801mh fujitsu fm7 corrosion pickups
Another postie-threatening crate arrived on my porch this week. There’s a lot of projects in this one; I’m not even sure a single one is “usable” as-is. This one sort of got away from me, but those are the fun kind!
X Marks The Spot
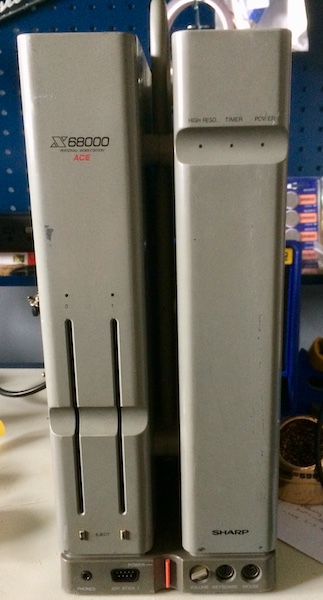
One of the more interesting Japanese microcomputers of the 80s and 90s was the Sharp X68000. You can think of it sort of like a Japanese Amiga - powerful custom chips, 68000 CPU, good arcade ports. Unfortunately, it also shares the Amiga’s bad habits, with some models of the machine being infamous for blown capacitors, exploded clock batteries, faulty floppy drives, defective power supplies and general finickiness.
Still, because of the games, a cult exists, which drives up the prices of the hardware. My technique on this kind of competitive auction is to try not to get into a bidding war, and so I kept plugging away at low bids until I found myself with this grey X68000 “ACE” for a lot less than I expected to pay. My initial elation was immediately replaced by fear - what flaw did the other bidders notice that I didn’t?
The things I noticed in the seller’s pictures were pretty obvious. Rusty ports, case dings, and a lack of any expansion cards meant that it was likely not very loved in its last few years before being auctioned off.
In the description for the auction ad, the seller noted that when powered on, all it does is blink the green power LED. My assumption was and is that the power supply was going into protection, which isn’t really that big of a surprise with the reputation the machine has for touchiness. If someone offers you a cheap air-cooled Porsche 911, are you not going to take it because the oil changes are expensive?
There were, of course, no peripherals - I soon found out to my chagrin that the keyboards went for more than I paid for the machine! I will have to build an adapter, or get even luckier.
Once the computer arrived, the first thing I did was set it up for glamour shots. If nothing else, I could probably turn these photos in for geek cred, even if the machine never runs again.
I only used it as furniture for a few hours, though, before I started wondering just what was inside.
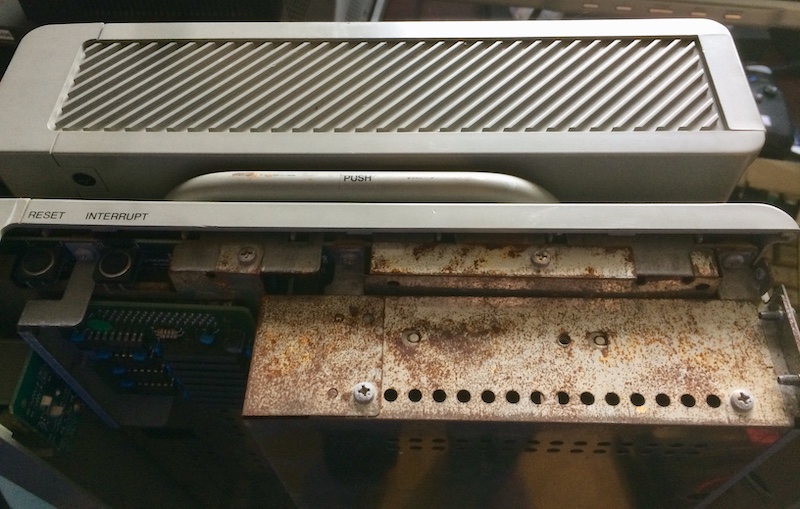
The “twin towers” design of the X68000 tower machines means that you have twice as many panels to remove. First up, I removed the side that covered the power supply.
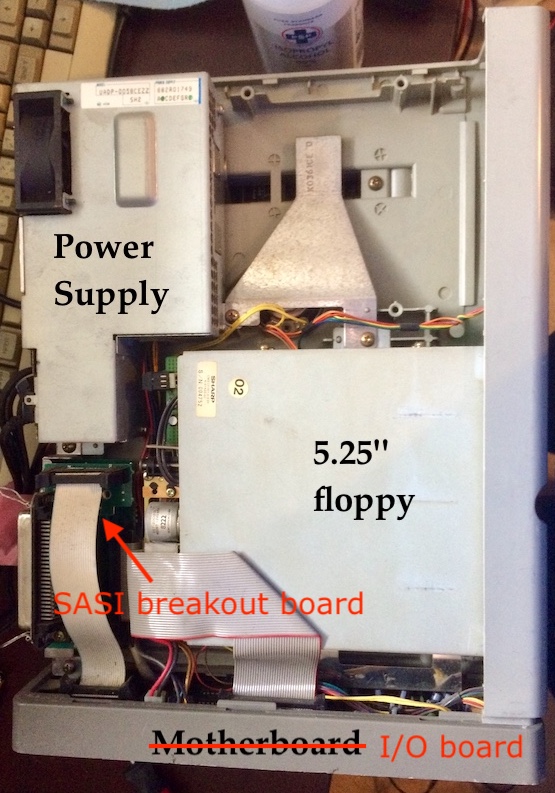
Note that the twin 5.25” floppy drives are auto-eject, like a Macintosh. I can’t wait to see it in action.
The power supply was tucked in pretty tightly, with a non-removable wiring harness snaking all across the machine. There wasn’t much I could do here to get at the power supply without fully dismantling the computer, so I decided to move on.
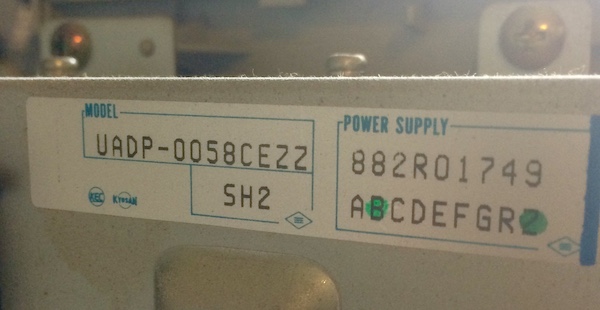
I can’t imagine anyone cares about the serial number on a power supply, but just in case, there’s this giant sticker. “KEC” is not a brand I recognize, but a quick Google seems to indicate that they make a lot of power-supply components such as burly Zener diodes and switching supply ICs.
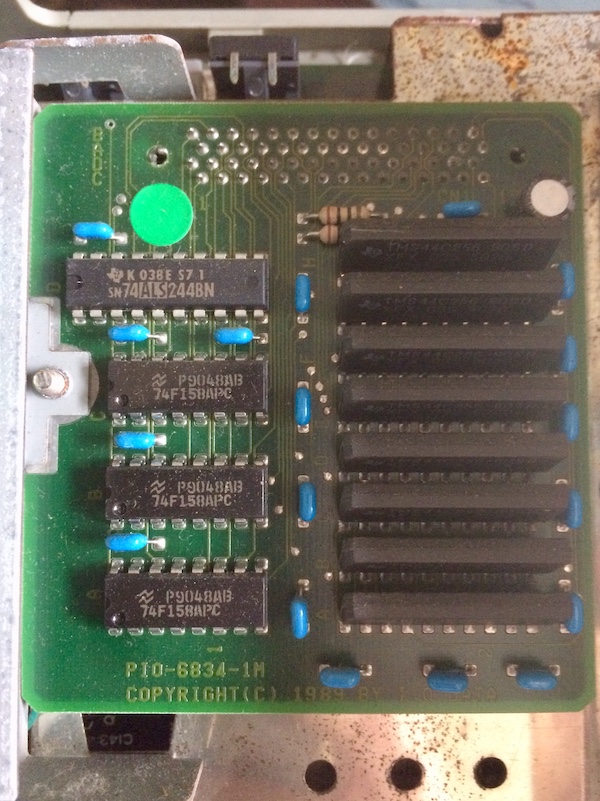
At the bottom of the machine lays the unique longitudinal I/O board (the motherboard is stored vertically, on the back side.) On that I/O board is a veritable forest of electrolytic caps! I did a quick visual inspection, but didn’t see anything obviously venting.
I flipped the machine over and removed the other slide-off plastic cover. Beneath this side was some fun stuff. Like this 1MB “I/O DATA” RAM expansion card! I was hoping this machine had been upgraded. The 1MB card is effectively the price of admission for any games or applications on this platform, with even more RAM strongly recommended.
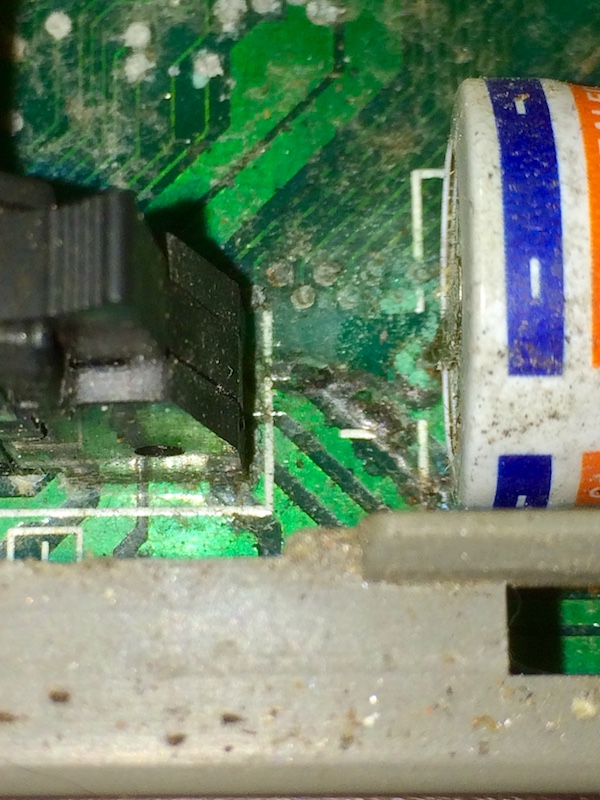
It can’t all be good news. As you can no doubt see in the previous picture, there’s a lot of surface rust on the metal on this side of the computer. Was it left in water?
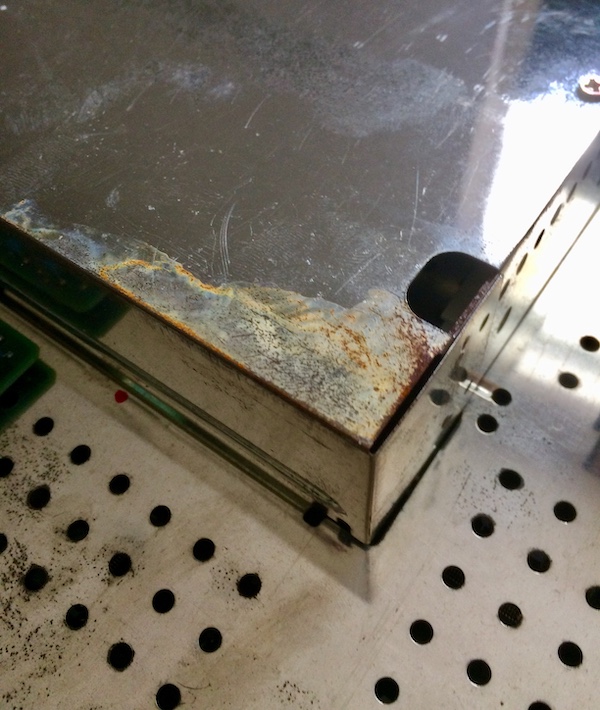
This stuff is everywhere. It’s even on the analogue video port.
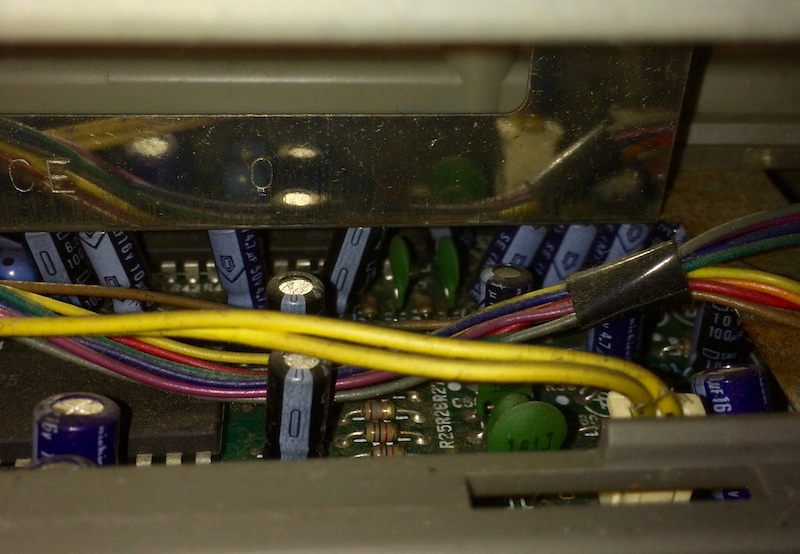
First, let’s check out the clock battery. The clock battery lives on this side of the I/O board, and its home is close to at least one proprietary IC that it probably shouldn’t be allowed to puke into. It’s a common way for ACEs to die.
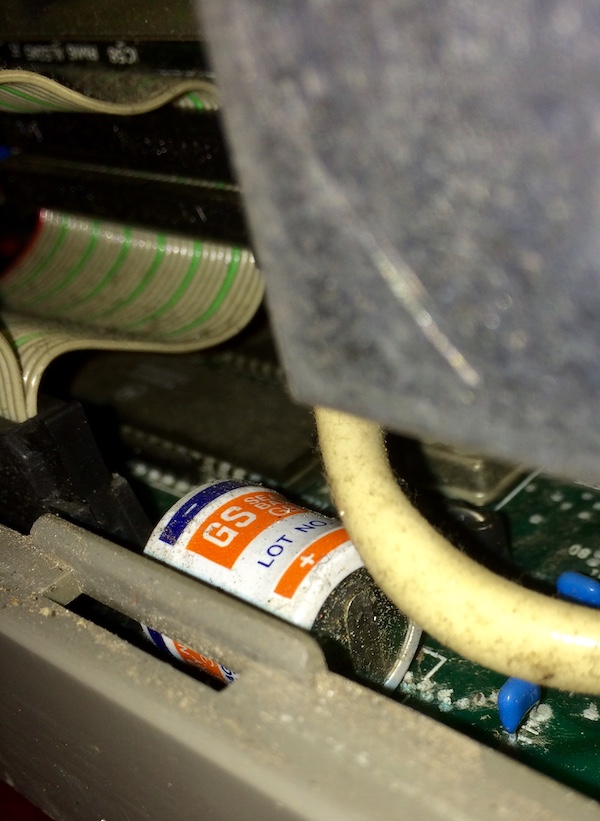
Things look alright.
Only a little bit of puke. This should clean up, but I need to get the I/O board out first, in order to remove the battery and patch any damage.
Speaking of rust, the video board that supports the analogue RGB-out port had some rust on the pins of said port. Let’s pop the whole module out and clean it up. The video board is attached to the central stalk of the machine through a pin header connector that reminded me of the “SHVC” sound modules on the Super Famicom. Maybe the Mitsumi and Sharp engineers got lunch together.
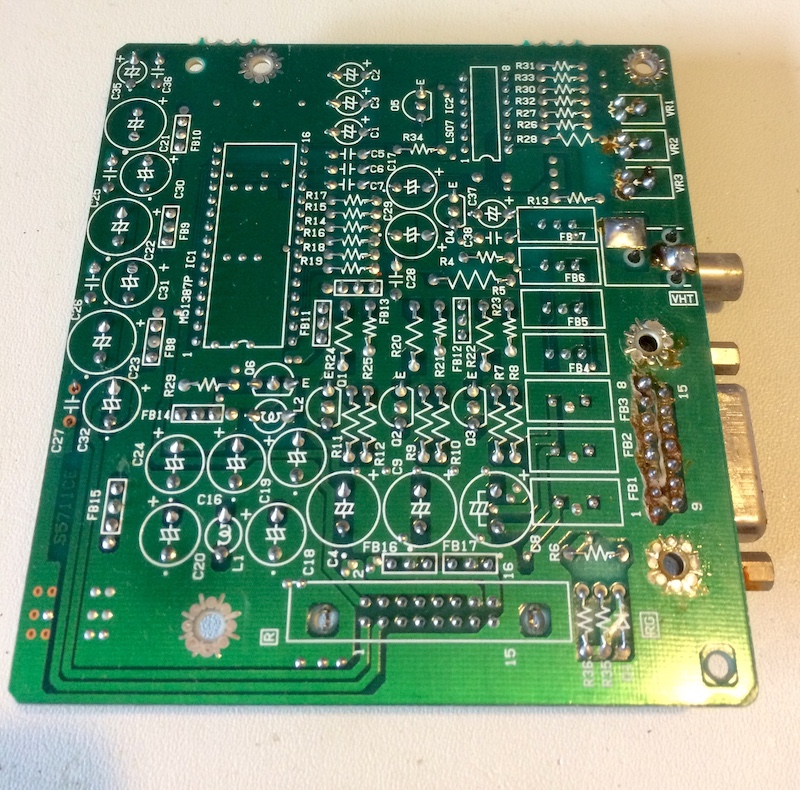
The rear-side silkscreen is beautiful in its own way. It’s almost like having a schematic right on the board (although values would have been nice). Good job, whoever designed this.
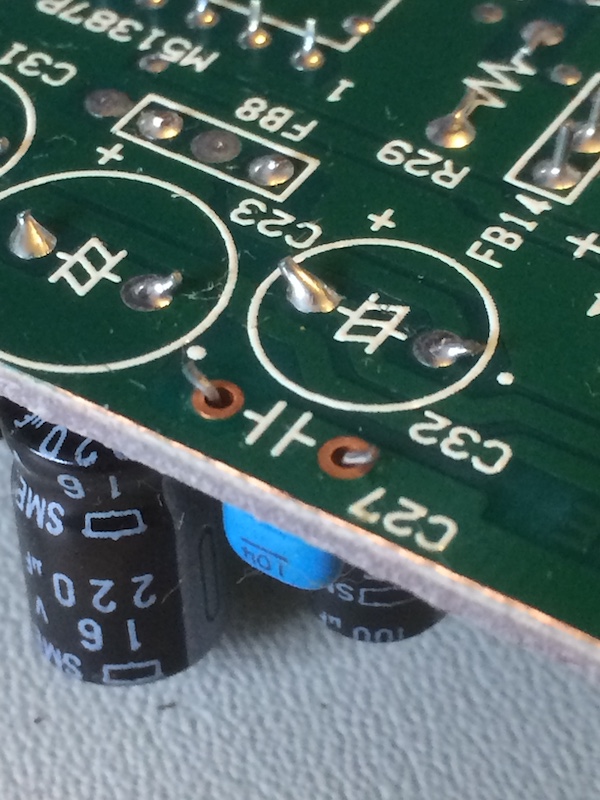
Now this is super weird. One of the capacitors, C27, isn’t even soldered in. I guess it must have been making good mechanical contact all this time, and so nobody ever noticed. I soldered it in, just to be sure.
I guess the rust must have bonded with some leftover flux or something, because it all came right off with a q-tip and isopropyl alcohol. A pretty simple win, but I’ll take it. I didn’t really want to desolder and resolder a DA15, anyway.
With that, I decided to reassemble the machine and leave it for another day. Getting it entirely torn down will require a lot of spare space, which I don’t have at the moment because of the arrival of the other denizens of the package.
More Happily
What set off this entire box of stuff was being peer-pressured into this cheap 8801MH.
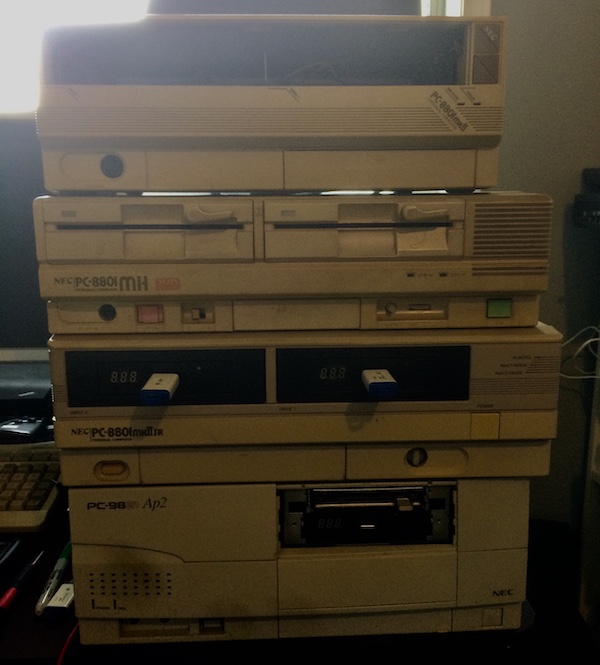
I’m going to need some scaffolding pretty soon, because this stack of NECs is getting dangerous.
The MH adds a much faster CPU (8MHz vs. 4MHz Z80), gobs of main system RAM (128kB!), and high-density floppy drives over the mkIISR. It’s also a little smaller of a machine, and it boasts a few more modern features like being able to set system configuration in software (the “soft DIPs.”) It also supports more kanji.
If you were a home gamer in late 1986, you’d buy the FH, which was its more inexpensive (64kB, regular-density floppies) sibling. The FH also came in black, which is a bucket list item for any PC88 collectors.
You might remember in my old mkII/mkIISR keyboard article that I complained that the FH/MH have a different keyboard than the mkII/mkIISR. At the time I wrote that, “Type-A” keyboards for the MH were plentiful and cheap, and mkII keyboards were impossible to find. Well, the tables have certainly turned now, haven’t they?
I did eventually find an MH keyboard for way too much money after shipping out this box - it’s on its way, but but just like the X68000 I need to figure something out until the ‘right’ peripherals can be obtained. We’ll get to that in a bit.
In the meantime, to test the MH, I fired it up. As expected, it booted happily and asked me for “how many files?” Video was strong, and the machine seemed stable after running it for about half an hour. I think this one will be pretty solid.
The high-density floppy drives are a common failure point on these machines, but the other PC88s are not currently set up to create physical floppy disks of any kind. One of my goals over the next few weeks is to turn the mkII into a floppy-writing machine, so that it can once again be a useful member of the PC88 family.
Lucky Sevens
Who was NEC’s competition in the 8-bit wars in Japan? There was Sharp, yes, with their X1. There was also Fujitsu, which you may recognize from the PC98-competitor FM Towns.
Fujitsu’s entry into the era was the Fujitsu FM-7, a sort of “cut down” personal microcomputer from their serious-business FM-8 and even-seriouser-business FM-11.
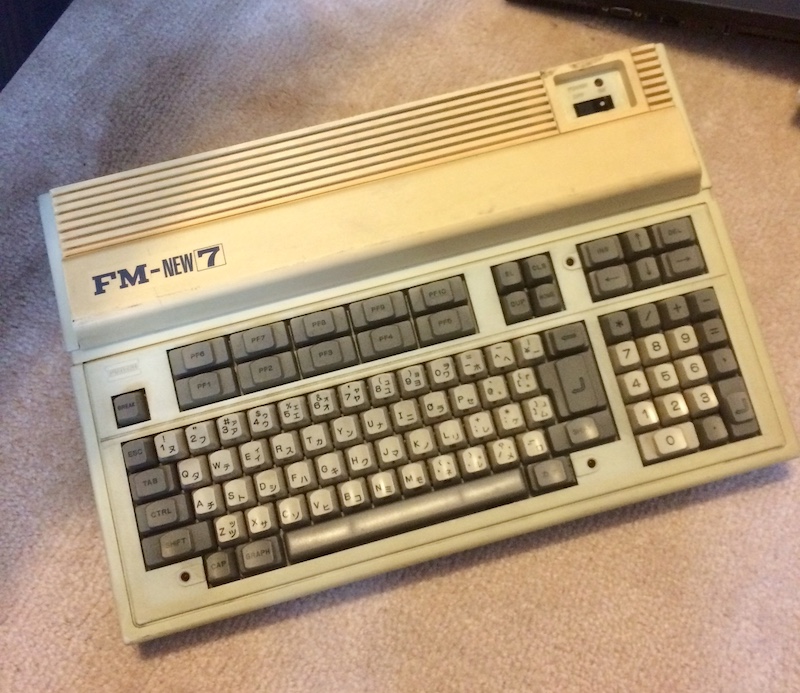
This machine is an FM-New7, which is sort of their “cost-reduced” version of the FM-7. As far as I know, there is effectively no difference except that more of the machine is herded into large proprietary ASICs instead of being made of jellybean logic and discrete chips.
It has not one but two Motorola 6809s - one handling the video, and the other everything else (i.e. the unimportant stuff). There’s a vibrant community around it, including English-language sources such as YSFLIGHT. He even makes homemade hardware!
You might remember me teasing this machine at the end of my latest mini-entry, about my PC-8801 video adapter also working on the FM-7. And indeed, it also works on this machine. My trusty NEC 1970NX happily displays the built-in BASIC.
All the keys seem to work, although some have a lot of resistance and need to be struck dead-on in order to work. I think this might clear up as I exercise the switches.
I’m not sure what I’m going to do with this machine - there are lots of expansion options, but very few that are cheap and easy. It would be fun to build my own DIY hardware, and maybe try out some games.
Another Sega?
I’ve been looking for a Sega SC-3000 for a little while. As you might be aware, I am kind of a big fan of Sega machines, and this seemed like a logical intersection between my growing obsession with Japanese 8-bit microcomputers and my already-worrying collection of Sega Genesis IIs.
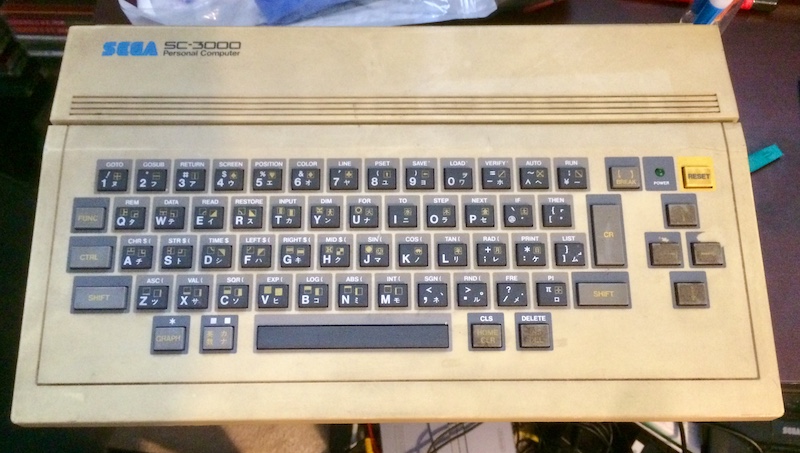
What is an SC-3000? In the early 80s, Sega built their first home computer. They also did a cost-reduced console version to fend off Nintendo, the SG-1000, in order to hedge their bets. Unfortunately, neither one was a success, and they were replaced by the Mark III nearly immediately.
This machine was very inexpensive - think MSX prices, although it predates that standard - and sold in Japan, New Zealand and Australia (plus Italy and France, as a ‘Yeno’). The hardware is basically equivalent to a ColecoVision (TMS9918 video, SN76489 sound, Z80 CPU). As you’d expect for any niche microcomputer, there’s also some homebrew software and hardware available. My favourite project is the SC-3000 Survivors Megacart, which not only has the ability to play tape games but is also thoroughly documented!
It’s a very lightweight plastic construction, with no-nonsense (some would say “cheap”) engineering. You can see right into the motherboard from the cartridge port, and the keys are Spectrum-grade rubber membrane stuff (later replaced with a mechanical keyboard in the SC-3000H). Definitely built to a price, and even though it wasn’t a success, I’ll take any Sega-branded computer I can get because I sure can’t afford a TeraDrive.
I got into a bit of a bidding war on this one, but I was psyched to swing the winning bid. What would a Sega 8-bit computer be like, I wondered?
Unfortunately, I haven’t really gotten to find out yet.
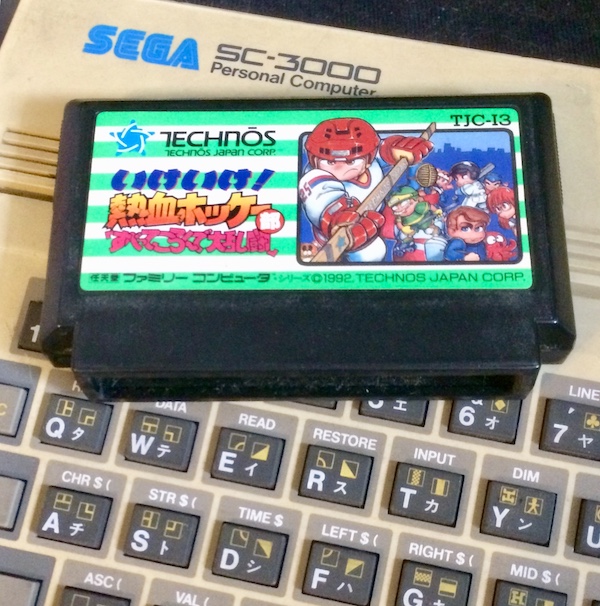
When I try to start it with a cartridge (Zippy Race) inserted, it just displays a black screen and buzzes. It’s also really difficult to put the cartridge in and out.
My first guess was that the cartridge slot is dirty, but after half an hour of cleaning it, I’m starting to suspect cold or broken solder joints from the stress of high-speed cartridge swapping. That’s a pretty common failure on these machines; the slot seems to be held on mostly by solder and crossed fingers.
There’s no built-in ROM BASIC (Sega BASIC came on a confusing variety of cartridges, with their own RAM), so there’s not much I can do with this computer unless the cartridge slot works.
This will be a further diagnostic project! I really hope to be soon enjoying my race across America.
Nintendo to the Rescue
Remember how I said up above that both the X68000 and the 8801MH need replacement keyboards? It’s annoyingly expensive to buy PS/2 adapters for those machines, and not too much better to buy the Japanese PS/2 keyboards to use them with!
Where could I find a cool 80s Japanese keyboard for cheap, I wondered?
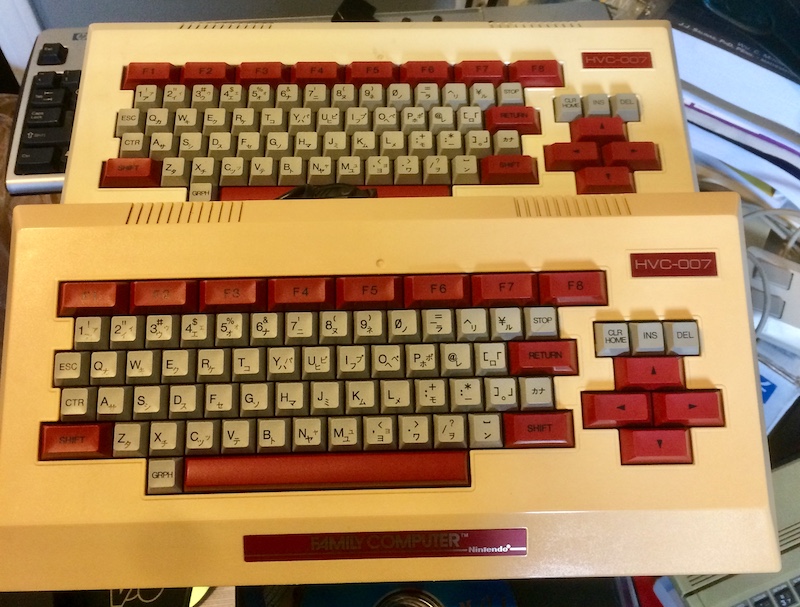
I’m not going to say how much I paid for these, out of fear that someone else will go around scooping them up and turn them into something lame like USB keyboards to get your work done. Yuck! Just know that it wasn’t much, and that these keyboards feel great. I mean awful. They’re terrible, don’t buy them.
Where did these come from? Well, in Japan, Nintendo wanted to pretend that the Famicom’s “com” suffix meant more than just videogames. As a result, they released the Famicom BASIC package, which consisted of a custom cartridge and this keyboard (part number HVC-007).
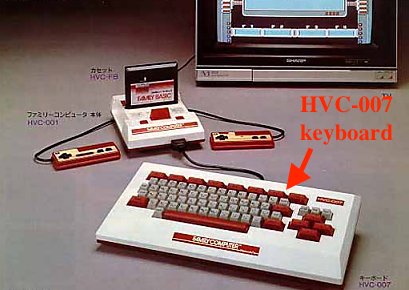
The promise was that your kid, or let’s be honest, yourself, could get a leg up on the competition by having a super cheap entry-level BASIC system to learn to program on at home. I have no idea if there are tons of Japanese programmers who trace their origins back to this little device, but it wouldn’t surprise me if there were.
We’ll go further into the technical details in another article, when I set up the adapter, but for now let’s take a look inside. I picked the more yellowed of the two to open first, in case something went wrong.
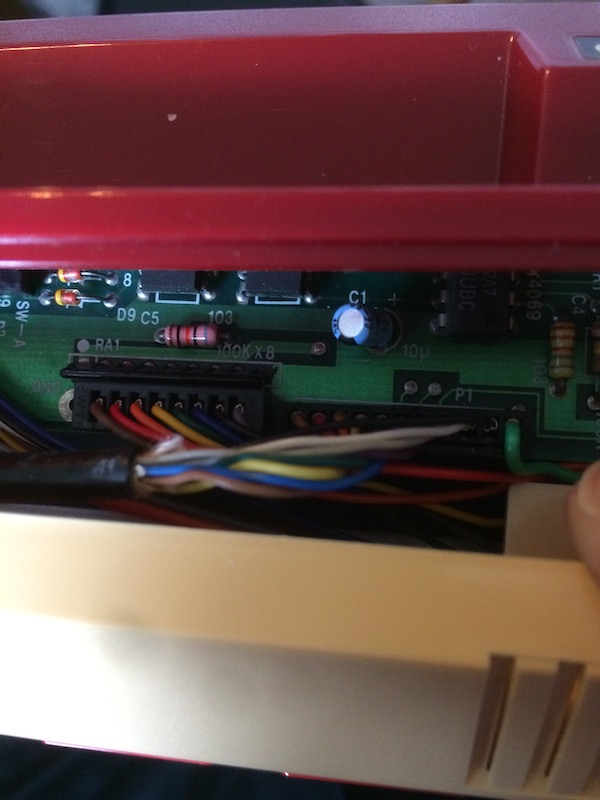
One of the screw posts sheared off - I think it had been dropped on that corner - as I was loosening it, but some Gorilla superglue made it right as rain. Let’s get a look at that PCB!

As you can see, it also has audio jacks. For some reason, Nintendo chose to have the keyboard be responsible for handling the I/O from the cassette tape deck. Your stored programs would go through these jacks and then be decoded, I assume, by the cartridge.
The ICs on this board are as follows:
- CD4017BE - some kind of decade counter, probably used to march through the keyboard matrix;
- CD4019BE - a quad “AND/OR” select gate, not sure how this would be used yet;
- D4069UBE - a hex inverter, which is mostly wired to the audio jacks.
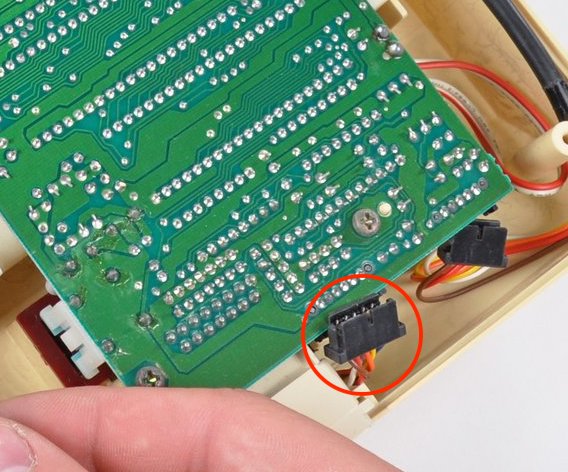
The important thing we’re concerned with here are those 8- and 9-pin connectors on the board edges. As you can see, one of them is covered in diodes, and the other has a pull-up resistor net. My assumption is that one of these controls rows (probably the 8-pin), and the other columns of the keyboard.
When I first thought up this project, I figured I would have to desolder wires from the PCB or add connectors so I could go “back to stock” if I ever wanted to. Hopefully, that won’t be the case, if I can find another set of these connectors to build my new PCBs with.
It would be really cool if we could just drop-in a replacement PCB for this and have it work in the PC88, wouldn’t it? Let’s take a look at these awful, thumb-shredding connectors to see if there are any clues who made them.
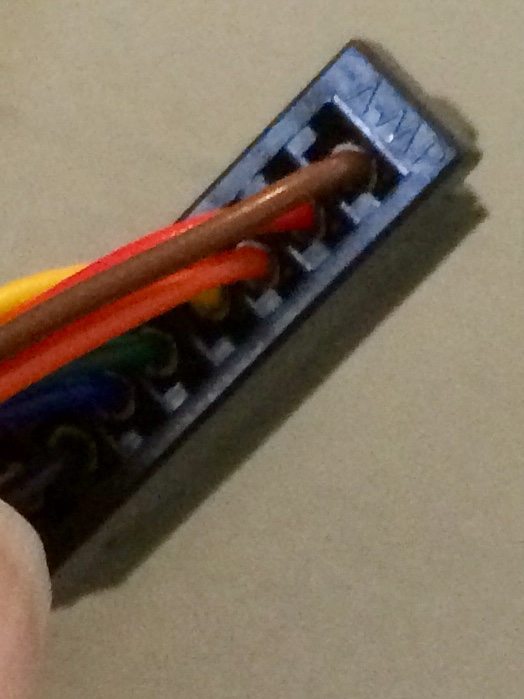
It says “AMP,” which I assumed meant a TE AMP series connector, since all their other parts (such as the VGA connector I used on my PC8801 video adapter) also have AMP prominently stamped on them.
I couldn’t immediately figure out who made these connectors (they are probably long, long out of print). They seem to be the same connectors that were used for the controllers on the original Famicom. These connectors are used because the original Famicom’s controllers are hardwired to the motherboard:
Update: After visiting a connector seller in Akihabara during a vacation to Japan, the proprietor told me that this was a Tyco part. So my first guess of TE AMP is probably correct, although he had no Tyco catalogues from this time period to get a part number. The search continues. Yes, I visit rare-connector stores on vacation, doesn’t everyone?
There’s some more research ahead of myself, but I’m really heartened to see that Nintendo is this consistent.
In Conclusion
Don’t spend all your money in Japan, because you’ll need to save some of it to fix the stuff you buy in Japan.
Still though, this is a box of fun!