Making my SC-3000 become a useful member of society
Tags: computer sega sc3000 repair
I was disappointed to find out that my “not working” Sega SC-3000 was in fact not working. However, I had a hunch that it was a common flaw: cold solder joints on the cartridge slot. It also has a more subtle flaw: it smells kind of bad.
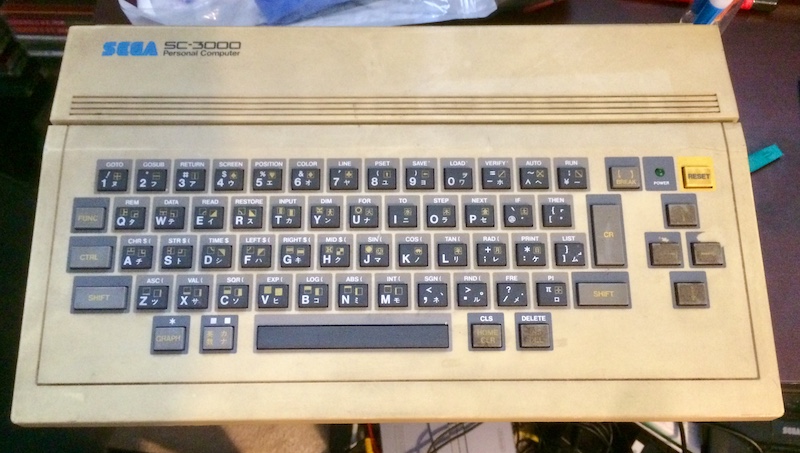
Since the SC-3000 has no internal ROM or any other way to run software on it, you need the cartridge slot or it might as well be an exotic paperweight. Unfortunately, Sega didn’t design this machine to last nearly 40 years (and who can blame them?) so the repetitive force of installing and removing cartridges will move the right-angle slot around and break the solder joints with enough age and strain. You have to use quite a bit of effort to get the cartridges in and out, too, which probably didn’t help.
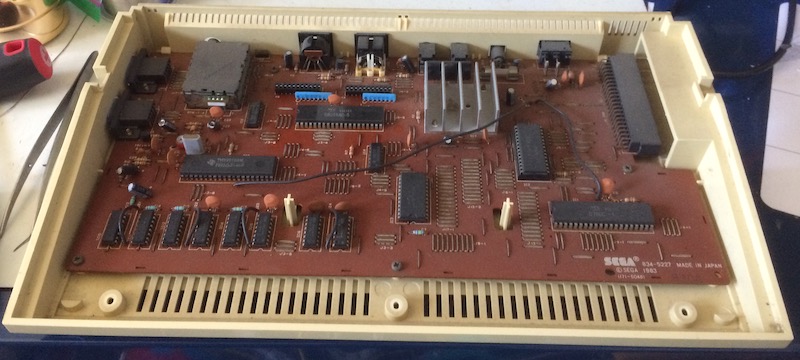
I popped the top and keyboard off the SC-3000 using the excellent instructions available from the tremendous SC-3000 Survivors website, which also has a cool DIY ROM-cartridge design that I would like to eventually copy for my own.
It looks like in the distant past, someone spilled something in here. The right side plastic felt stuck together, all of the screw holes had some white powdery substance around, and there is a pervasive odour inside the machine. I gently wiped down all the plastics with an alcohol-soaked shop towel, and it came away pitch black.
The keyboard only has bare solid-wire connectors, so you have to be careful removing and inserting them into the terminals on the board. I wasn’t careful, and ended up bending one of them. Thankfully, it went back to normal with the help of my trusty tweezers. I think a good long-term fix would be to use a better connector on these wires, but hopefully I’m not going to be in here often enough that it will matter.
One of the challenges in taking this machine apart is that Sega soldered the power switch in permanently. This means that you must first desolder the switch from the motherboard, otherwise you can’t get the board out. The switch just pops right out of the back on tension clips once freed.
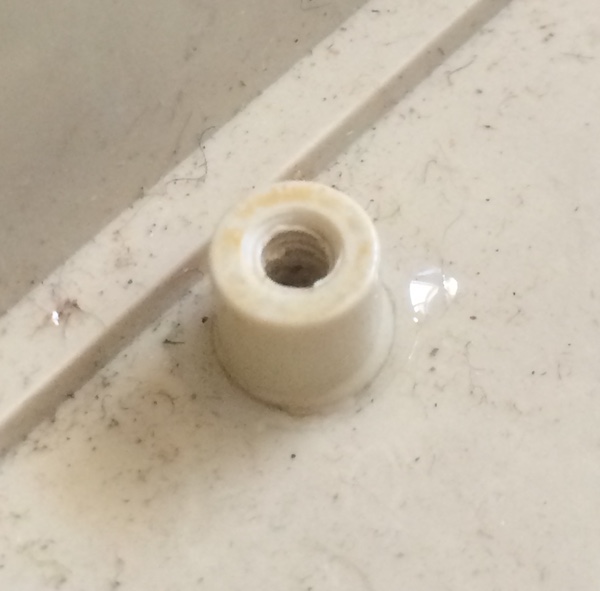
Someone had probably been in this machine before, as evidenced by the very loose screws holding it together. There was also a screw stuck into a broken-off standoff, and one screw missing entirely from the motherboard. I super-glued the broken-off standoff back on, and I replaced the missing screw with one from my pile that looked to be about the same thread pitch and size.
Unfortunately, the standoff just broke off again because the bottom of the screw hole filled with super glue and got pushed off the case when I tightened the screw - screws have an incredible amount of force. It could also have been because I didn’t let the fresh glue cure for long enough. Even though the glue says five minutes, I usually leave it all day instead of just an hour.
I might go get some of those snap-in PCB supports and replace the post entirely.
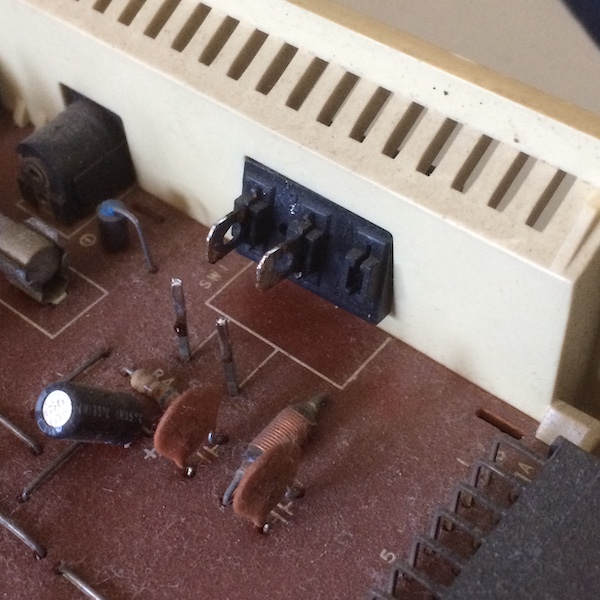
The power supply here is the same centre-negative supply that you’ll find on a Model 1 Genesis or Sega Master System, so I had one on hand to test with. Just like the Model 1 and Model 2 Genesis, however, you get broken solder joints from repeatedly inserting and removing the power plug.
Sega didn’t really learn their lesson on this issue until the Saturn, where they went with an internal power supply and a very well-supported “infinity-sign” kettle lead plug.
Let’s take care of this before we button the machine back up; don’t want it failing later.
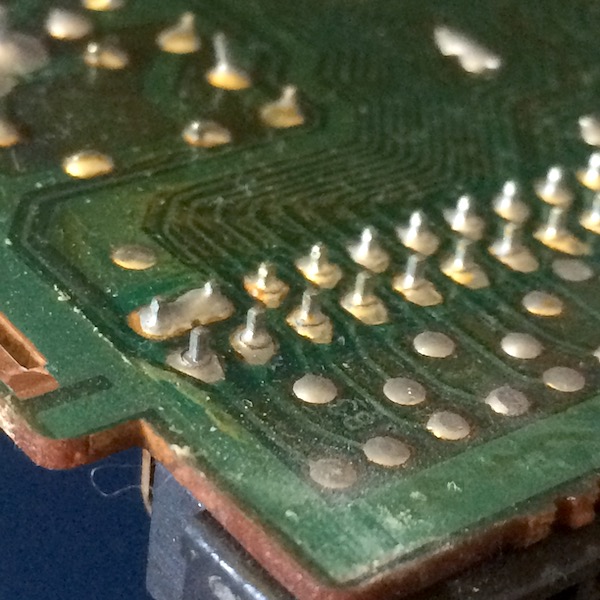
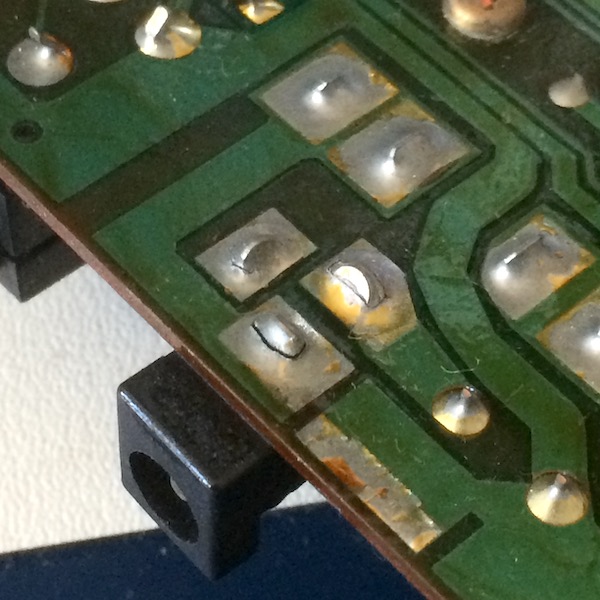
Here’s what we came looking for. As expected, the solder joints are in bad condition on the cartridge slot. I considered reinforcing the bottom of the slot with some tape or a plastic spacer, but it appears Sega or a previous repair-person had tried to glue down the slot.
Cleaning up cracked solder joints is no problem at all.
That Was Zippy
I test fired without the keyboard attached. The machine waits for a worryingly long time and then launched into the Zippy Race cartridge I inserted (it’s the only one I own).
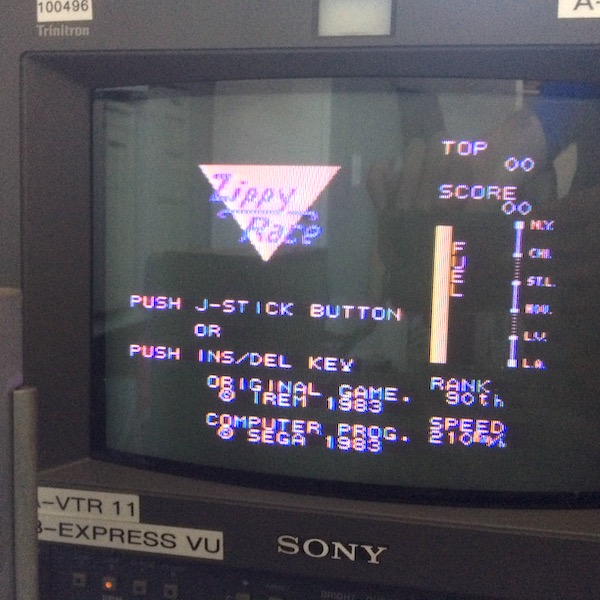
I buttoned the machine back up, which was kind of a pain (all the clips fought me and I had to put the keyboard back together in just the right way). I was rewarded by finding out that the keyboard does seem to work!
At least INS/DEL, left cursor, right cursor and RESET do. You can’t move up and down in Zippy Race, so I didn’t get a chance to test the up and down arrow keys (not the best choice of test game, but you take what you can get). I would really like a BASIC cartridge now, so I can test out the full keyboard, and a joystick so I can actually play Zippy Race.
These squishy rubber keys are really not designed for intense video game play. The top of the keyboard also seems to press down a disturbing amount before a keypress is registered. I’m not sure if that is “normal” for these machines, or if it indicates some case damage, or that something isn’t quite installed properly.
My next steps for this machine will probably be to tear it apart again, so I can clean the keyboard keys. Not sure what that will involve, but for now I’m happy listening to the little jingly and not-at-all-ear-destroying music of Zippy Race.
Repair Summary
| Fault | Remedy | Caveats |
|---|---|---|
| Games don’t boot. | Re-solder cartridge slot to logic board. |