The circle of life - an NEC PC-6001 arrives, breaks, is fixed
Tags: computer nec pc60 pc6001 pickups capacitors repair
Sure, I’ve got NEC PC-88s, I’ve got NEC PC-98s, but didn’t NEC make anything that was a little friendlier to the home user? By now, you should know better than to doubt our friends at the Electric Company. The NEC PC-6001 has a thriving homebrew scene around it in Japan to this very day, and is still fondly remembered. Let’s rip one open and stuff it with hot molten lead.
You can think of it as a Japanese VIC-20 or a small-budget alternative to the PC-8001 series - although both are not quite accurate (there is a Japanese VIC-20, after all). Even though my first-run PC-6001 is much less capable than the ultimate PC-6601SR/Mr. PC, there’s a lot here to have fun with.
For instance, the base PC-6001 has a 4MHz Z80, an AY-3-8910 sound chip, and 16KB of RAM. That’s tons of stuff for 1981!
I was only vaguely interested in the PC-6001, but I saw this “untested/junk” one when I was working on building a Buyee shipping box to justify the shipping cost of the PC-8001mkIIMR keyboard, and I won it for only ¥1101 (about $13.95). The more the merrier, said everyone except for my long-suffering postal worker.
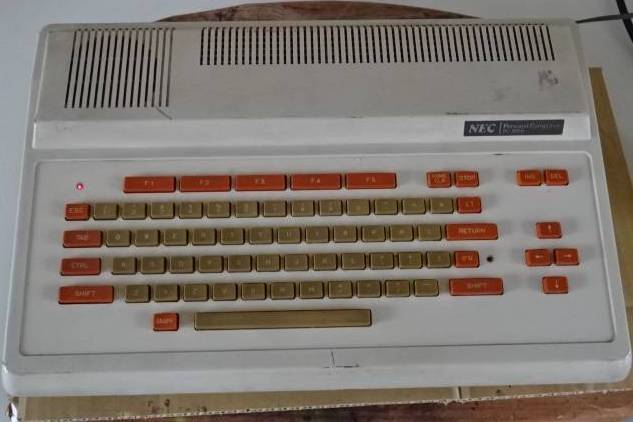
My PC-6001, being an early model, has these chiclet keys. Not great, not terrible. The same machine was sold in America as the PC-6001A, and then later as the NEC Trek, with a different keyboard.
![]()
You’ll notice that the case is a little grimy. I found some sticker residue as well, which made me wonder if the seller had found it at a Hard Off and tried to turn a quick buck at the auctions.
I’m not entirely sure why the bottom yellowed so much worse than the top of the computer, but maybe they used the same plastic manufacturer as the Super Nintendo. It doesn’t bother me enough for me to consider the many different restoration methods available - it’s more “honest” this way.
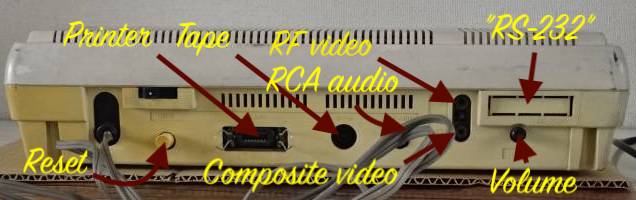
Unlike the more serious PC-8801mkII, connections are very home-friendly. You’ve got NTSC RF-out (with two channels selectable), composite video out, RCA mono audio out, standard “CMT” cassette tape, a printer port and two joystick ports on the side. There’s a weird blockoff plastic bit that says “RS-232,” which I assume is for some kind of serial expansion that wasn’t installed on mine.
Update: It looks like the RS-232C expansion was sold separately as NEC product numbers PC-6061, PC-60m61, or PC-6061SR. I haven’t seen any one of these for sale yet, possibly because the manual warns you that you should let the dealer install it.
In addition to the regular ports, you also have a cartridge slot on the other side, which is part of what makes this machine interesting.
What’s this actually going to be used for?
While waiting for the computer to arrive from the Home Islands, I did a bit of searching and found this cartridge-slot pinout (pins arranged as if you are looking into the machine, from the right side).
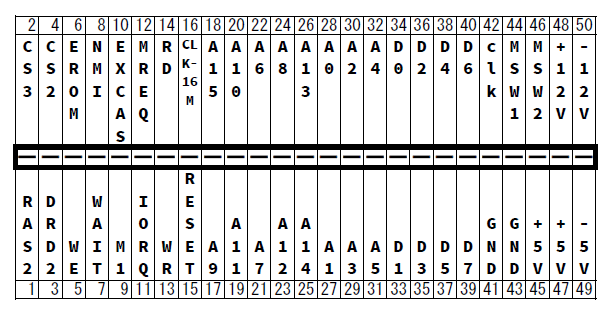
The pinout comes from this great site, which also explained in precise detail how to build a flash-ROM cartridge for the computer. I do so love it when the research is already done for me. Who could pass up an opportunity like that?
With a flash ROM cartridge, I’ll be able to play the PC60 classics, including Nostromo, possibly one of the earliest survival-horror games.
The machine has to work first, of course, so let’s see if it does.
OK, let’s test it
I wasn’t expecting great things, because the seller says it was only tested to “power-on.” In general, if the machine is easily testable (e.g. by plugging it into a readily-available TV) and the seller didn’t test it, you should assume that they did test it, and that it is broken.
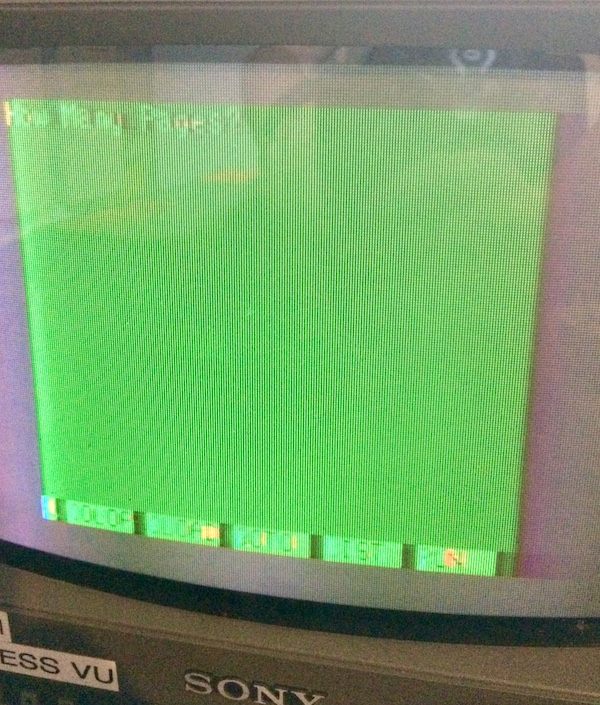
Plugging it into my junky non-RGB test PVM, and throwing the satisfyingly chunky power switch, gave me this.
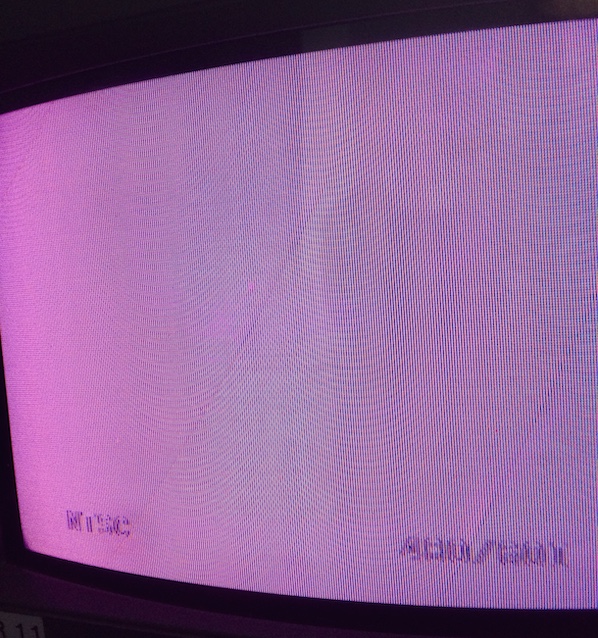
A white screen, but one that the TV thinks has a valid NTSC sync signal in it (this feature is part of why I use a PVM, and not a regular TV). I tried typing some numbers to get past the “How Many Files?” screen followed by the BEEP command, but I didn’t hear anything from either the internal or TV speaker that seemed to indicate the computer was fully ‘alive’ inside there.
My guess is that the video circuitry is probably ‘ok,’ but nobody is telling it what to do.
Boy, that PVM probably needs some work too, huh?
What’s broken?
The first step is to check the power supply voltages. I stuck some multimeter probes into the expansion slot on the side of the machine. If I was looking for a small difference, I’d only measure at the power supply itself, but in this case any huge difference (completely missing rails) would still make itself really apparent at the expansion port.
| Rail | Measured Voltage (V) |
|---|---|
| -12V | 0.0V |
| +12V | 0.0V |
| -5V | 0.75V |
| +5V | 5.09V |
One out of four ain’t bad, I guess?
This isn’t too surprising - there are a few reports of other enthusiasts with power problems on their own PC-6001s. The culprit is variously fingered as either shorted tantalum capacitors on the mainboard, or bad diodes in the rectifier of the power supply.
Another obstacle is that the PC-6001 relies on relatively fragile 4116 RAMs. This is the “older” kind of RAM that I was speaking about back in the Tandy 1000 motherboard inspection, the kind that needs negative voltages to function (in this case, -5V).
These 4116-style RAMs also have a reported bad habit of dying when one or more of their supply voltages drop out, which seems to be what’s happened here. What’s doubly unfortunate is that those RAMs are soldered into the motherboard, so if we’re replacing them, we need to put in some sockets.
Only one thing to do, and that’s pop the machine open and poke around.
Open ‘Er Up
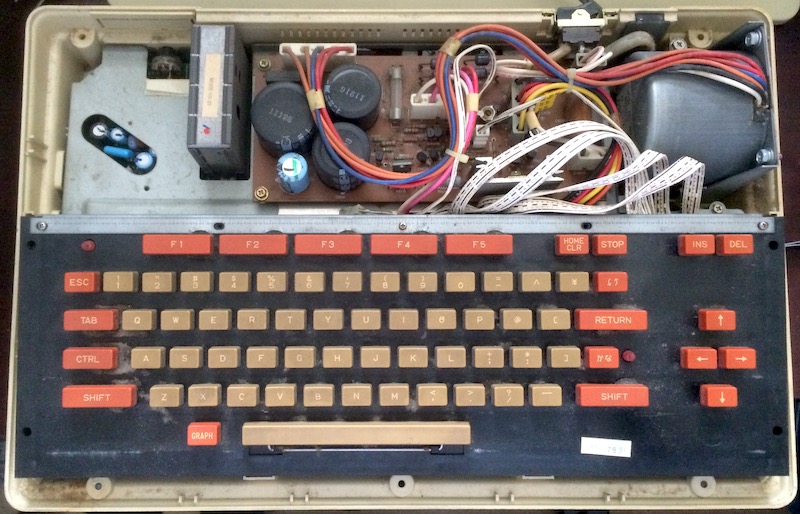
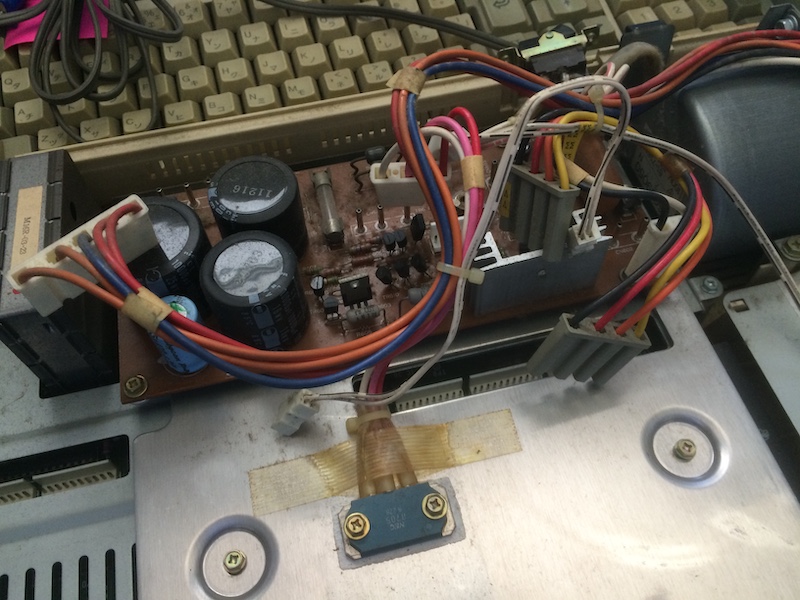
With the case opened, that power supply board jumps out at you immediately. It’s pretty big! That huge can transformer on the right is hard to ignore.
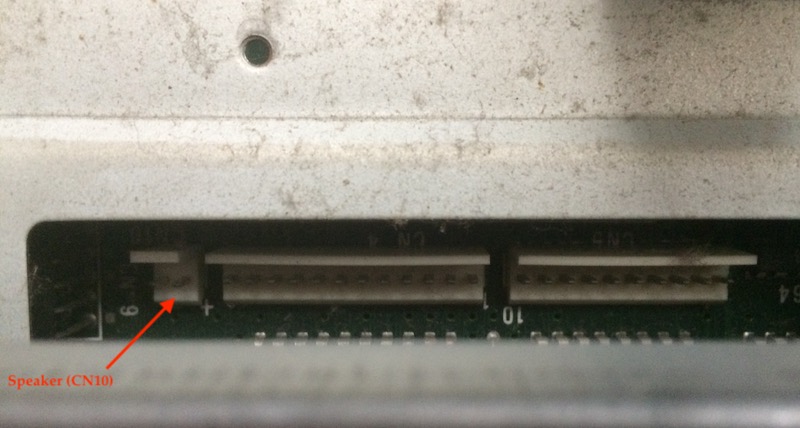
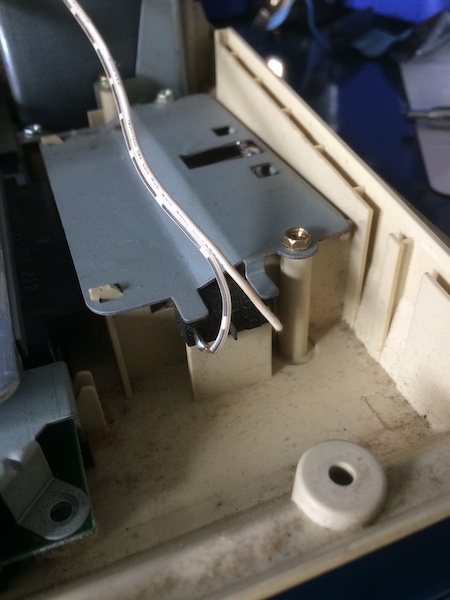
When I opened the case, I pulled up a little too far and spontaneously disconnected the speaker connector. Here’s where it goes. I don’t know what these other two connectors do, but it must be pretty important if they have this many pins. Maybe they are related to the RS-232 blockoff plate.
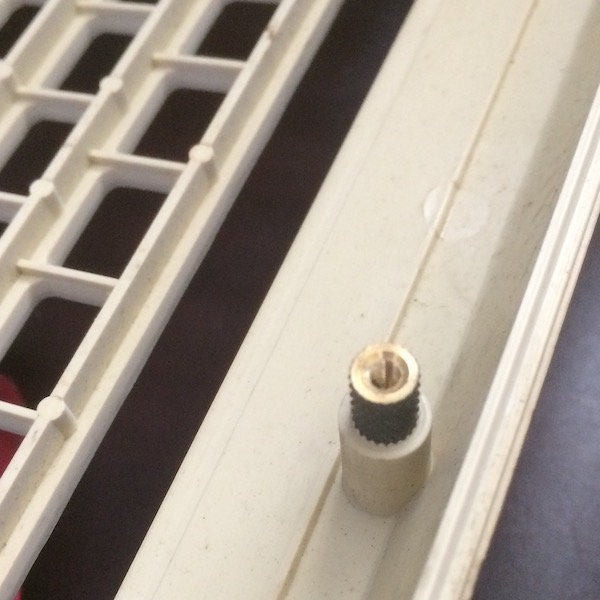
The case is surprisingly high-quality for the price. It boasts very rigid, thick plastics with expensive-looking brass inserts for case screws to go into - no self-tappers here. Someone really enjoyed spending their boss’s money on this one.
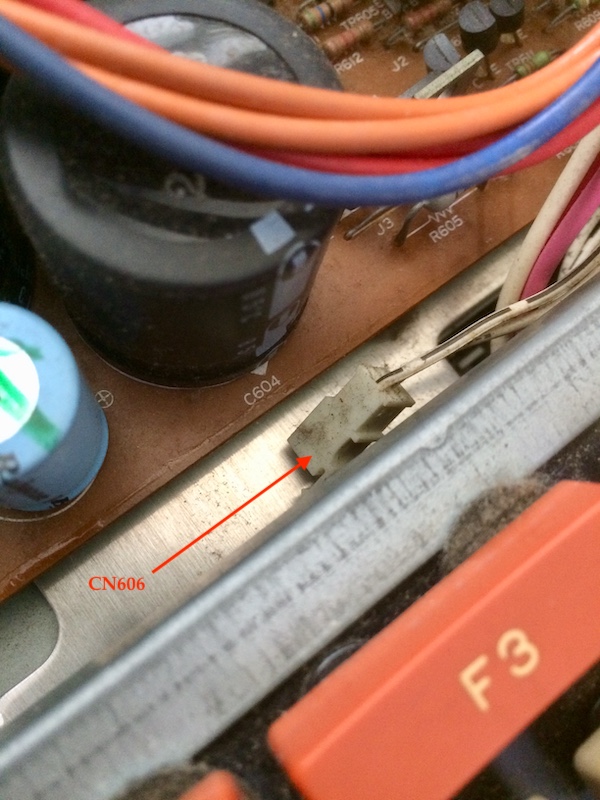
Poking around, I immediately noticed this loose wire. It looked like at one point it went from a two-pin connector on the power supply (CN606) to a two-pin connector on the motherboard (CN12). A loose wire on the power supply that came off during shipping? Maybe that’s all that’s causing our problems here.
The keyboard isn’t screwed in once you remove the top case, so I moved it aside to take a better look at where it is supposed to go. This revealed what I assume these three thick wires which are marked E, C, B, which are fished through this super-thick RF shield to what I assume is a switching transistor in a way I’ve never seen before.
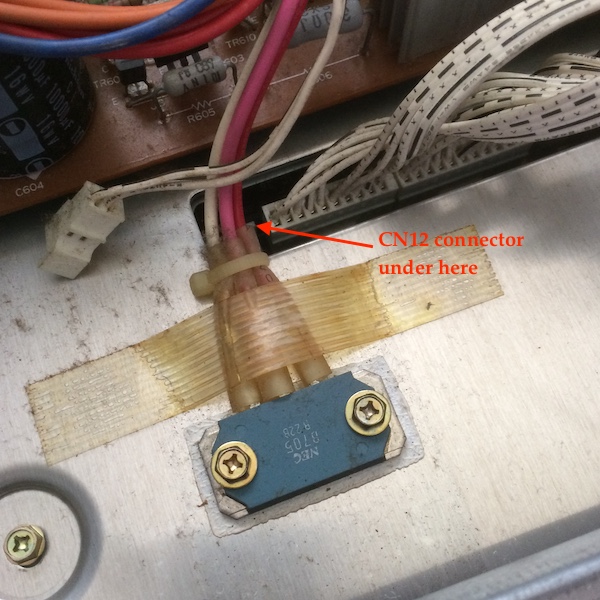
Underneath, the CN12 connector is there. It looks like it fits CN606. Does CN606 actually go to CN12, or does it just look like it should? Let’s check the schematic.
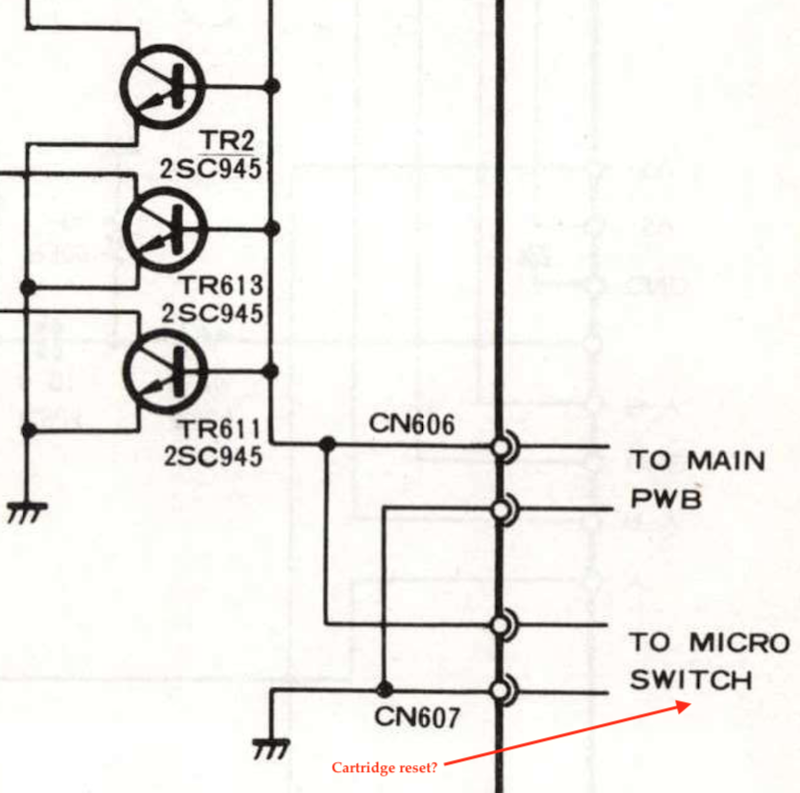
CN606 comes out of the power supply and seems to control some transistors. It’s close to a ‘micro switch,’ which I think might be the switch in the cartridge port that puts the computer into reset when you put a new cartridge in (according to the NEC TREK manual, at least).
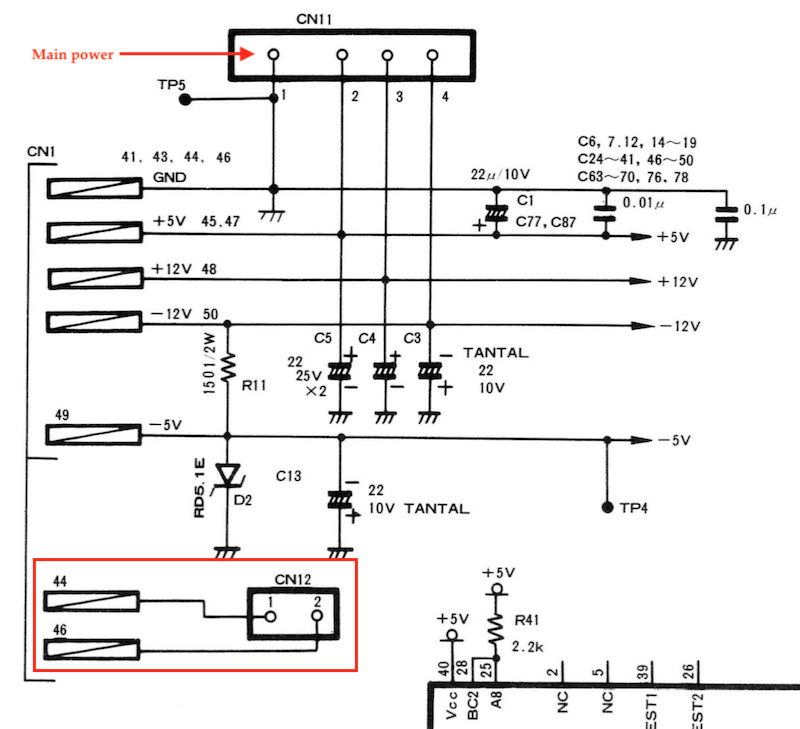
Sure enough, CN12 reappears in this partial pinout of the cartridge port… but it’s never mentioned anywhere else in the schematics. What is its function?
Here, CN12 goes to pins 44 and 46, which the diagram says are MSW1 and MSW2. Although the description is confusing when Google Translated, I think it works kind of like this:
- When you insert a normal cartridge, a microswitch in the case will trip and shut down the machine so that you don’t damage anything by hot swapping cartridges;
- If you are the developer of a cartridge and you want your cartridge to be hot-swappable, you can bridge pins 44 and 46, which will bypass the safety switch.
So: probably shouldn’t be disconnected. Also: probably not the cause of our problems.
More Shorted 80s Motherboards?
Even though it bit me on the Tandy, I decided to check the power connectors with a continuity test. Maybe it was as the internet said, and I should expect a shorted tantalum capacitor or two in here.
Sure enough, using the multimeter on 12V - GND and -12V - GND revealed that they were continuous. 5V - GND wasn’t shorted, which makes sense, because otherwise I likely wouldn’t have even seen the white video that I did in the first place.
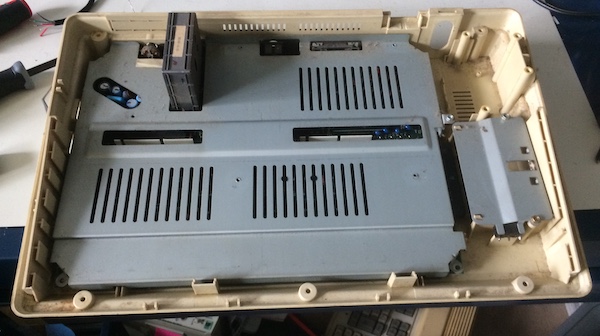
The first step of exposing the motherboard is to pull the keyboard and power supply. The keyboard came out pretty easily.
Unplugging the power supply is quite the project: it has so many cables! I marked the CN606 and CN607 connectors so I wouldn’t mix them up.
The screw heads holding the motherboard in are super soft, so I decided after stripping a few to just go directly to a nut driver. All of the screws seem to be different sizes, but the ones that gave me trouble were all 5.5mm (7/32”), which is an uncommon enough size that I had to buy a nut driver from Amazon. Really happy that, like the outer case, these are metal inserts - no cracked or stripped case plastics here - just some electrolytic corrosion at worst.
Since this machine is so big, it also takes up a lot of room when dismantled. I didn’t want to desolder the wiring harness from the power supply’s transformer, or the hard-wired electrical plug from the same, so there was quite a bit of jiggling around to be done to work the heatsink off and put it aside so I could yank the motherboard.
Transformers, Get Out
I ended up yanking the transformer along with the power supply. The only soldered joint I had to break was to the microswitch in the cartridge port:
This went to the plug for CN606, so it wasn’t being used at the moment anyway. I’ll resolder this before I put the machine back together.
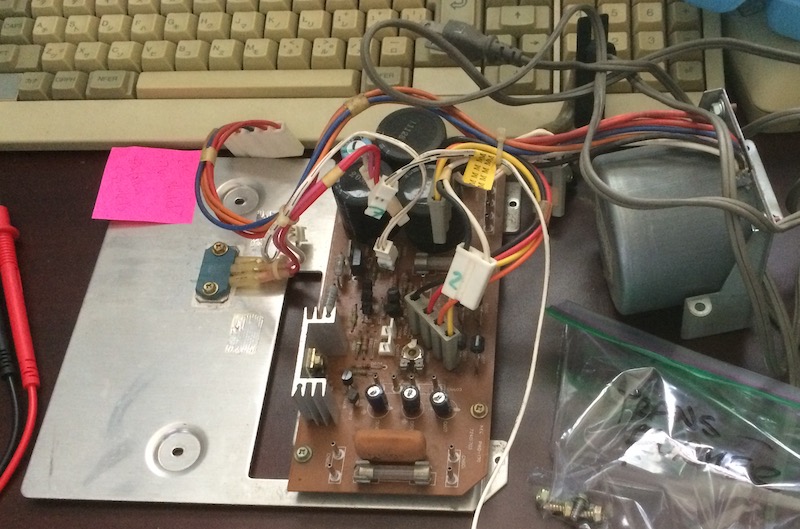
I really hate hard-wired electrical cords. Give me a nice kettle lead plug any day.
Look how much room there is with that beast removed:
I Wanna Be The One To Walk In The Sun
With the RF shield removed, the motherboard is finally exposed. It’s probably the first time this thing has seen daylight since the 80s.
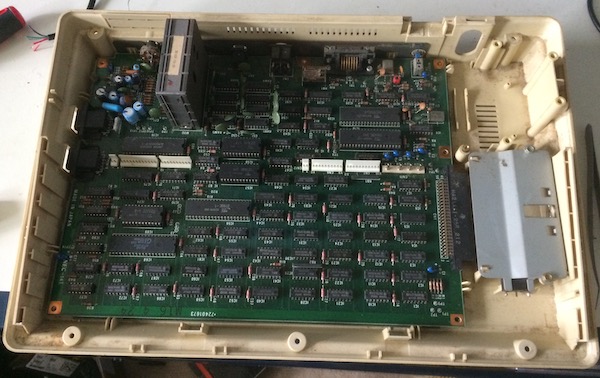
Boy howdy that’s a lot of 74s.
During the week I was doing this work, NEC celebrated the PC-8001’s 40th anniversary by coming out with a special-edition Windows laptop and a tiny emulator-based miniature plastic PC-8001 to go with it. I was a little disappointed it wasn’t in mass circulation (only 1000 units are to be made, 500 of them only available if you buy it with the laptop). Maybe in 2021, they’ll do something for the 6001’s 40th.
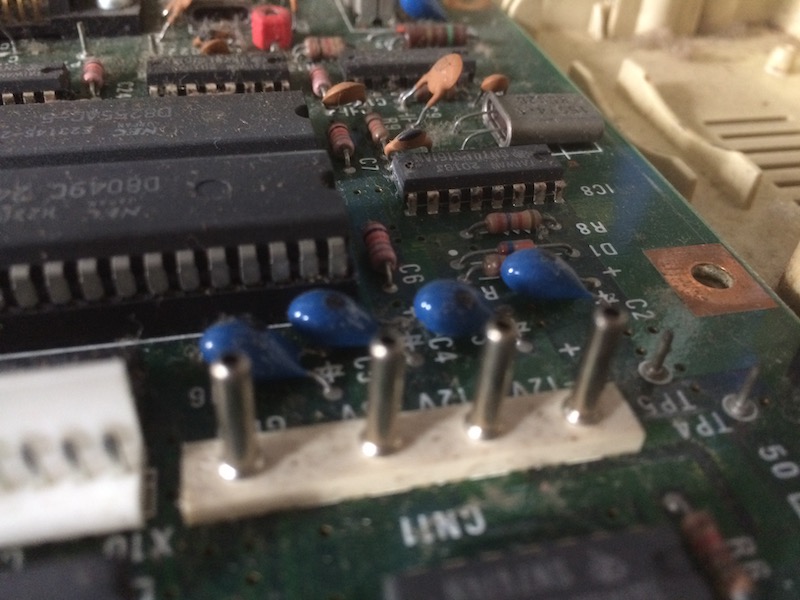
These are the caps I’m pretty sure are responsible for shorting out the 12V and -12V rails. They’re very close to the motherboard power connector, which is maybe why they died (tantalums hate sharp in-rush current).
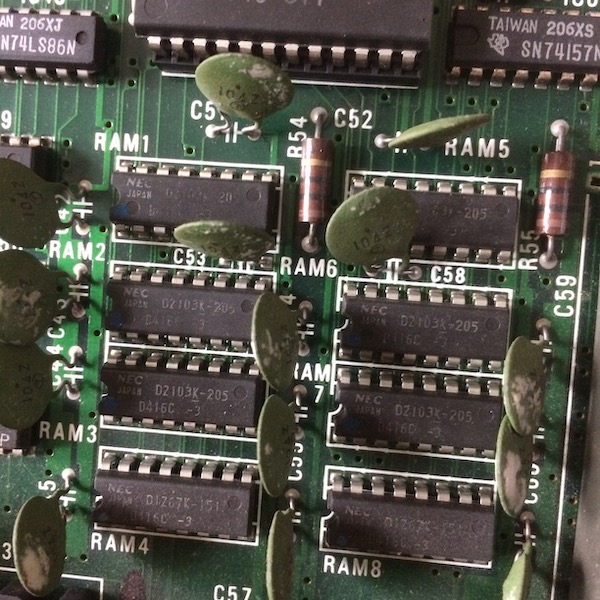
While we’re in here, let’s look around. Here’s the 4116 RAM, which might well have been killed by the shorted power rail situation. I’m not sure what the white stuff smeared on these disc caps is, but it didn’t seem to be part of the inside of the cap.
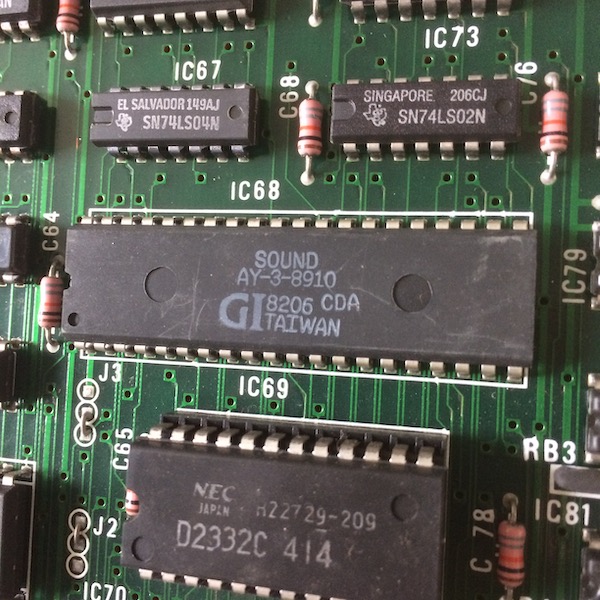
The AY-3-8910 hangs out near the CPU.
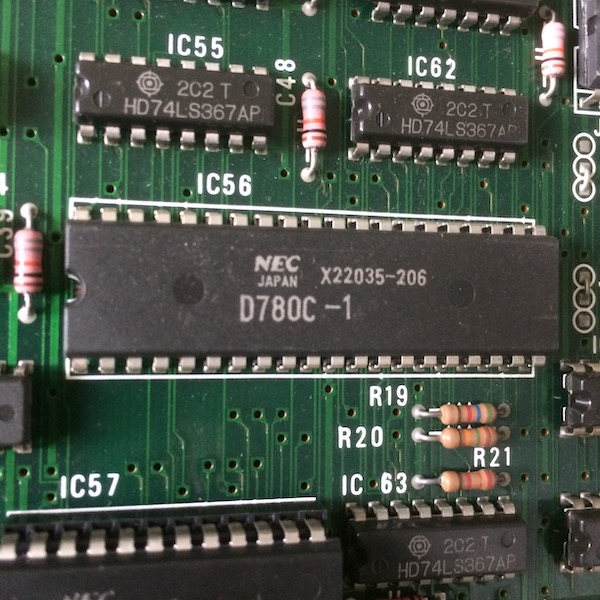
Here’s that CPU.
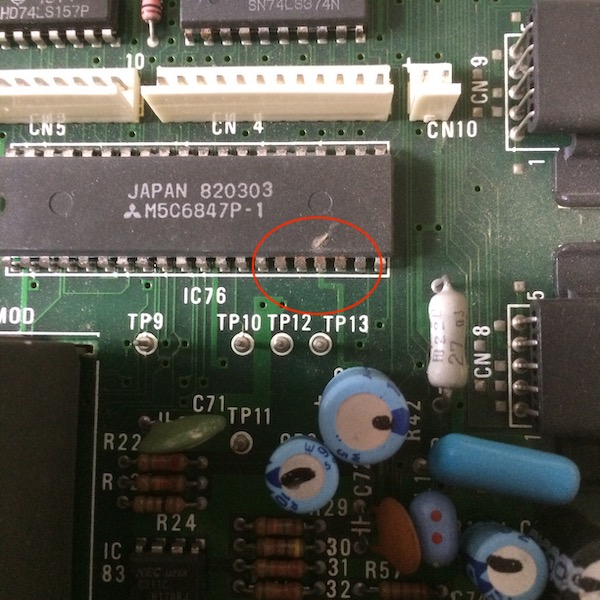
The only environmental damage besides dust I could find were these discoloured pins on this 6847 display controller chip. There’s a bit of plating missing from some 74LS04 and 74LS08 chips further down the board, but it doesn’t seem to be full-on corrosion.
Cap Attack
It’s hard to believe we’re already doing another capacitor replacement. The universe is cruel to me sometimes.
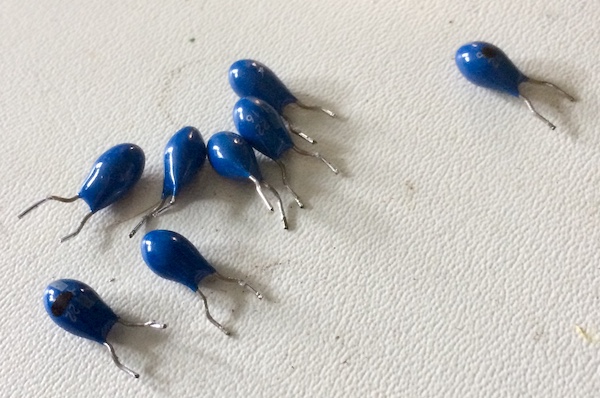
I had a bit of trouble getting these tantalums out - the legs were trimmed really short, so it was hard to get enough solder on them to get the gun to suck it all cleanly. Each one fought me a little bit on the way out, even when the hole was clear. All eight of the tantalums were removed - if two of them are bad, I can’t really trust the rest.
I swapped these out for Nichicon 22uF, 25V electrolytic capacitors. Be careful when going between tantalums and electrolytics: for some reason, tantalums put the stripe on the positive terminal, not the negative one.
Even though the schematic I have on hand seems to indicate that these tantalums come in multiple capacitances, all capacitors removed from my computer were 22uF/16V. Your PC-6001 may differ.
Let’s Get Back Together
I hurried through the reassembly. My cats were hungry and figured out where I was from the sound of the soldering fan. I put new kapton tape on the transistor wiring to replace the old cellophane that I had taken off to service the machine, slammed the case back together, dropped in all the screws and fired it up.
The computer didn’t even hesitate: in standard NEC fashion it leapt to life immediately, asking me “How Many Pages?”
Long-time aficionados of this web log will remember that the PC-88 asks you how many files you want to reserve. I’m not sure what the difference here is; if it refers to memory pages or screen pages.
Anyway, I can’t tell it how many pages I want, because even though every other key on the keyboard seems to work, the “return” key doesn’t! It was extremely filthy when I pulled the keyboard, so maybe it’s a corroded contact.
Even though I have this new job in front of me, it feels really good to finally have this one all back in one piece and working.
I look forward to figuring out the keyboard and then putting this little computer through its paces. Welcome to your new home, PC-6001. Sorry you have to room with the Tandy.
Repair Summary
| Fault | Remedy | Caveats |
|---|---|---|
| Doesn’t start. | Replace shorted tantalum capacitors. | Electrolytics may not be an appropriate substitute long-term. Power supply may be faulty/noisy and caused the problem in the first place. |