Make Your Own ColecoVision At Home (Part 4 - Quadrature Controllers)
Tags: console coleco colecovision leako homemade-hardware retrochallenge retrochallenge-october-2021 clone
We got conventional ColecoVision “hand” controllers working well in the last entry. I’ve never used any of the ColecoVision’s more exotic controllers before; will they work properly on my clone machine, even though I didn’t really understand them?
Naturally, I’ve been sitting on all of the test controllers for months without maintaining them. This means that the classic problem encountered in the previous entry will also apply. Do these more complex controllers, largely sourced from the same lot as the other broken Coleco controller, work at all?
First, A Confession
AtariAge member fieroluke has been developing a drop-in replacement for the original ColecoVision board, partially based off my files and research, but mostly based off the same ChildOfCv schematics I used. He is a much more seasoned and skilled engineer than I, so he’s been making great progress.
He’s also been catching my bugs! One such bug was the complete absence of quadrature input into the Leako: I had missed a junction when copying the schematic over from the ChildOfCv schematics, and so the quadrature input never made it to the CPU.
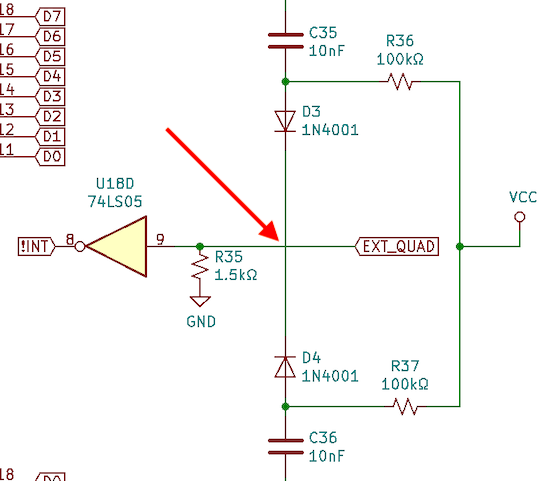
Luckily, I had the foresight/fear to expose that input as a test point on the v0.6 board, so a quick bodge wire from one of the input diodes to the test point restored quadrature input.
I owe a huge debt of gratitude to him for catching such a subtle mistake.
Then, An Explanation
We’ll need quadrature input for each of the following controllers. If you’re not familiar with the idea of quadrature encoding other than that episode of Star Trek, allow me to give a quick little primer.
Quadrature encoding is the basis for a lot of analogue input devices into digital systems: trackballs, mice, Arkanoid spinners. It’s also used for a whole bunch of other technologies, from electronic fuel injection in cars to CNC machining.
Let’s look at a traditional ball mouse for a good example. As the ball rolls along the desk, it turns two rollers – one for the X and one for the Y axis. Attached to these rollers are toothed wheels, and some sensors that shine light through the toothed wheel.
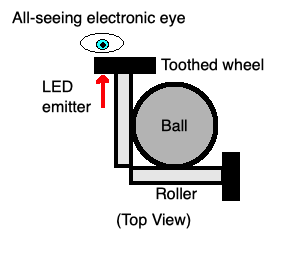
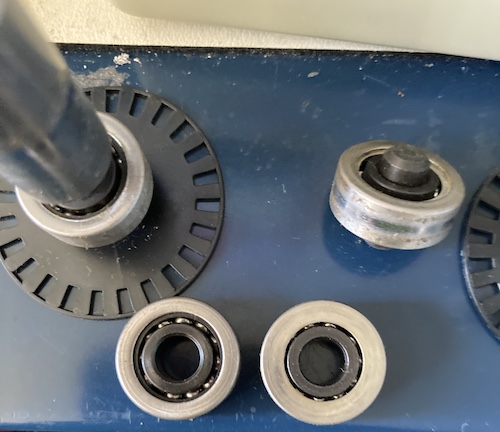
The wheels look sort of like these ones, from inside the Roller Controller:
When light is detected through the wheel, let’s say that the sensor emits 5V. If it’s dark, 0V. When you roll the mouse along the desk in increasing speed, you’ll get a square wave pattern like this:
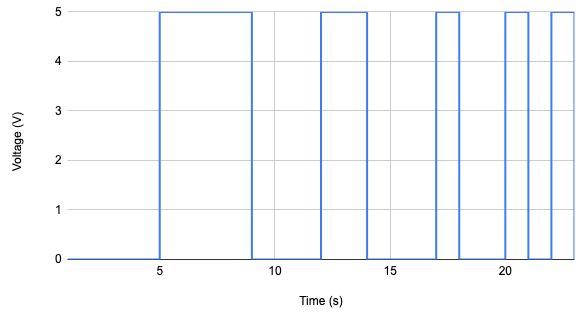
Which is fine if you only want to know how quickly something is spinning, but mice can move right or left. By adding a second sensor, slightly offset from the first, you now know which sensor the window is passing through first: if the light goes through e.g. the “right” sensor before the “left” sensor, then you know the wheel is going clockwise, and by repeatedly sampling these sensors and looking at the rising/falling edge of the signal, you also know the speed.
As you can see from the schematic above, in the case of the ColecoVision, spinning the quadrature input also causes a CPU interrupt. This interrupt seems to be handled somewhere inside the BIOS, which makes sure that they don’t “drop” frames of the spinner.
The ColecoVision uses quadrature encoding in order to provide arcade-style analogue controls, and this scheme is used by at least three controllers. Those controllers are the Super Action Controller, the steering wheel controller, and the almighty Roller Controller, and I bought all three of them for testing. You’re welcome!
Naturally, all of these controllers needed a little bit of toil in order to get working at all, but after that point, the Leako took care of business.
Current Affairs
In the previous entry, I neglected to mention that I had done a few more tests in the time between Part 2 and Part 3. I got in a barrel-plug adapter for my bench supply, so I tested it on the Leako. At 5V, according to the bench supply, the Leako is drawing 0.31A when sitting on the “please insert a cartridge” screen and 0.42A with a cartridge inserted. Not bad at all!
Smellovision
I had been using my PVM to test, but I decided that it would be nice to be able to do the entire thing on my workbench, where I could more easily probe for signals and such. As such, I got out an AliExpress backup camera LCD, which takes +12V and composite video. It’s based around an IC with a frog on it called the AMT630 video display controller.
Unfortunately, not having been designed to actually be a TV, that LCD is super picky. As a result, it will often lose vertical hold, “rolling” on any signal that is even vaguely outside of its sync requirements, such as the ones emitted from the Sega Genesis, or Famicom, or Commodore 64. I don’t think I actually have anything that works properly with this screen, come to think of it. The Leako was also emitting one of those funky signals, and it also failed to interpret the NTSC colour burst while it was at it.
I’d like to use this screen as the basis for a portable computer in the future, so I’ll have to see if there’s some way to calibrate the display timing, or if there’s something inside stepping on the sync level later.
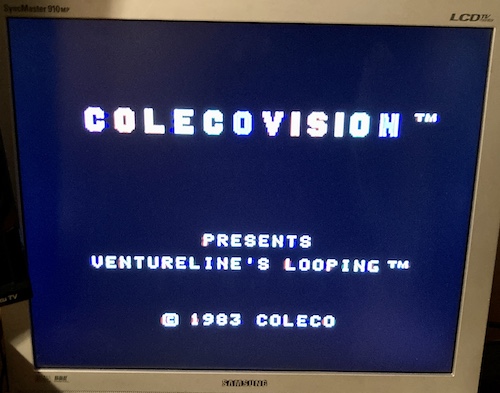
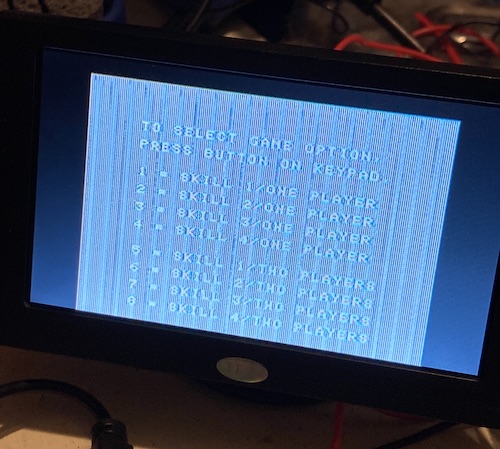
For the time being, I decided that I would use my Samsung 910MP’s junky composite input, which displayed working (if poorly scaled) output.
And then it (finally!) died, so I ended up using a cheap TCL LCD TV in another room, which was good because the Roller Controller sure took up a lot of desk space.
Subpar Action Controller
The regular ColecoVision controller has one problem: it just doesn’t have enough buttons. Sure, yeah, I hear what you’re saying. It has 12 number pad buttons and 2 action buttons for a total of 14. That’s a lot of buttons: almost more than an Xbox360 controller.
What if I told you that we could add two more action buttons and a quadrature roller? You’d say I’m mad, gone off the deep end, and call the cops. Well, nobody called the cops on Coleco. Introducing the Super Action Controller, the bonkersiest thing I’ve plugged into an 8-bit game console in quite some time.
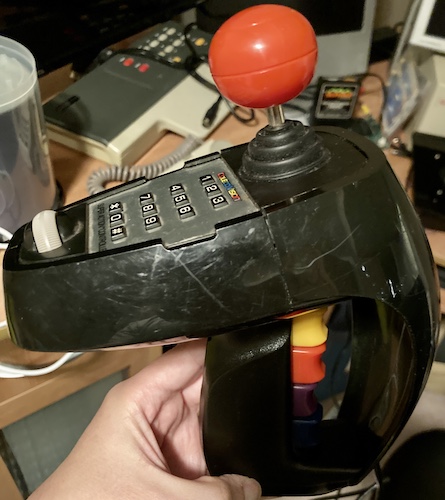
I got this somewhat haggard boxing-glove-sized behemoth for – no joke – one dollar on eBay, and then proceeded to spend more than that on Lysol wipes to clean all the dirt off. Of course, I also had to pay twenty-four dollars in shipping, but that’s just how the cookie crumbles. The seller sold it as working but untested, which of course is to be expected with ColecoVision joysticks.
Not every game supports this (mostly because very few 8-bit games are ridiculously complicated enough to necessitate it,) but one came packed-in with the controllers when you bought them new. That game is Super Action Baseball, and it’s perhaps the most unnecessarily overcomplicated baseball simulation available on a game console. Here, just look at the “controls” page of the manual:
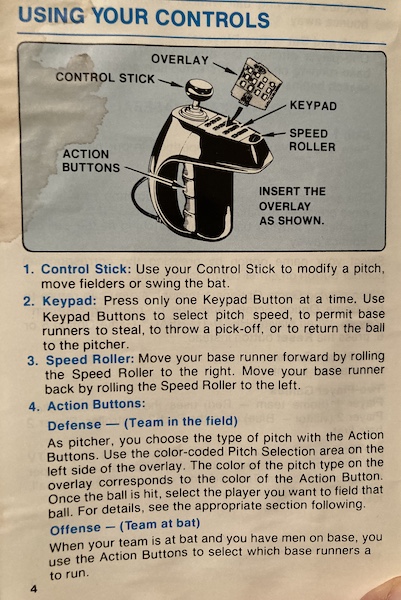
This thing is an absolute RSI nightmare, and trying to play Baseball with it had me chording triggers and frantically pressing number pads like a court stenographer. You have to spin the quadrature roller like some kind of maniac in order to run after you get a hit! Fielding reminded me more of trying to play Cannon Fodder than anything else.
Naturally, this old joystick is not in the best fighting shape. Some of the number pad buttons have to be hit really hard, as does “up,” but thankfully from the last entry we know that the digital joystick reading works, as I built a whole new stick from scratch. I’ll refurbish this stick some other time.
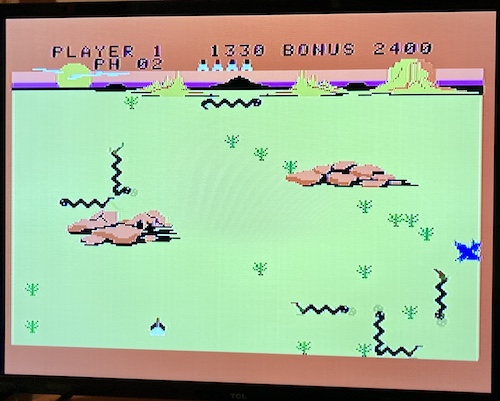
I was also able to spin the speed roller in Slither to move my ship horizontally – albeit in the opposite direction of travel – so that’s working as well.
A truly unique experience that I am happy to put back on the shelf. Let’s move on to something I can do – drive poorly, at high speeds.
It’s Turbo Time
Alongside the junky Quebecois controller covered way back in Part 2, I got a Roller Controller and a steering-wheel controller. The latter – known as “Expansion Module #2”1 – originally came with a Sega racing game called Turbo2. I bought what turned out to be a defective copy from eBay, but we’ll cover that later.
The steering-wheel uses an encoder wheel, with two rings of “teeth” at different spacings. As the steering wheel turns, the encoder wheel rotates through two optical sensors, and repeatedly sampling those two sensors (by reading port $FC) allows us to figure out approximately what angle the wheel is at and how quickly it’s being turned.
The steering-wheel controller is powered off of four 1.5V C-cell batteries, for a total of six volts DC. Some sort of miracle occurred where I was able to find enough C-cell batteries lying around my house to run this thing.
I had initially assumed that the controller logic would draw power from the batteries even if the ColecoVision is off, but after looking at grainy pictures of the internals, the controller appears to have a transistor that is switched on by the ColecoVision in order to pull power. Which is good, since otherwise I imagine those batteries would go flat in a few days unless you’re diligent about taking them out.
The battery flap itself doesn’t appear to be the original, but instead some kind of 3D-printed replica. What happened to this wheel before it ended up with me?
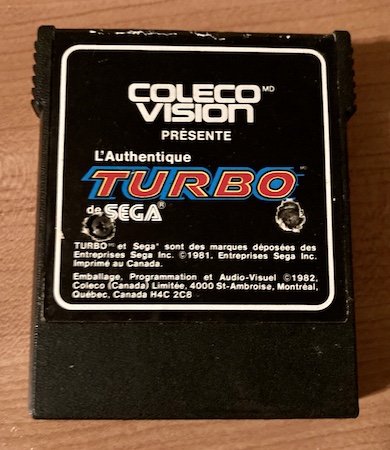
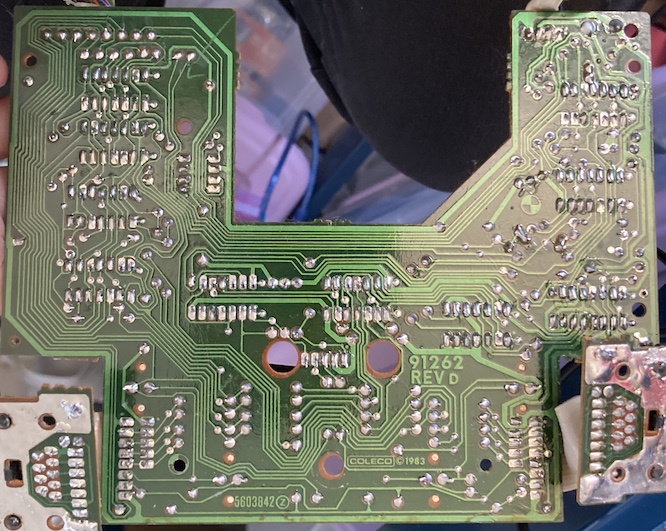
Looks like someone’s already been in here for some reason. That reason is probably that the game doesn’t boot!
I took a look at the connector and saw some green death. After scraping it back with the Olfa knife and doing a little bit of continuity testing around the area to make sure the traces were still intact, the game would now go to the “TURBO PRESENTED BY COLECO” screen, but would refuse to go any further, constantly resetting. Hmm.
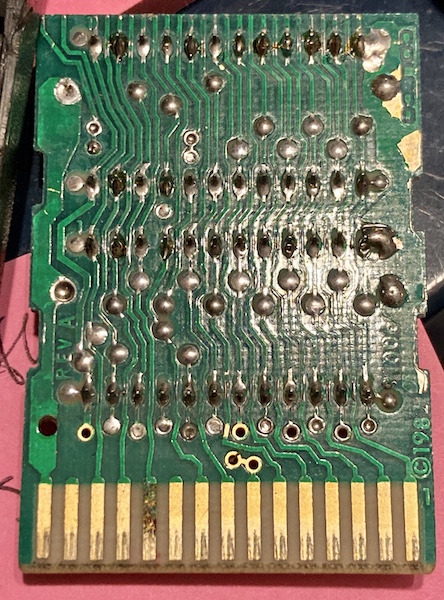
I didn’t find anything obvious like bad solder joints or shorted connectors when I inspected the PCB.
I did not have any other games to test the steering wheel with, so I fired up Omega Race and tested that the gas pedal worked. As expected, the gas pedal did indeed launch the ship forward when depressed.
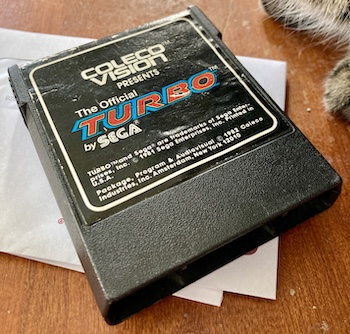
I found another copy of Turbo in Canada on eBay for ten bucks, so I ordered it. When it arrived, I realized it had a different PCB altogether; some fingers were not populated. Interesting. The bad cart (French Turbo) will have to be a future project.
This copy got past the splash screen and I was soon able to begin a race. The gas pedal worked as expected, but the steering wheel didn’t. The car would drift slowly towards the right, unless I was actively spinning the steering wheel to the left very, very fast. Reminds me a bit of my daily driver, but certainly not up to snuff for a Sega arcade race car.
Let’s move on to the Roller Controller, which came from the same Quebecois set as this steering wheel and the defective hand controller. Will I go 0 for 3?
I Am The Out Of Controller
The Roller Controller is what it sounds like on the tin – a trackball, for playing games like Slither and Omega Race. Sorry, no Marble Madness or even Missile Command; the latter never came out, and Centipede, of all games, doesn’t work in roller mode. Now I understand why the family never had one growing up, even though we played a lot of Omega Race.
At first glance, it appears to be a very sturdy unit, with holsters for storing the regular controllers.
Unfortunately, this controller too is showing the ravages of age, with very worn-down rollers and bearings, a cracked plastic case, and a ball that is seemingly not quite round. It makes an enormous racket when rolling, and the rollers seem to drag, even after lubing up the rotating assembly.
Powering The Trolling Motor
The other problem is that the Roller Controller needs power to run its internal logic ICs, optical switches, and comparators. Unlike the steering-wheel controller, there is no way to run it off of batteries.
Since the ColecoVision does not provide power on the controller pins, you have to get that from somewhere else. That somewhere else is the original ColecoVision power plug – the Roller Controller’s plug acts as a pass-through, and you sandwich it between the ColecoVision and the ColecoVision’s power plug. The controller pulls the +5V power pin to run its logic, and everyone is happy. A functional, if somewhat ugly, solution that also draws some current while the ColecoVision is off.
Naturally, this is not easy for me to do, because I do not have the original ColecoVision power jack on the Leako. On the Leako, there is only a barrel jack for accepting regulated 5V from a DC adapter.
When I first tested this controller, using a ColUSB USB-C power adapter that mimicks the shape of the original power connector, I got no response from the system when pushing the number pad buttons on the connected joystick, and so I could not start a game in order to see if its encoding was working.
I checked the pass-through pins with a multimeter for voltage, and found nothing. It’s possible that the ColUSB doesn’t like the Monoprice USB-C power supply I was using (the manual warns against using “quick chargers,”) but I didn’t have any others on hand.
I tore the controller down to figure out if anything else was wrong, and to give everything a good cleaning, as it was caked with dirt and dead bug parts.
This thing is an absolute beast of a controller, and connects to the console with two controller plugs. The plugs are marked “1” and “2,” and inexplicably the “2” goes in what I know to be the player-one connector!
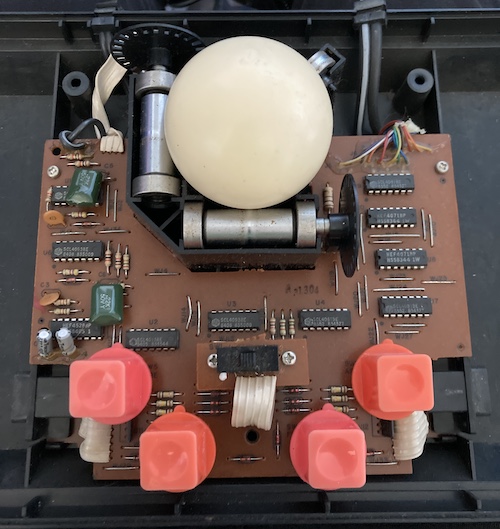
While it was apart, I blew out the ball-bearing carrier bearings for the roller shafts with brake cleaner, pushing out the old dirt and grease. After that, I then re-packed them with some brake pad lube I had lying around in the garage. It’s not the ideal grease for this purpose, sure, but it stayed in there and made them roll a little quieter. I’m not sure how fast this thing is supposed to roll.
The encoder wheels were not exactly flat; there was significant wobble on each. Heating them up with a heat gun and then shoving them against a flat window helped to make them a little straighter, but it wasn’t perfect.
After lubing up the Roller Controller and inspecting it for obvious damage, I decided I would convert it to micro-USB in order to provide power. This was where things started to roll away from me, if you’ll pardon the pun. In the past, I’d seen these cool USB cables where you can panel-mount them. There’s a threaded chunk of plastic that is overmoulded onto the jack, offering both waterproofing and strain relief. I think they’re meant for boats, or heavy equipment, or something. In this way, I would get +5V and some data pins, in case I wanted to really go nuts on this project and add a microcontroller later in order to turn the Roller Controller into a mouse (already done, and much more elegantly.)
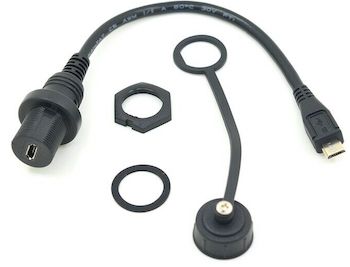
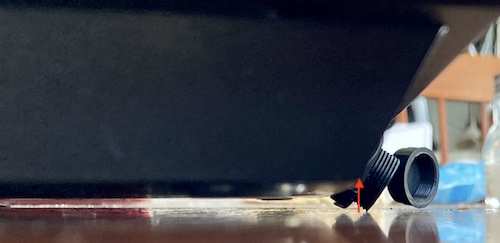
The usual cost and shipping issues aside, this cable did arrive (just) in time for RetroChallenge. I took a measurement with my caliper (the diameter is about 14.2mm, or 9/16” if you’re curious) and then tried to figure out where I could drill so that there would be room for the cable, without interfering with any of the mechanical assembly. I decided to mount the plug beneath the “data” cable that goes to the controller ports of the ColecoVision.
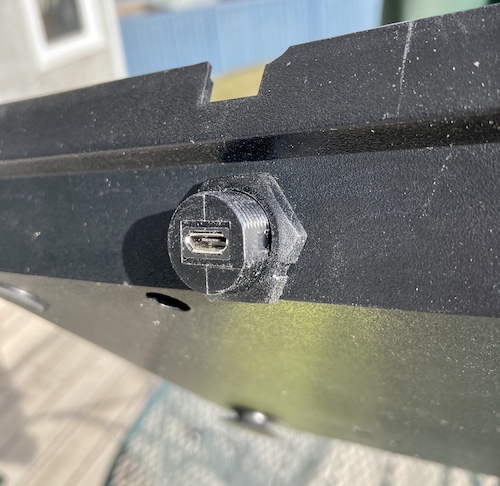
There was not a lot of good vertical room available for this hole, unfortunately. I wanted to move it up a few millimeters, but then I feared that the nut would foul on the top lip of the case, making it impossible to tighten up. As a result, I ended up with this giant USB port growth sticking out of the bottom, which prevented the once-sleek Roller Controller from lying flat, especially when you had a micro-USB cable sticking out of the port.
Pressed for time, I made a hacky decision. I removed the panel-mount USB cable, and covered its hole with electrical tape. Then, I desoldered the original power connector and wired in a regular old USB cable to its pads. This took a surprising amount of time (the potting glue can only be removed with the assistance of a heat gun,) but soon I had a working Roller Controller.
Well, sort of working. I could accurately (if very slowly) move around in Slither, but the “right” and “up” directions were extremely hesitant to trigger. Omega Race seemed not to respond to the roller at all unless it was put in “joystick” mode.
Once I put the lid back on (remember, the pickups are optical, so any stray light inside the case is no bueno) the roller got better, but it still felt very sluggish.
So, does the Roller Controller work with the Leako? Well, maybe. I’m not sure I can honestly say that my Roller Controller is in perfect working order. More testing will be necessary, but the Leako is clearly processing some quadrature inputs from it and the Super Action Controller.
The problem felt similar to that of the steering wheel controller with Turbo - the system will semi-smoothly interpret results in one direction, but only pick up the other if you’re spinning it like a demon. Possibly, spinning it really fast causes an aliasing effect, which is tricking the machine into picking it up as a legitimate motion.
Next Steps
In the near future, I’ll tear both of these controllers down and verify if they are in fact working properly. After studying all three sets of schematics, as well as my own design, I am reasonably sure the Leako properly copies it. I don’t think the use of HCT over LS logic inside the controller decoders matters; the “input high” and “input low” thresholds are identical – that’s the whole point of HCT after all. So probably the next step here is to build a test jig that will decode the controllers onto an oscilloscope, or to figure out how to test the (apparently flaky) optical sensors in isolation.
As for the main project, for the time being, it seems like the Leako is definitely reliable at doing “regular controller” stuff, including the Super Action Controller. Thus, I plan on proceeding with the release of the files by the end of this month.
Maybe someone else will even find a new and exciting mistake!
-
Expansion Module #1 is basically an entire Atari 2600, which seems like more work than making a steering wheel. I guess the engineering team wanted to take it a little easier for their followup effort. ↩
-
The arcade version of Turbo inspired a little-known Namco game called Pole Position. You might have heard of it, it’s based on a cartoon. ↩