Call In The PROs To See Things Clearly (X68000 PRO Part 4)
Tags: computer sharp x68000 x68000-pro video
A small update on the X68000 PRO that was saved from an inglorious death over the course of the last three articles. It’s gotten a video configuration that works properly. I know, that’s way cooler than painting the case, right?
Dude(tte,) You’re Tricking a PLL
Last time we worked on the X68000 PRO, it was discovered that my NEC 1970NX monitor – which was good with everything up to this point – did not properly display the full height of the X68000’s output. I had to decide between either cutting off the top or cutting off the bottom line of text. After tinkering with the monitor settings and even trying a GBS-C, I still had nothing to show for it and was starting to cruise Yahoo! Auctions for an original, wallet-emptying, Sharp-branded X68000 CRT monitor.
That’s when I saw on Discord that Chrissy had been having luck with a Dell widescreen monitor. After asking him, it turns out that it was a Dell P2314Ht. I immediately ordered one of those, and probably paid way too much, as it didn’t come with a stand. To mount the monitor, I picked up a cheap desk-clamping arm, and removed the old Sun 24” display that had been (uselessly) occupying the corner of the workbench. Lifting the monitor into the air gives me back a lot of desk space, which will hopefully mean that some machine can live there full-time in the future.
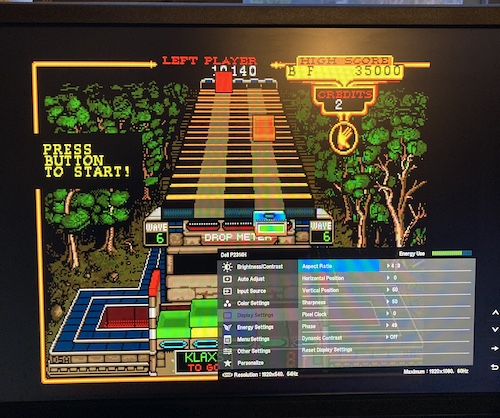
My ardour cooled once I set up the fancy new monitor, and saw that it was wildly off-centre, and even cutting off everything on the right side. I tinkered with pixel clocks, image offsets, and tried to “trick” the auto-detect mechanism by hitting it during different screens, but nothing worked.
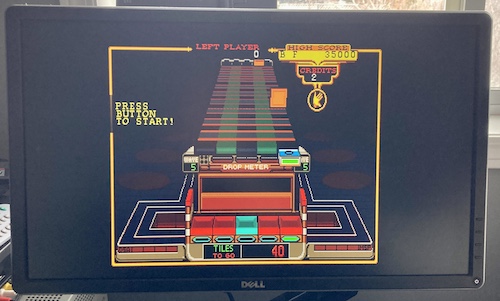
The below picture is the absolute limit of how far I could adjust it. You can see that the right-side border is still missing, and the image is not even close to being centred:
This was surprising, because Chrissy had not just one but three of these monitors, and had no problems. I was starting to feel like I was going insane; we were comparing build dates, serial numbers, and trying to figure out if we had different firmware versions.
Finally, he reset one of his harem of monitors to factory settings, and ended up with the exact same screwed-up image I had. What a daring sacrifice!
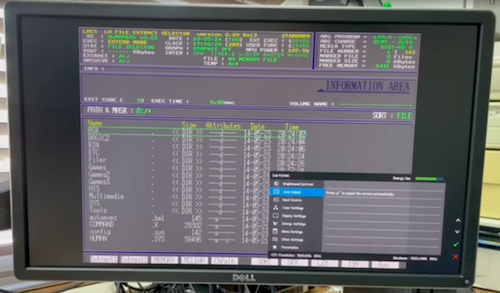
Sure enough, auto-adjust inside Klax didn’t fix things for him, until he went into the filer menu that’s part of the NFGGames hard drive image and auto-adjusted then.
What’s the difference between that filer menu and everything I had been using thus far? A non-black background.
It seemed that the monitor would “give up” trying to establish how wide the field is once it started hitting a lot of black, and apparently just refused to keep counting past a certain point. This makes sense: black is a very low signal, which would be the same thing to the monitor’s auto-detection system as “not drawing anything.”
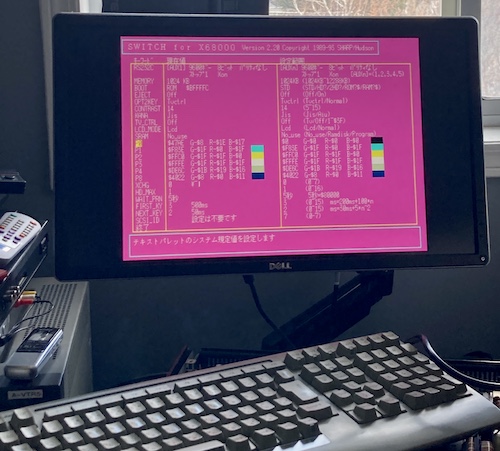
I didn’t have a hard drive installed (yet – see below) so I opened the SWITCH.X program on the Master Disk, and changed the background colour.
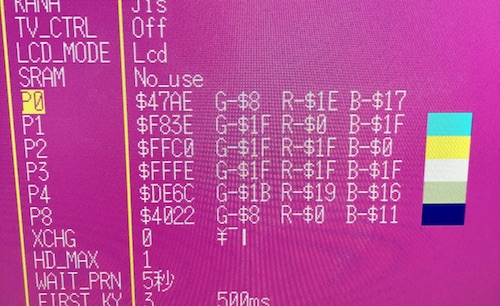
After selecting the “Exit” menu option at the bottom, pushing “Y” to save, and then going back into SWITCH.X, triggering the Dell monitor’s “Auto Adjust” feature gave me a perfect picture.
This monitor really is a gem: it’s worked well with the FM77 and PC8801s so far, although its scaler has a tendency to oversample and make white text on black backgrounds look a little blurry.
It is the 2020s, and there is time for tricking a monitor with more processing power than the computer into working properly.
Next Steps
Although it feels like a little thing, getting this fixed finally removed one of my big annoyances of using the X68000.
There’s lots of work left to do to make the X68000 PRO “finished.” In brief:
- Add a hard drive using BlueSCSI or SCSI2SD, to either the internal SASI port or external add-on SCSI card;
- Put the card cage and expansion RAM back in;
- Replace the corroded serial port;
- Paint the case;
- Maybe play a gam– okay, haha, I can’t even finish this sentence. We’re gonna do some 68K assembly programming instead.