Giving the SPARCstation some jumper cables
Tags: computer sparcstation sun pizzabox battery mod
My SPARCstation 1+ is very forgetful, and the cause is the old evil of batteries. In this case, the battery is entombed in an immortal epoxy container, which makes it really hard to swap! That’s why my good friend, and yours, the Dremel, is here.
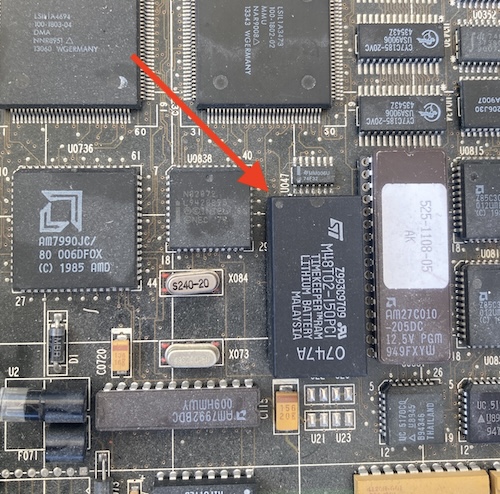
Because the SPARCstation is an advanced, modern computer, it stores a lot of what it understands in the world inside its ST M48T02 “Timekeeper” chip. This is actually a RAM chip with a little hat, which in turn contains a rechargeable battery. Collectively, this component is referred to in Sun literature as the IDPROM.
This whole model is sort of similar to the “suicide chips” in Sega and Capcom arcade games, which use a potted module to hold onto encryption keys or some other kind of swizzling table in order to provide copy protection.
These Timekeeper family of chips are used in a handful of other non-Sun computers, all for similar purposes. For instance, there are several models of the Philips CD-I that refuse to boot properly if the battery in their Timekeeper goes flat.
On the Sun, several settings are saved in this little 2-kilobyte miracle, such as:
- the serial number/unique machine ID (hostid;)
- the MAC address of the ethernet chipset;
- the current time and date;
- all the boot settings.
It’s this last one that is the most annoying part for us. Because the SPARCstation is starting up every time without any knowledge of the past, it always defaults to the most intensive diagnostic. That means it takes a good 5+ minutes of RAM checking and ROM checking before I can do anything at all, and I have to tell it what device to boot from every time. There’s always a screaming, angry message or two when SunOS finally boots, with one part or another of its corrupted saved data being out of range and intolerable.
I could buy a new M48T02. They are still made, but they cost $27 USD on Digi-Key (PN 497-2825-5-ND.) Even before the exchange rate, that’s a lot of money that would be better spent on more computers. And eventually, ST will just stop making these altogether.
The class cut-up
Over the years, similarly cheap Sun aficionados have added an external battery to the Timekeeper. By cutting into the epoxy on top of the module, we can figure out where the battery is connected to the internal RAM, and put a new battery on it. That’s what we’ll do.
Removing the chip from the Sun’s motherboard is easy on these things. Unlike some cheap PC clones with soldered-in Dallas time keepers, this is just in a regular 24-pin DIP socket. I gently pried it out using a flathead screwdriver and flipped it over to look at the epoxy cap.
Make sure to take a picture before you pull anything, so you know which end is “pin 1.” Although there’s a dot and a polarity groove, the matte finish of the epoxy makes it easy to miss when you’re rushing. On top of that, there’s no convenient “pin 1” silkscreen marking on the motherboard like there is for some other ICs on this computer.
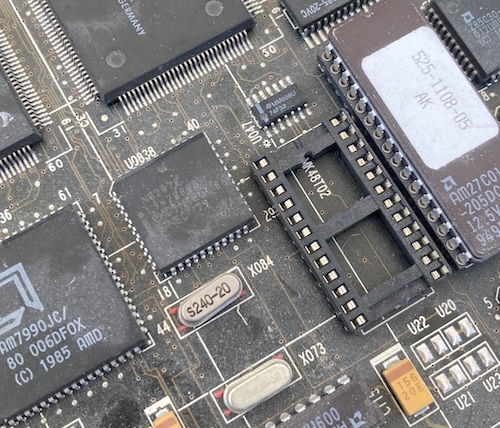
The socket, also, is not super obvious on polarity, which is a very annoying thing. Unless you already know what the polarity was, I can see this being ambiguous. Maybe you disagree, but either way, a photo is cheap insurance.

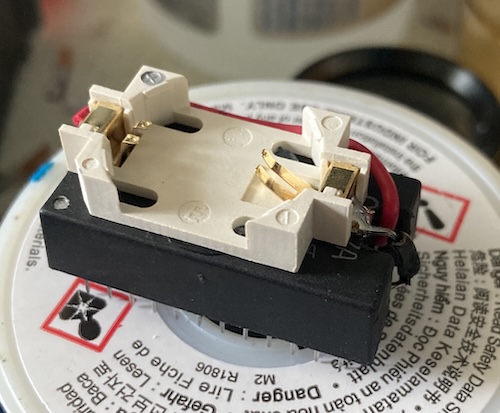
As I said above, the way that these modules are constructed is two-part. There’s a wide DIP chip on the bottom, which provides the actual RTC logic and memory of the timekeeper, and has the pins that connect to the computer. On top of that, ST has entombed a crystal and a lithium battery in what they call the “CAPHAT.” This sarcophagus-like arrangement is mostly just epoxy, though, and many folks before me have figured out how to cut into the CAPHAT and either completely remove the battery, or jump an external battery into it. I decided I would attempt the latter task.
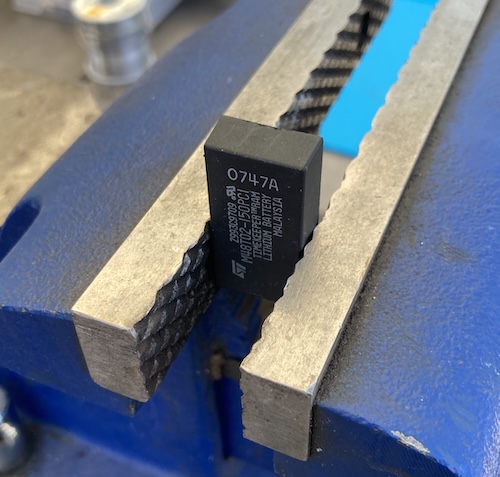
The terminals for the battery are on the non-pin-1 end of the package, so I put it into the vise with pin 1 facing down.
My first hack at it with the cutting wheel went way too deep. I was surprised at how soft the epoxy actually was and how eagerly the Dremel bit into it. Spooked, I chipped away at it more gradually after that. Then, once I had both contacts exposed, I worked around the area with the grinding ball mill attachment to grind the plastic off around them.
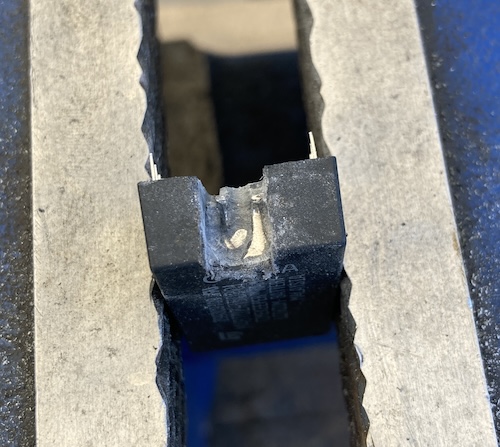
After a little while, I could see the top and sides of the cell emerging from the epoxy coalface, so I used a continuity test to figure out which terminal was which. The negative terminal is continuous with the ground pin on the package, which is pin 12. It’s conveniently also the terminal that is closer to that pin. This seems to generally be the convention on Timekeeper ICs, but I don’t want to say it will always be the case for your own chip. Make sure you always check first, and then check your work!
Once I figured out which terminal was positive, I cut in a little bit further to split the cell’s tab from the terminal. This is so that I wouldn’t end up charging the old lithium cell in parallel. To make sure everything was electrically clean, I used a glob of flux and solder to tin the terminals. I threw some cheap wire on there, and stuck a CR2032 holder on top with a dot of clear silicone RTV.
Before inserting the battery and powering the chip, I made sure to double-check that I had the wires around properly. First, I got the M48T02 datasheet and confirmed that Vss, or ground in this case, was still on pin 12 of the chip. The negative terminal of the newly-installed battery holder was continuous with this pin, so I at least didn’t have reverse polarity.
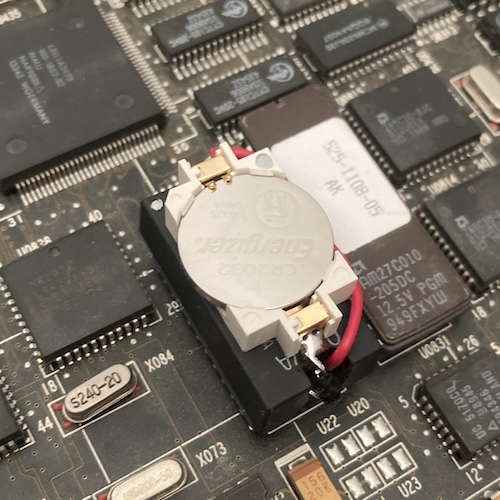
One big downside of this arrangement is that, with the additional height added by the coin cell socket, the middle SBus expansion card slot is now harder to use. In fact, I’m pretty sure it now interferes with any card. If I end up having to populate all three slots on this SS1+, I will have to remove the RTV’d on battery socket and mount it somewhere else on a fly wire. A problem for the future to solve, like acid rain or prop comedy.
Making New Memories
Now that the SPARCstation is capable of remembering things, it is time to reprogram the contents of the IDPROM. This is not a hugely difficult process, but it’s boring enough that I put it off for many, many weeks after the excitement of “cutting into a chip.”
The first step is to look at the bottom of the computer to identify the serial number. Both the IDPROM and the MAC address derive from this serial number. You could put anything in there, but you might as well do it right. Or at least better than I did.
This was the first problem I ran into when following the comp.sys.sun.admin NVRAM/hostid FAQ. The instructions for resetting the IDPROM clearly say that the hostid is the byte string of the decimal serial number:
Bytes c through e in the table above are collectively referred to as the serial number. If you convert the concatenation of bytes c-e to decimal, this is the serial number you see when you turn the machine on.
My serial number is “029F1287.” That’s not a decimal number, nor does it fit into three bytes as a hex number. If you interpret it as hex, that’s four bytes, which my advanced mathematics education tells me is “more.” I did find another thread on sunhelp complaining about the same problem, but with no seeming resolution.
Knowing that it doesn’t really matter what I put in there, I ended up interpreting it as a hex string, skipping the first byte entirely, and using $9f , $12 , and $87 . It just has to be unique on my network, which it certainly will be.
Another problem arose when I started plugging in the script. These instructions say to use real-machine-type, but I don’t have that word defined on my ROM version, so I just used $53 instead, for “SPARCstation 1+ (4/65).” Yours will probably be different! Don’t copy me.
You set the IDPROM using a mkp word. Remember that this is Forth, so you’re entering data in reverse Polish notation. Bytes C through E are the serial number on the IDPROM, and Bytes 2 through 7 are the MAC address, should you want to make these different for some reason.
After booting the SPARCstation, I went into new command mode (n) and then started throwing OpenBoot commands at it. The first batch here should be the same for all Sun machines, although you may want to try real-machine-type . first to make sure that you have that word defined, unlike me.
set-defaults
setenv diag-switch? false
1 0 mkp
real-machine-type 1 mkp
8 2 mkp
0 3 mkp
20 4 mkp
We’ve now set the header of the IDPROM and the first three bytes of the MAC address. After this, you will need to replace $host_id_ with the values you got from your own serial number.
At the very end, a checksum of the preceding bytes is done using XOR and then stored in byte F.
$host_id_1 5 mkp
$host_id_2 6 mkp
$host_id_3 7 mkp

0 8 mkp
0 9 mkp
0 a mkp
0 b mkp

$host_id_1 c mkp
$host_id_2 d mkp
$host_id_3 e mkp

0 f 0 do i idprom@ xor loop f mkp
I then turned the machine off and back on again. The serial number was remembered!
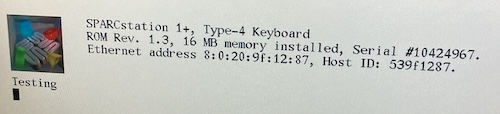
After that, it wouldn’t boot because it was trying to boot off sd(0,0,0)vmunix, which, if you remember from the previous post, is a victim of Sun redirecting the SCSI IDs in firmware. SCSI ID 0 is SCSI ID 3, and vice versa.
Rather than undo that, I did setenv boot-from sd(0,3,0)vmunix to set (and remember) the default boot volume, and then boot to get me into SunOS.
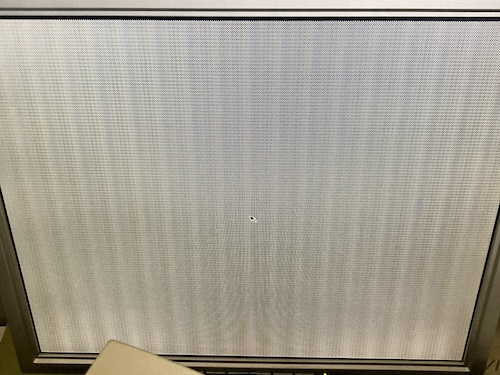
Hooray! This computer is finally working, remembering its own settings, and booting on its own. Unfortunately, the mouse still isn’t working, even though it’s a new-to-me Sun Compact-1 mechanical mouse (part number 370-1587-03, which should be compatible.) I don’t have a good setup to test what the mouse is doing at the moment, so we’ll save that for a future post.
Thanks to Rees and the entire Sun community for helping me figure out how to get this pizza box booting properly again.